Understanding Presentations – Tables
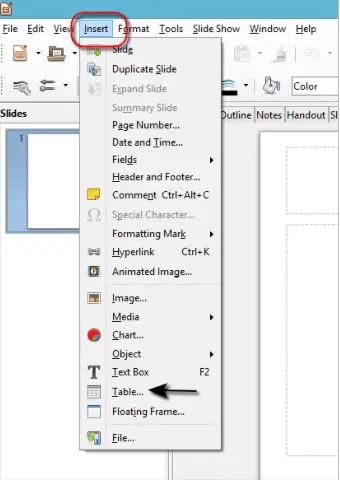
Tables are very effective in conveying structured information. Table in a slide can be inserted by clicking on ‘Insert’ in the main menu bar and selecting ‘Table’ from the drop down list which gets displayed.


 After this, a dialog box appears, in which we can select the ‘Number of rows’ and the ‘Number of columns’ needed in the table. After selecting the appropriate values, click on ‘OK’ and the table will get inserted in the slide.
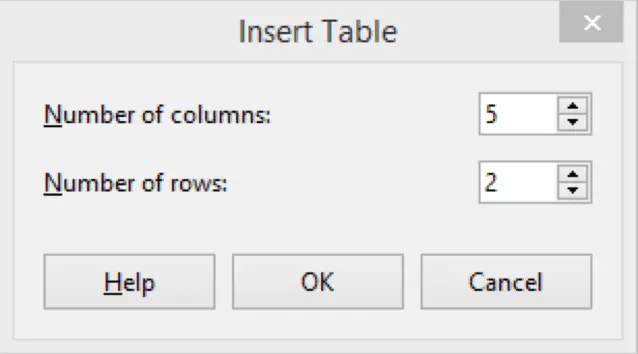
We can select the design of the table from the ‘Tasks Pane’. Any of the predefined designs can be selected which differ mainly according to the color scheme.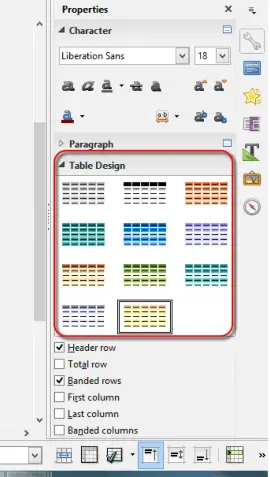
The options under ‘Table Design’ do the following functions:
- Header Row: This option is selected by default and it adds a different colored background to the first row in the table.
- Total Row: This option adds different colored background to the last row in the table.
- Banded Rows: This option is also selected by default. It adds different colored background to alternative rows, making it easier to read the data in the table.
- First Column: It adds a separate background color to the first column of the table.
- Last Column: It adds a separate background to the last column of the table.
- Banded Columns: It adds a separate background to alternate columns.
Enter, edit text in a table slide.
To insert data in a table, click once inside the cell in which the data needs to be entered. This will give a blinking text pointer inside the cell. Now simply enter the required data using the keyboard.
To edit the data in a table, click once inside the cell whose data needs to be edited. Now delete the already present value using the ‘delete’ button from the keyboard and then enter the new value. This is how we can edit the table data.
Select rows, columns, entire table.
To select a row or a column, click once on any one of the cells from that particular row or column. The table formatting toolbar menu will get displayed at the bottom of the presentation. From this menu, click on the ‘>>’ icon. A new list of options will get displayed. From this list, the ‘Select Column’, ‘Select Rows’, or the ‘Select Table’ options can be selected to select a column, a row or the whole table respectively. These options have been shown in the below given illustration.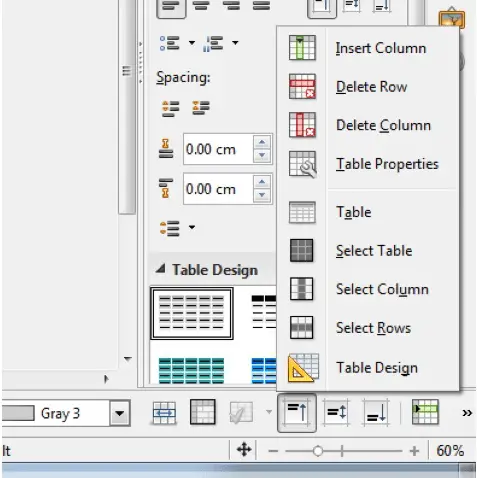
Insert, delete rows and columns.
To insert a row or a column, click once on any one of the cells from the column to whose right the new column needs to be inserted or from the row below which the new row needs to be inserted. The table formatting toolbar menu will get displayed at the bottom of the document. From this menu, click on the ‘>>’ icon. A new list of options will get displayed. From this list, the ‘Insert Row’ or the ‘Insert Column’ options can be selected to insert a row or a column respectively. These options have been shown in the illustration above.
To delete a row or a column, click once on any one of the cells from that particular row or column. The table formatting toolbar menu will get displayed at the bottom of the document. From this menu, click on the ‘>>’ icon. A new list of options will get displayed. From this list, the ‘Delete Row’ or the ‘Delete Column’ options can be selected to delete a row or a column respectively. These options have been shown in the illustration above.