Understanding Presentations – Print
Change slide setup, slide orientation to portrait, landscape. Change paper size.
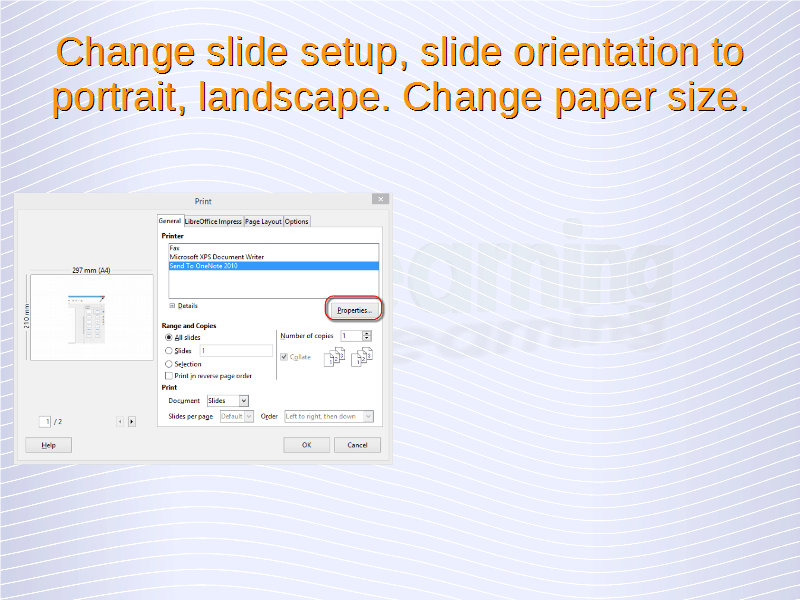
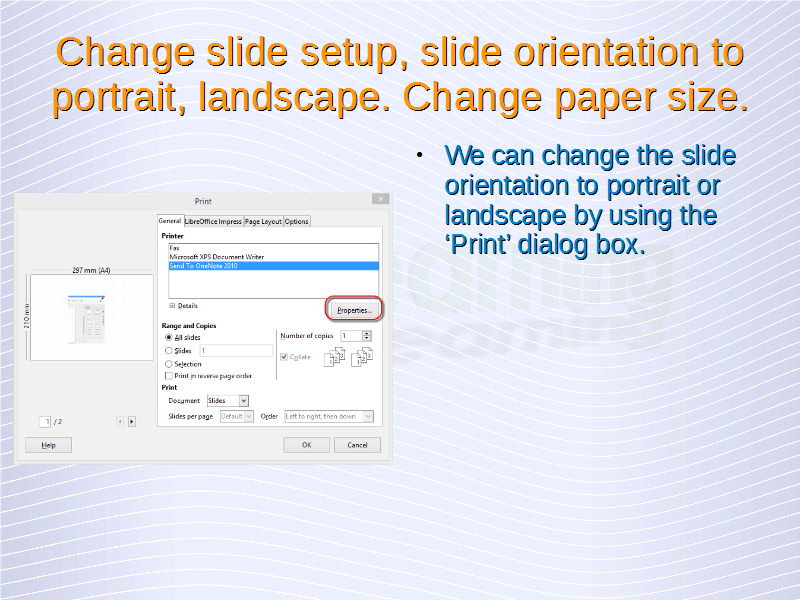
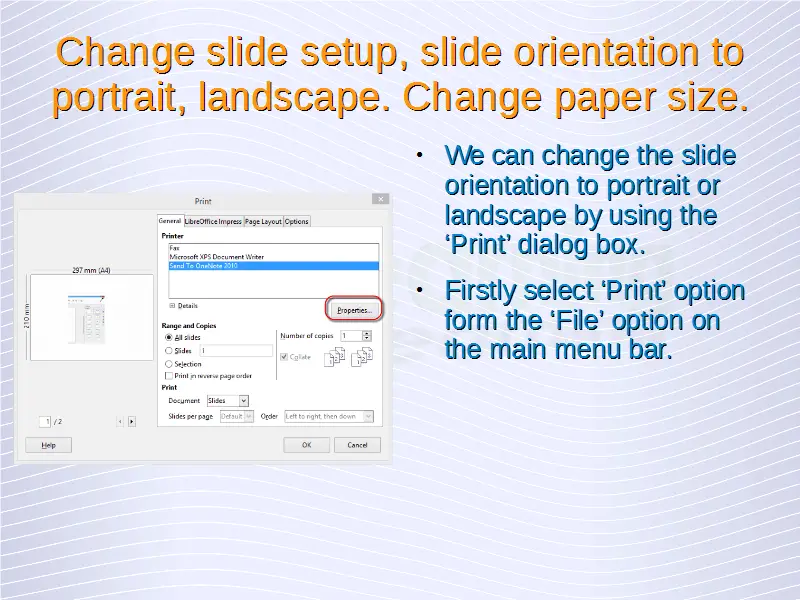
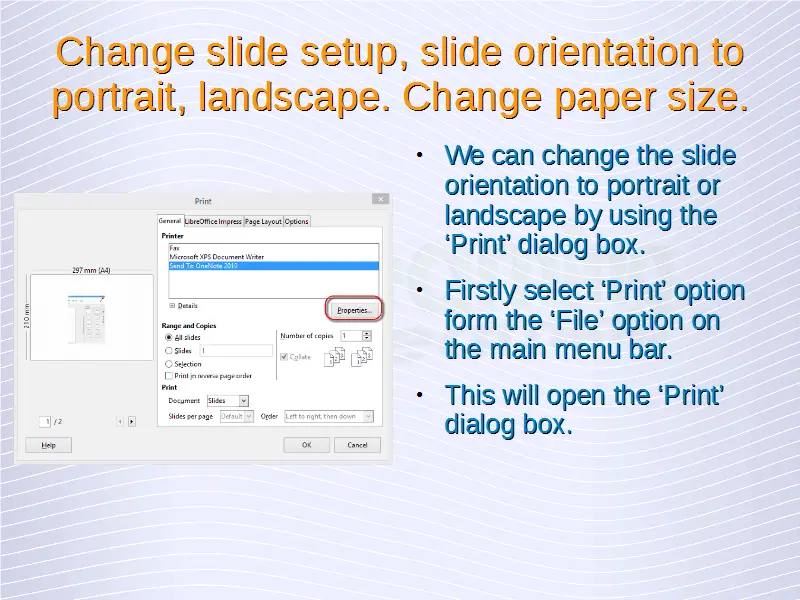
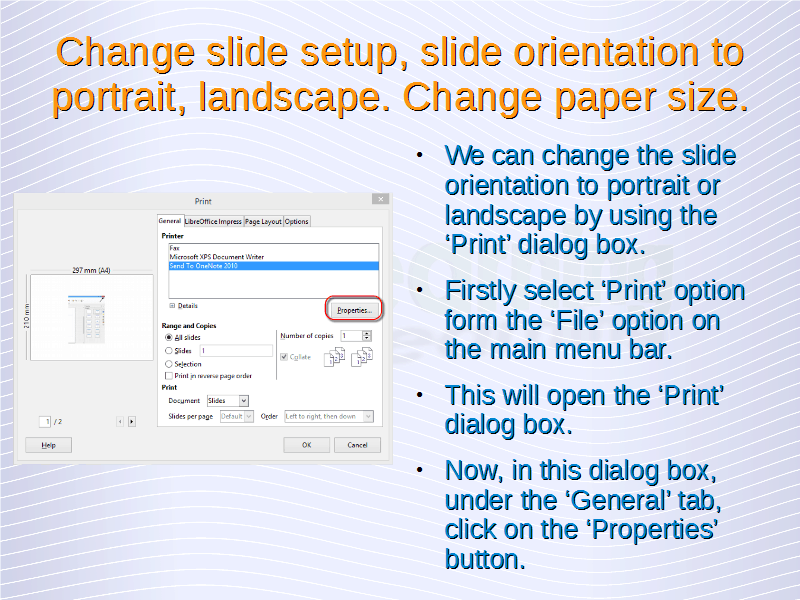
We can change the slide orientation to portrait or landscape by using the ‘Print’ dialog box. Firstly select ‘Print’ option form the ‘File’ option on the main menu bar. This will open the ‘Print’ dialog box. Now, in this dialog box, under the ‘General’ tab, click on the ‘Properties’ button.
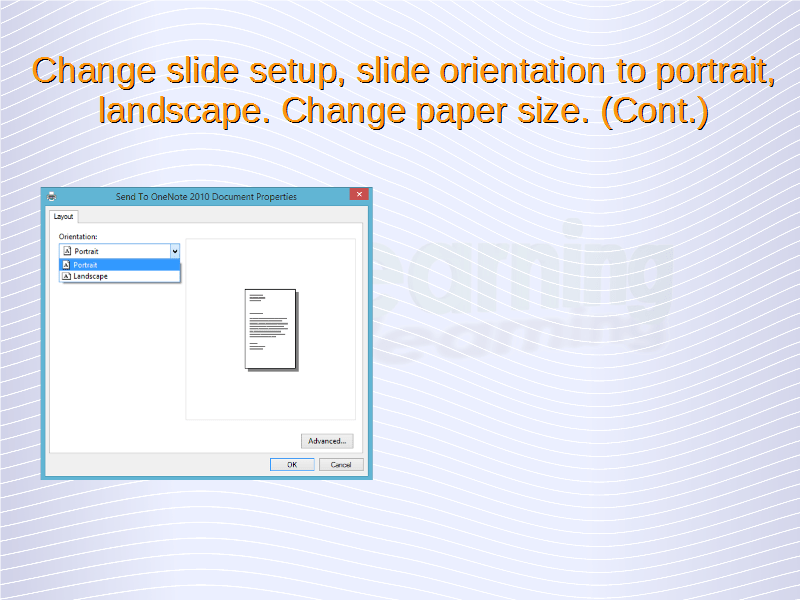
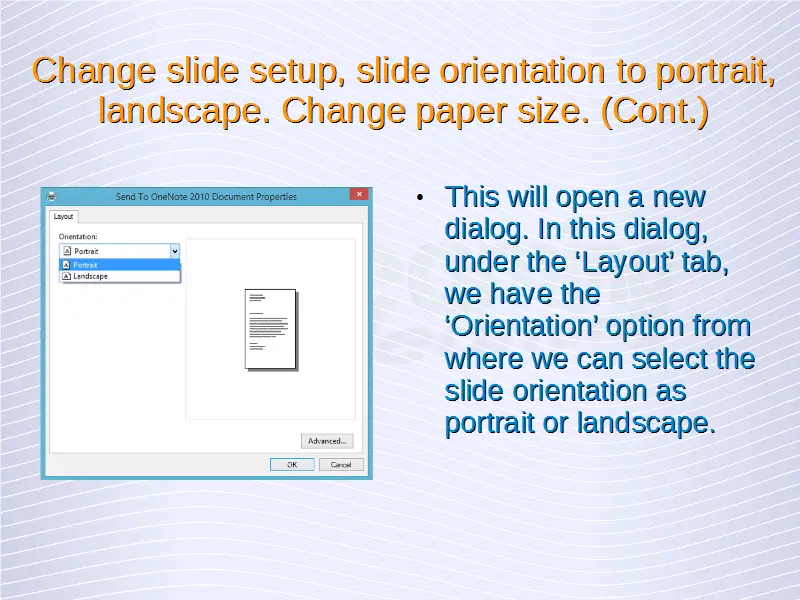
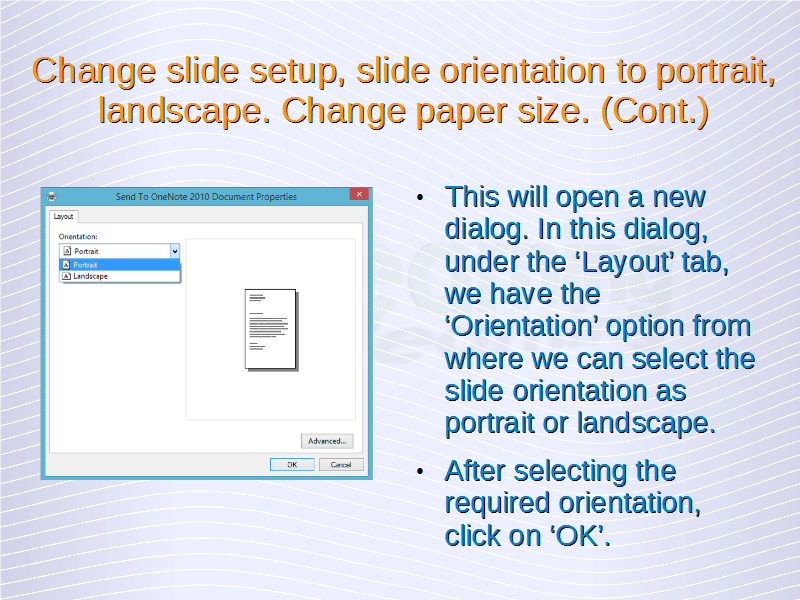
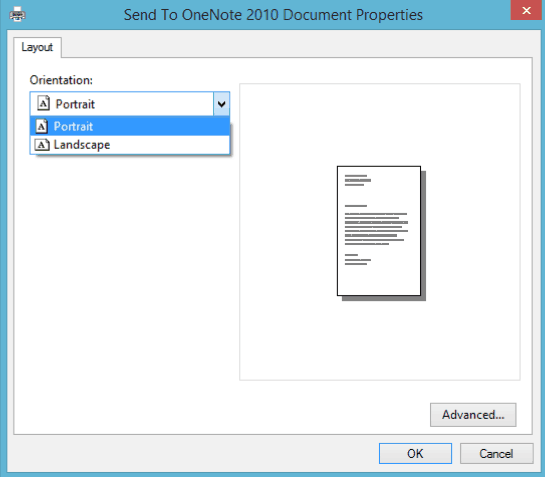
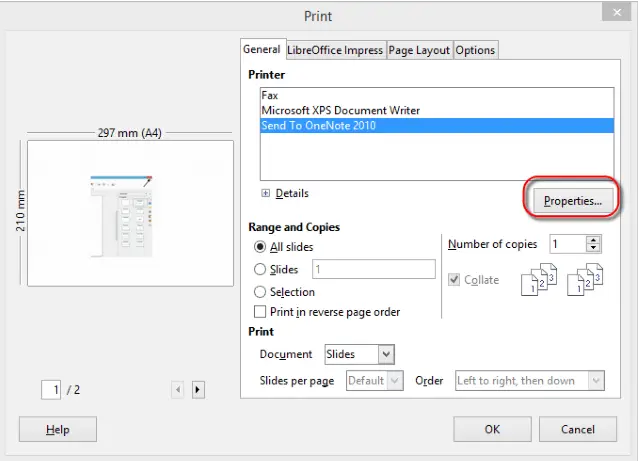 This will open a new dialog. In this dialog, under the ‘Layout’ tab, we have the ‘Orientation’ option from where we can select the slide orientation as portrait or landscape. After selecting the required orientation, click on ‘OK’.
Print entire presentation, specific slides, handouts, notes pages, outline view of slides, number of copies of a presentation.
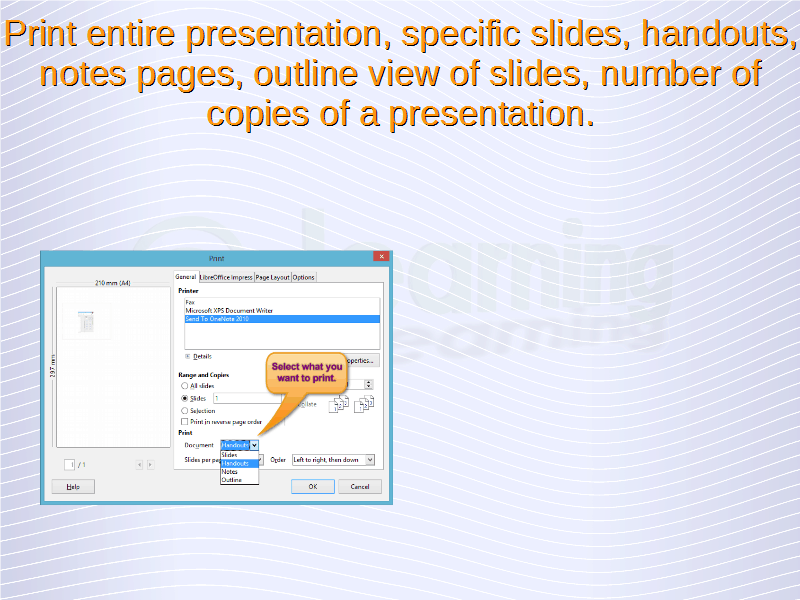
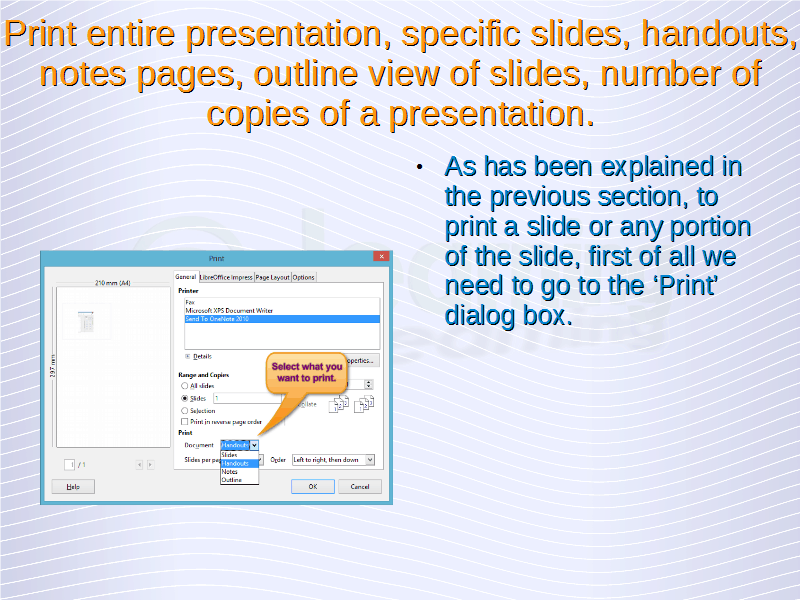
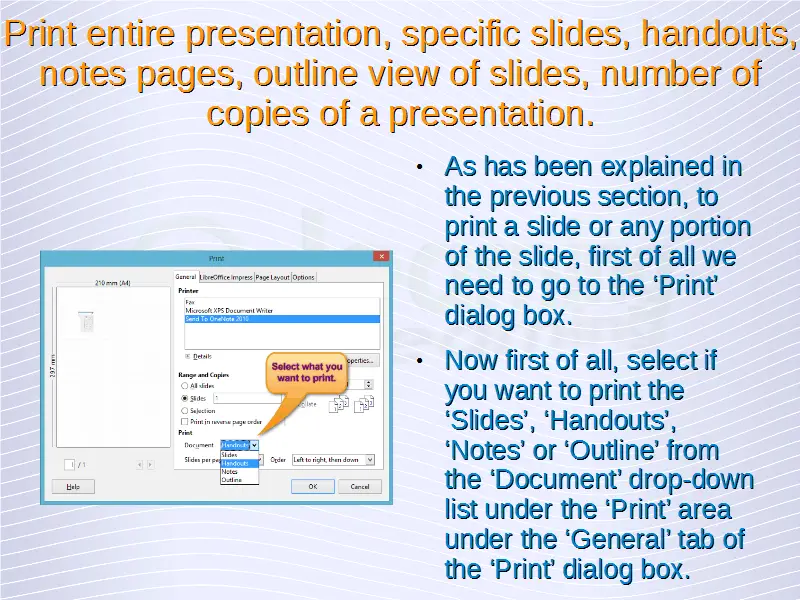
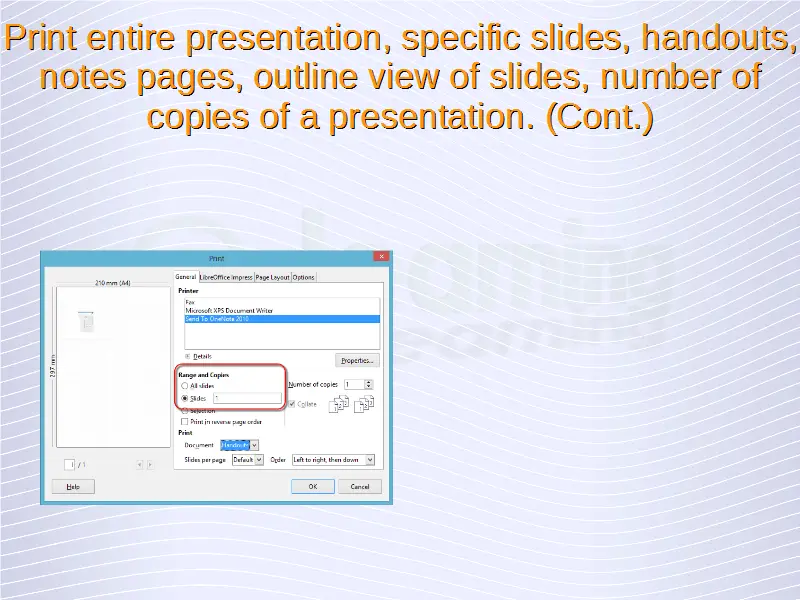
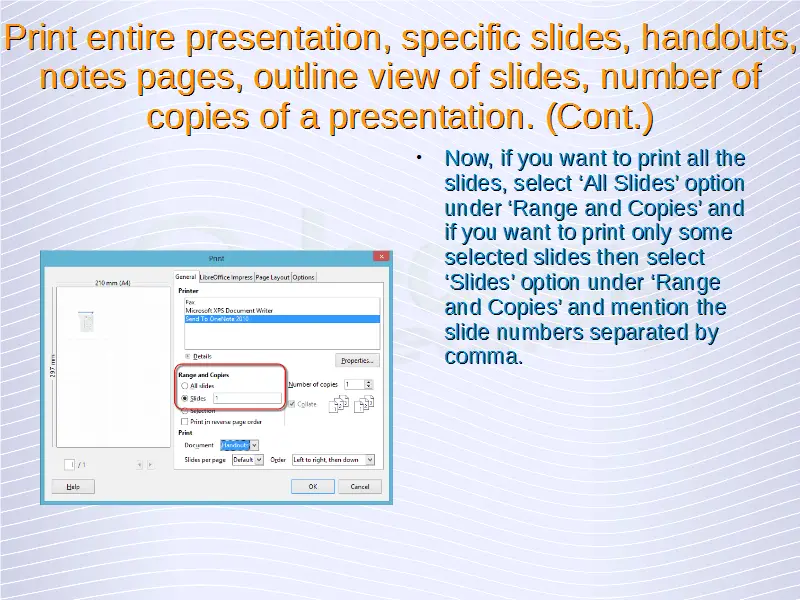
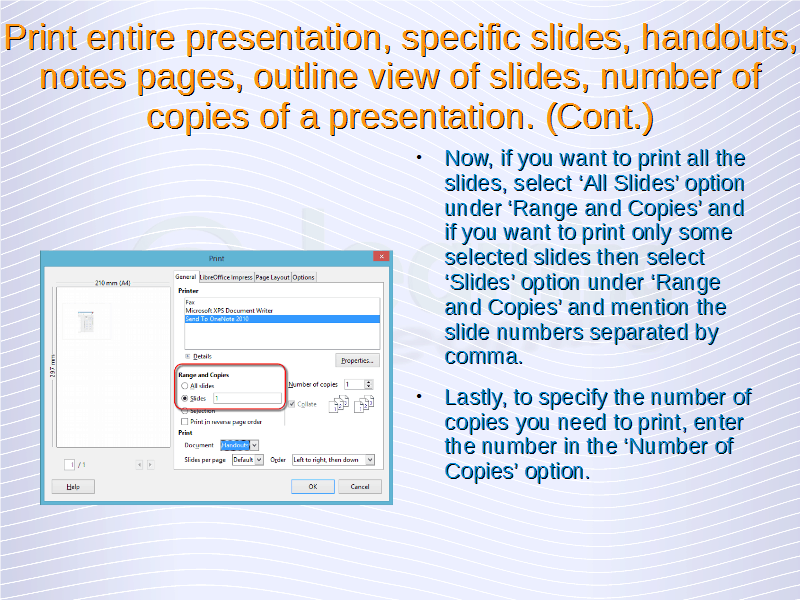
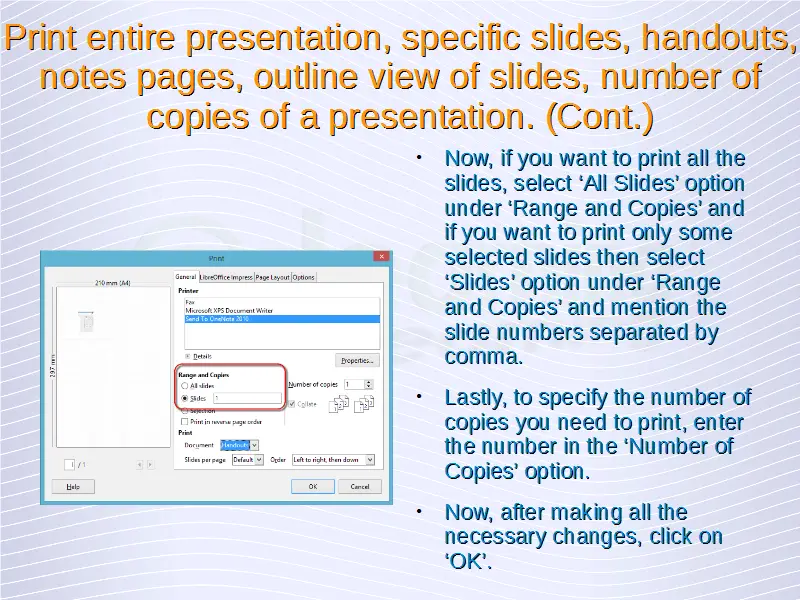
As has been explained in the previous section, to print a slide or any portion of the slide, first of all we need to go to the ‘Print’ dialog box. Now first of all, select if you want to print the ‘Slides’, ‘Handouts’, ‘Notes’ or ‘Outline’ from the ‘Document’ drop-down list under the ‘Print’ area under the ‘General’ tab of the ‘Print’ dialog box.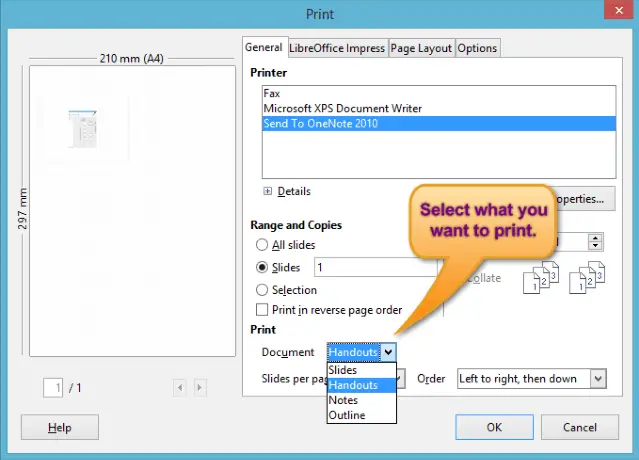
Now, if you want to print all the slides, select ‘All Slides’ option under ‘Range and Copies’ and if you want to print only some selected slides then select ‘Slides’ option under ‘Range and Copies’ and mention the slide numbers separated by comma.
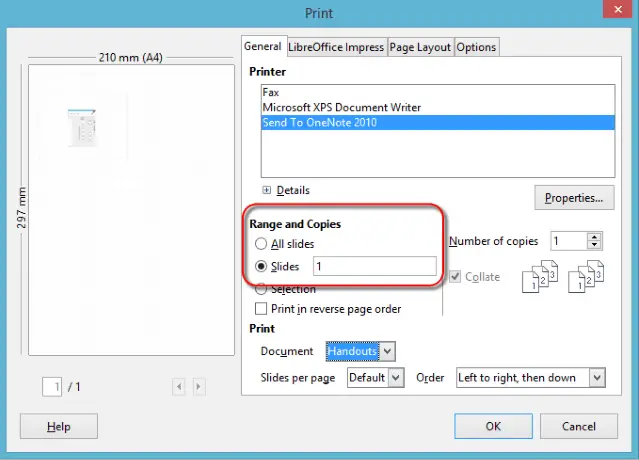 Lastly, to specify the number of copies you need to print, enter the number in the ‘Number of Copies’ option.
Now, after making all the necessary changes, click on ‘OK’.
