Understanding Presentations – Grouping and Arranging
Group, un-group drawn objects in a slide.
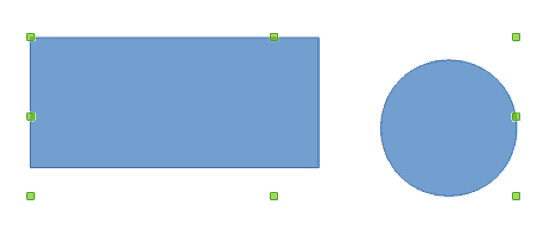
Grouping objects means that a particular number of objects which are being grouped together will behave as one entity. So any operation which needs to be performed will be performed on the whole group together. We can group any number of objects in a slide by using the ‘Selection’ tool from the ‘Drawing Toolbar’ and then drawing an imaginary rectangle around the objects to be grouped.
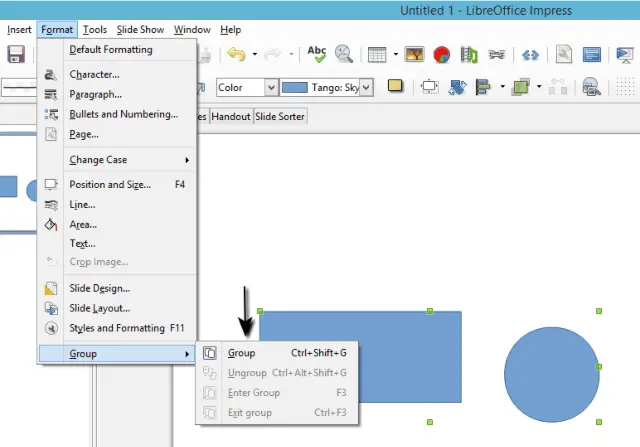
 Now, go to the ‘Format’ option on the main menu bar and then from the drop down that appears, select ‘Group’ and from the list that appears, select ‘Group’. The selected objects will get grouped together.
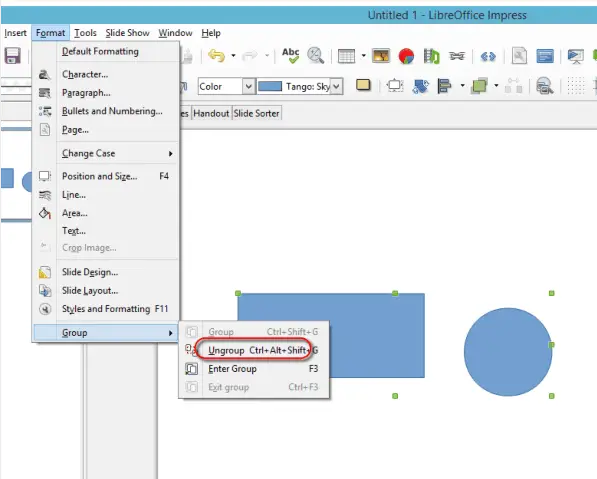
To ungroup the objects we need to follow the same steps as above. We can select the whole group by selecting any one of the objects. Now, click on the ‘Format’ option from the main menu bar and then select ‘Group’ from the drop down that appears and after this, select the option ‘Ungroup’ from the list that appears.
We can also right click on the selected grouped objects and then from the list that appears, choose the ‘Ungroup’ option.
Bring a drawn object one level forward, one level backward, to the front, to the back of other drawn objects.
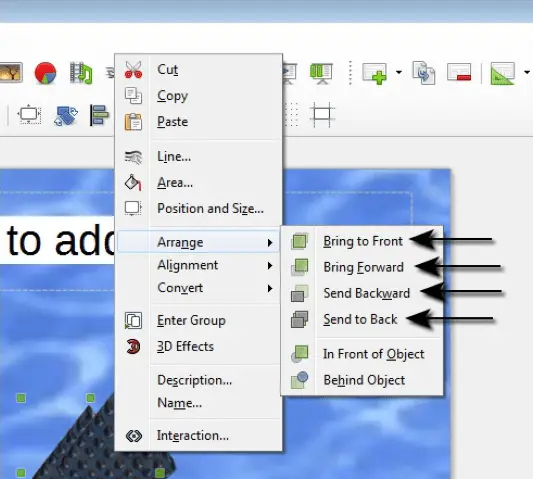
To bring an object forward or to take it backward, first of all the select the object and then right-click on the selected object, and from the menu which gets displayed, click on ‘Arrange’. This will open a list of options. In this list, click on ‘Bring to Front’ to bring the object to the front, click on ‘Bring Forward’ to bring the object one level forward, click on ‘Send Backward’ to send the object to the back of the other drawn objects on the slide and click on ‘Send to Back’ to send the object one level backward.


