Understanding Databases – Printing
Change the orientation and paper size
Orientation is the format in which the page displays, either in portrait mode where the page is displayed with the long edge vertical, or landscape, where the longer edge is horizontal.
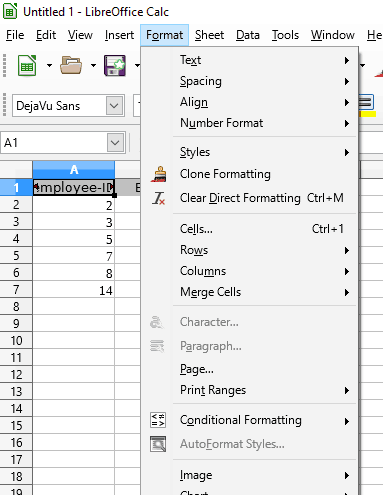
To change the orientation, select either Portrait or Landscape.
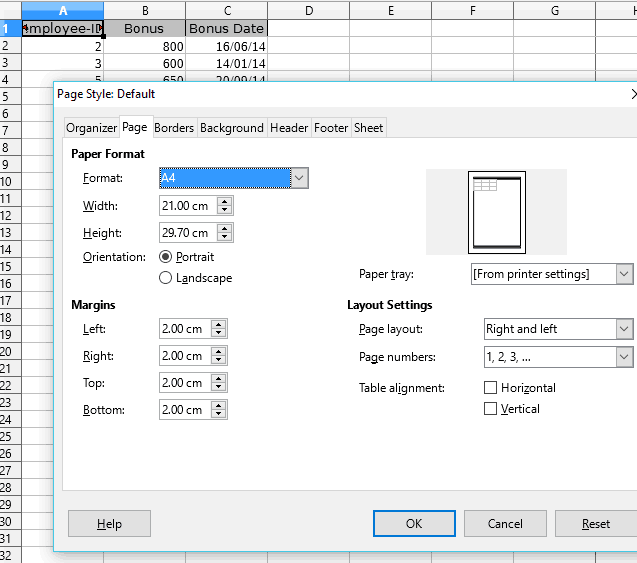
To change the orientation, select either Portrait or Landscape.
To change the paper size, select from the ‘Format’ drop-down menu or use the manual width and height entry boxes below it.
Print a page, selected record(s), complete table
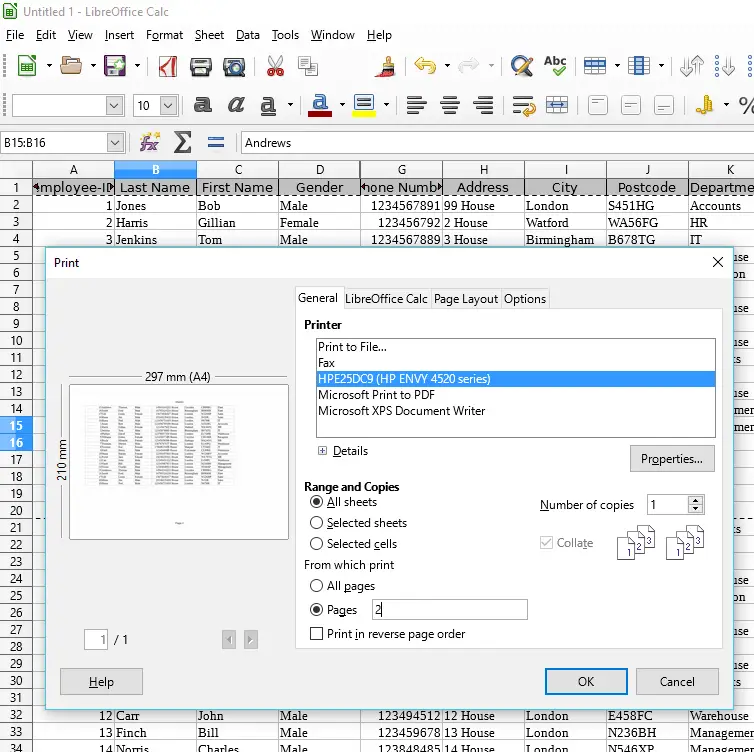
To print records from a table or query, first copy the records from Base and paste into Calc or Writer.
In Calc or Writer click on the printer icon.
Select the pages you want to print by selecting ‘All sheets’ then in the ‘From which print’ section select ‘All pages’ or ‘Pages’ and type the individual or range of pages desired.
Then Click ‘OK’ to print to the selected printer.
Print the result of a query
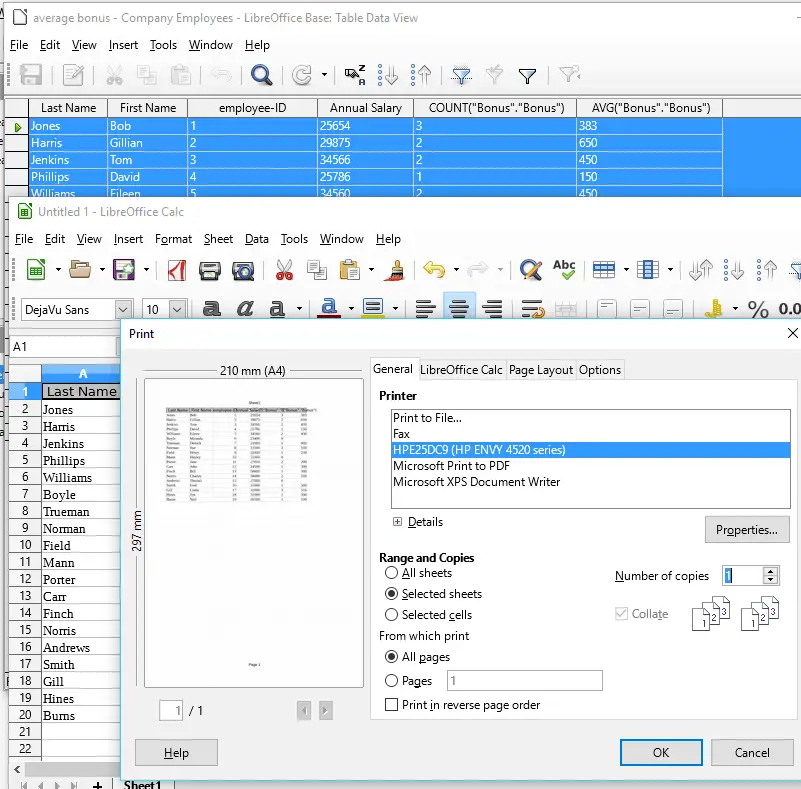
To print the result of a query, first open the query by double clicking it in the main window.
Select all the records by left clicking the grey box in the top left corner, then right click and select copy.
Paste records into a Calc or Writer file.
Click the printer icon in the toolbar and select ‘all pages’ then click OK to print.
Print specific page(s) in a report, or print complete report
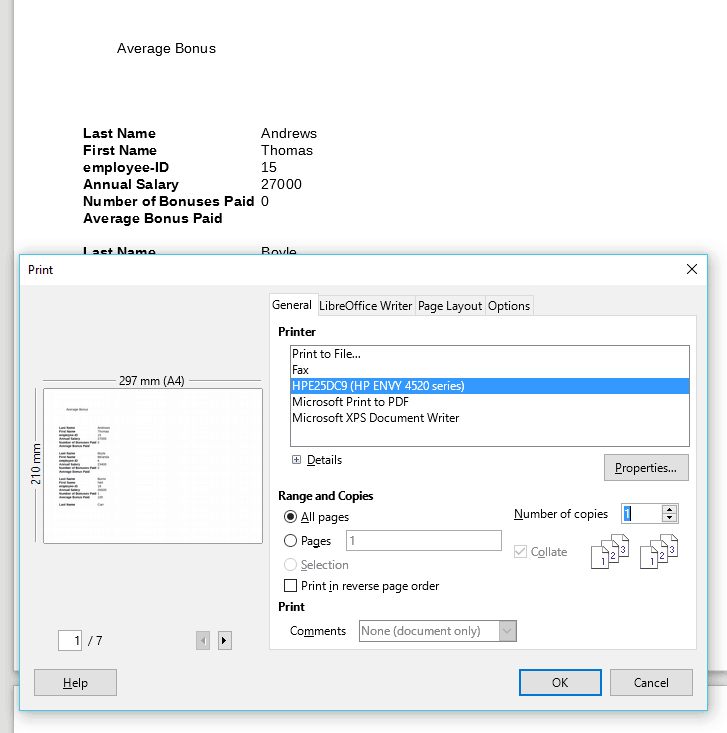
First, open a report by double clicking it in the main window.
This will open a text report in Writer.
Click the printer icon on the toolbar to open the print window.
In the print window, select individual pages or all pages from the ‘Range and Copies’ section, then click OK to print.