Understanding Databases – Managing Tables
Set a field as primary key
To set the primary key, right-click the grey box to the left of the field you want to set as primary key.
Check the ‘Primary Key’ option and a yellow key symbol will appear in the grey box.
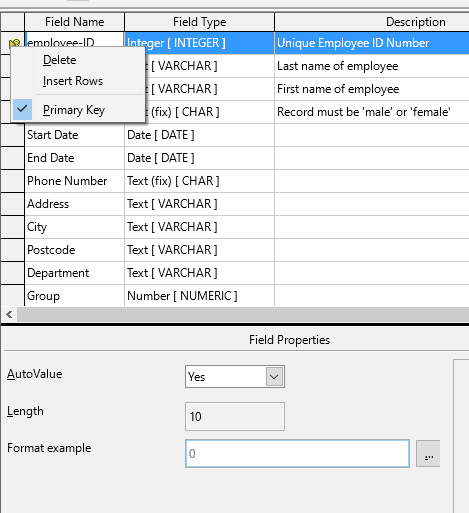
It’s a good idea to set the primary key to an ‘Integer’ type and select Autovalue option to ‘Yes’, so that the table auto-populates with ascending unique values.
Index a field
An index is a copy of selected columns of data from a table, allowing more efficient searching of records.
For example, if we have a big table that contains fields: First Name, Surname, Gender, Age, Address. If we wanted to run a query that finds all people named ‘David’ of a certain age range, this could take a while as the computer has to search through thousands of records.
If we were to create an index that contains only the First Name field in alphabetical order, and set up the query to search only that index it will find all of the records containing ‘Dave’ within the specified age range far more quickly, even instantly.
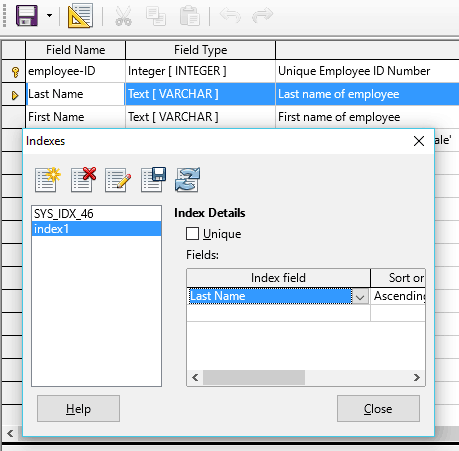
Click the grey box to the left of the field you want to index. Then click on the Index Design icon.
Click the New Index button, choose the Index field from the drop-down menu and sort ascending or descending.
If you don’t want duplicates to be allowed for the indexed field, check the ‘Unique’ box.
Add a field to an existing table
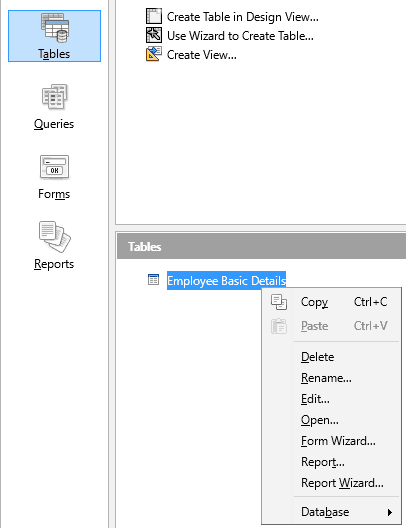
To open an existing table, click ‘Tables’ in the Database area of the main window. Right-click the table you want to open in the ‘Tables’ area. Select ‘Edit’ from the drop-down menu.
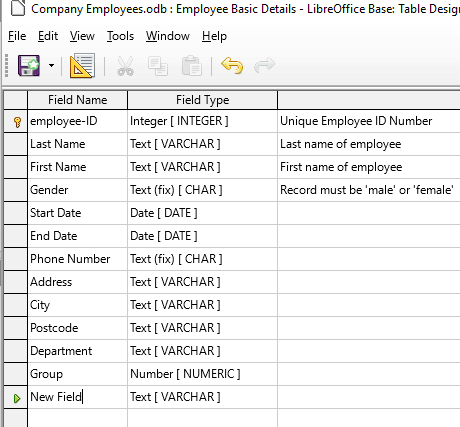
Once you have saved the table for the first time in Base, you cannot add fields in-between existing ones. You can only add a new field below the last entered field. Use the same process as earlier to enter a field, set the type and change the properties.
Change column width
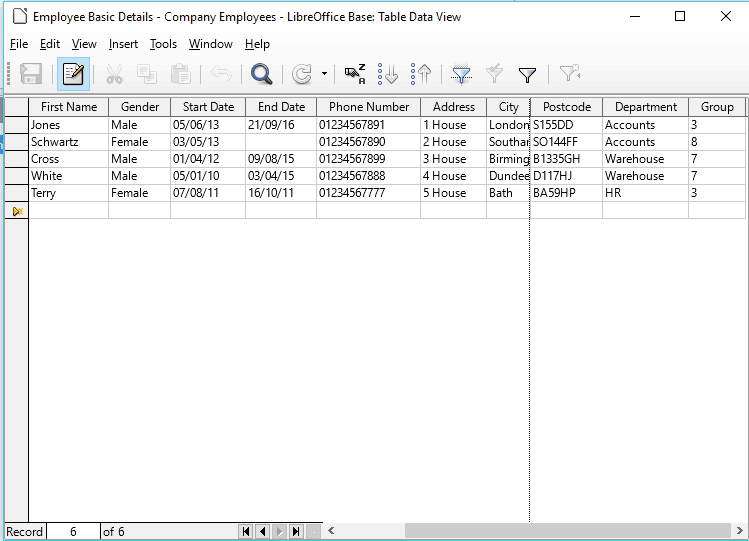
To change the column width in a table, click the vertical line joining columns and then drag right or left.