Prepare Outputs
Setup
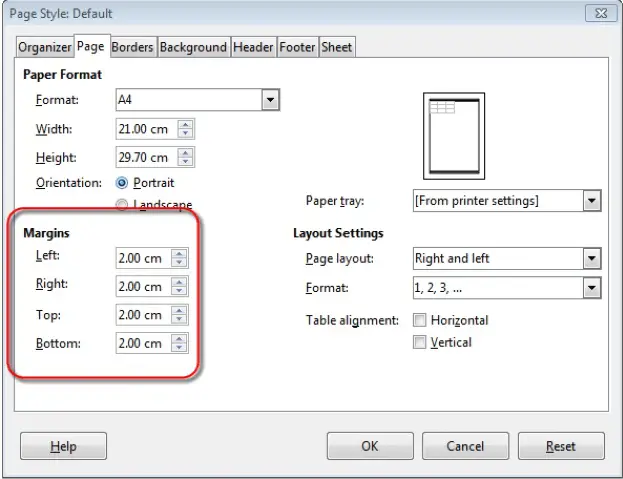
Change worksheet margins: top, bottom, left, right.
In order to change the worksheet margins, click on the ‘Format’ button from the main menu bar. Click on ‘Page…’ button from the resulting drop-down. This gives the ‘Page Style’ dialog box. Under the ‘Page’ tab, you can make the appropriate changes to the ‘Margins’ in order to change the top, bottom, left, and right margins of a worksheet.
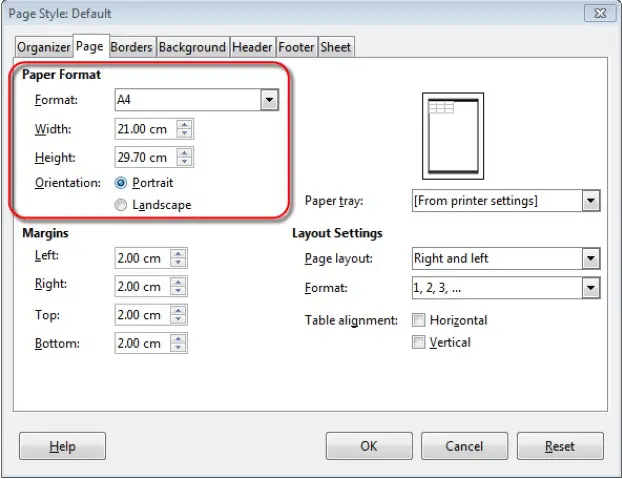
Change worksheet orientation: portrait, landscape. Change paper size.
In the same dialog box, under the ‘Page’ tab, the ‘Paper Format’ options can be selected to make changes to the paper size and worksheet orientation.
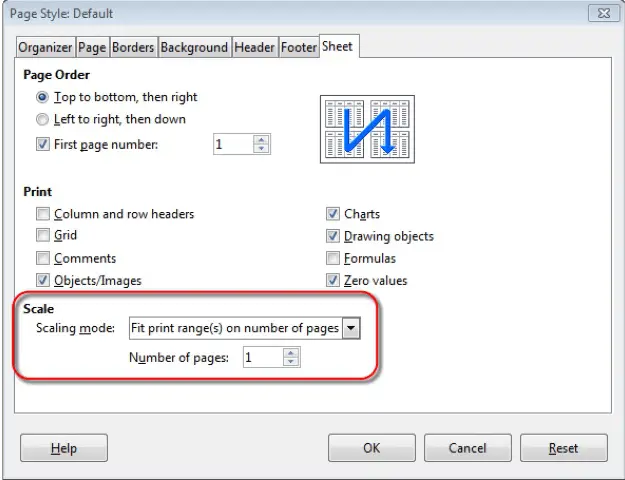
Adjust page setup to fit worksheet contents on a specified number of pages.
In the same dialog box, under the ‘Sheet’ tab, the ‘Scale’ options can be altered to fit the worksheet contents on a specified number of pages. When ‘Scaling mode:’ is selected as ‘Fit print range(s) on number of pages’, then the worksheet contents will be printed on a specific number of pages as selected in the ‘Number of Pages:’ option.
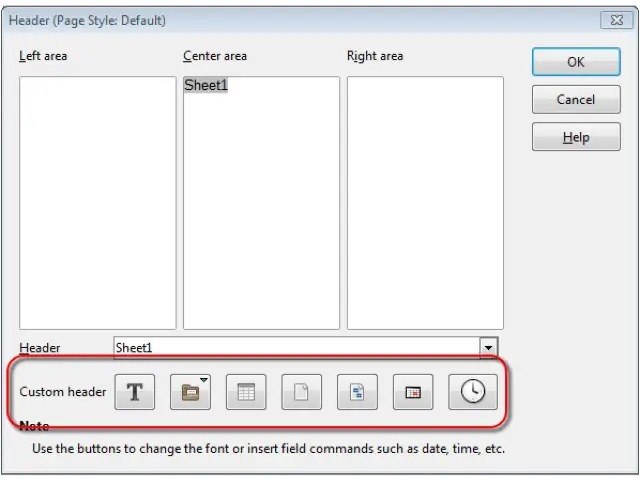
Add, edit, and delete text in headers, footers in a worksheet.
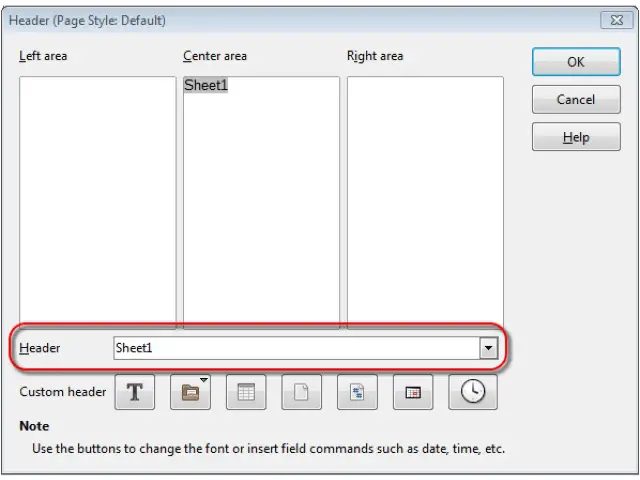
In the same dialog box, under the ‘Header’ or the ‘Footer’ tab, you will find the ‘Edit’ button. Click on this button and a new dialog box will appear. This dialog box provides the options for entering contents in the header or footer of a worksheet.

Insert and delete fields: page numbering information, date, time, file name, worksheet name into headers, footers.
In the same dialog box, which was displayed after clicking on the ‘Edit’ button, the different options for inserting fields like date, time, worksheet name and page numbers are present. In the ‘Custom Headers’ section, there are different icons for adding text, sheet name, date, time and page numbering information to the headers and the footers.
