Advanced Spreadsheets – Naming Cells
Name cell ranges, delete names for cell ranges.
To name a cell range, click on ‘Insert’ from the main menu bar. From the resulting menu, click on ‘Names’ and from the sub-menu which gets generated, click on ‘Define’. This will open the ‘Define Name’ dialog box.


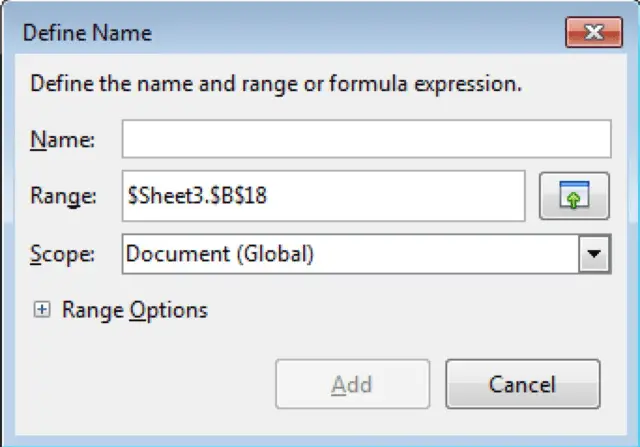
In this dialog box, under ‘Name’, give the name of the range and from the ‘Select’ icon given in front of ‘Range’, select the cell range which you want to be included in this range. After this, click on ‘Add’. This will add the named cell range to the spreadsheet.
To delete the cell range, again click on ‘Insert’ from the main menu bar. From the resulting menu, click on ‘Names’ and from the resulting sub-menu, click on ‘Manage’. This will open the ‘Manage Names’ dialog box. This dialog displays a list of all the named cell ranges in the sheet. Simply select the name which you want to delete and click on ‘Delete’.
After this, click on ‘OK’. The named cell range will get deleted.
Use named cell ranges in a function.
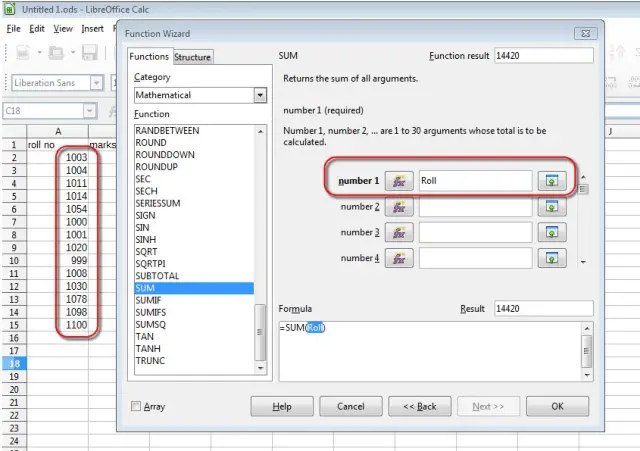
We can use a named cell range in a function. To do that, just put the name of the cell range in the argument of a function in ‘Function Wizard’, instead of selecting the cells.
As an example, here we have created a named cell range called ‘Roll’, which contains the roll numbers as have been highlighted in the illustration below. Then while using the ‘SUM’ function, instead of selecting the cells, we have just put the name of the range as the argument. This is how we use named cell ranges in functions.