More advanced CSS
 In this lesson we will learn some more CSS styles we can use to develop the look of our pages.
By now we’re used to applying styles, and we have our own separate CSS file to add them to.
I hope you’re beginning to have ideas of how you could make your personal webpages look and how you can use each style to get the maximum effect.
Use the buttons below to navigate through the lesson


Let’s learn some new styles that may help.
Border-radius
Border-radius is a new style that gives a modern-looking “rounded corners” effect. For example:
H1 { color: white; background: red; border-top: 10px solid #ffaadd; border-bottom: 10px solid #ffaadd; padding: 10px; border-radius: 54px ; }

Here you can see that the border-radius takes a pixel value and makes the corners appear round. You can see that it affects both the background (red) and the border (pink).
Box-shadow
Box-shadow adds a shadow effect to our element. Let’s put a shadow on our title:
H1 { color: white; background: red; border-top: 10px solid #ffaadd; border-bottom: 10px solid #ffaadd; padding: 10px; border-radius: 54px ; box-shadow: 10px 10px 10px black; }

Float Styling
Float is a complex style. It removes the element from the flow of the page and makes it ‘float’ to either the left or the right, letting everything else flow around it. For example:
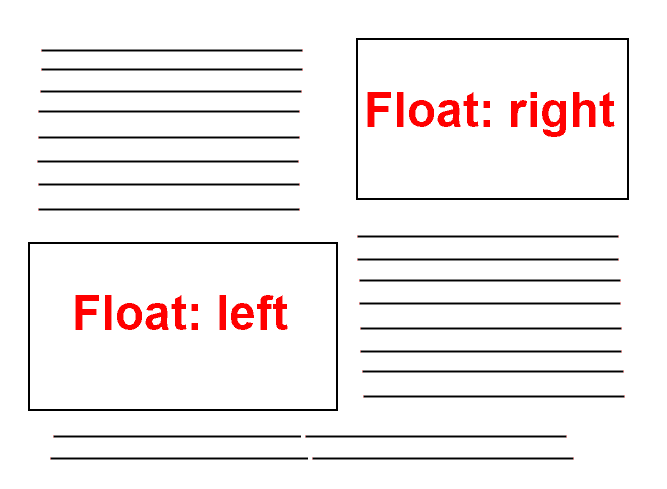
In this example we have a few paragraphs of text, and a couple of images.
Instead of having the images above or below the text we want to mix the two, so we float the images within the text. The CSS syntax is just:
.selectorToFloat { float: left; }
(or float:right, of course!)
Floats can get very complicated. The best way is to try them, so put some text and images in your HTML (remember the <img> tag!) and try moving the images around with “float” to see how it works.
Width and Height
Sometimes we want to set the width and height of particular elements in CSS. We do this by simply setting “width:” and “height:”.
E.g. “width: 200px; height: 100px;” would resize an image to those heights in pixels.
Display Style
The CSS “display” style is the final one we will look at in our introduction to CSS.
Remember when we learned about <div> and <span> and how one behaved as a block, and the other inline?

We can achieve the same effect for any element we choose with a selector by setting the display style:
Display: block;
Display: inline;
Display can also be set to hide/show elements. Currently this isn’t very useful as we haven’t yet learned how to apply code to our pages, but when we begin to write JavaScript it is sometimes useful to set a CSS style to hide elements.
CSS Introduced
I hope you now have enough understanding to see how to layout a basic page in CSS, and how to apply selectors to elements.
By using the CSS we have learned you can begin to design your own pages.
Try creating a HTML page with your own content and styling it however you like! Practice will make you a much better web designer.
We have only covered the basics so far, but if you understand everything so far in the course you are well on your way to making some awesome websites and understanding how the internet works!