Files and Folders
Files are organized on your computer in folders. If it helps, think of your computer as a filing cabinet. There may be drawers that group information or paperwork, e.g. one drawer for household items, another for personal items and so on. Inside the drawers there are dividers for sub groups such as gas, electricity, insurance etc in the household drawer. The personal drawer might contain details about holidays, certificates, letters etc. Inside the dividers there will be the information or paperwork, which could even be sub-divided in paper folders. The permutations are endless and you are only constricted in the number of files and folders you have by your computer’s available storage space.
Use the buttons below to navigate through the lesson
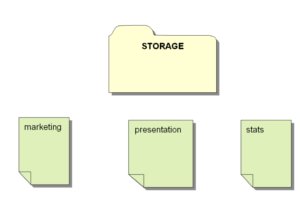
- In this scenario we have a folder called “storage” containing different files – double click on the folder “storage”.
- Inside the folder three files can be seen
- Below is a graphical representation of how this file/folder structure is organise

- Once inside the folder the files can be viewed in different formats depending on your preference – Click on “View” and select “Thumbnails”
- Here the files are viewed as thumbnails – again click on “View”
- Next select “List”
- Here the files are viewed as a list format – click “View”
- Next select “Details”
- Here the files are viewed in the details format which gives a more descriptive view and properties of each file – Click on “View”
- Select “Arrange Icons by” and choose “Name”
- Here the files are arranged alphabetically by order of name. Click “View”
- Select “Arrange Icons by” and choose “Type”
- Here the files are arranged by type i.e. all Word files will be grouped together, all PowerPoint together etc – again click “View”
- Select “Arrange Icons by” and choose “Modified”
- Here the files are displayed in date and time order of when they last were edited.
- Next select “View” then “Arrange Icons by” and “Show in Groups”
- Now the files are displayed alphabetically, regardless of file type, this is particularly useful when large numbers of files are stored in a folder.
- Another way of viewing files and folders is through “Windows Explorer”. To locate select “Start”
- Select “All Programs”
- Select “Accessories” and next “Windows Explorer”
- From the left-hand pane the folder “storage” can be found. Then double click
- Once open the files can be viewed in the right hand window
- Microsoft have also provided a convenient location for you to store your files, this is known as the “My Documents” folder – click on “Start”
- Select “My Documents”- Here a drop down view of the contents of the folder can be seen
- For a more detailed view – right click “My Documents” and select Open”
- The contents can now be viewed more clearly and in detail.
- Another useful folder that is provided is the “My Pictures” folder – click “Start” and select “My Pictures”
- Here your electronic photo album can be viewed
- Here the pictures can be viewed in the same way as normal files but with some extra features- click “View” and select “Filmstrip”, photos can be selected and be viewed in more detail in the centre of the screen
- Another added feature is the “Pictures Taken On” view, this allows photos to be organised by date & time from when the original photos were taken from a digital camera or photo camera
- The easiest way to view your photo album is by the slide show as this method allows you to view pictures full screen without any user intervention – In the left hand pane click “View as a slide show”
- And the slide show will begin….
- ….and will carry on automatically
- The slide show can then be stopped by placing the mouse cursor over the screen and clicking on the cross in the top right hand corner
