Create a new presentation based on default template.
A default template is the one, which is used to create a presentation when any new presentation is created. This means that when we create a new presentation, it gets created based on the default template which has been set.
We are going to learn how to set a default template in the subsequent chapters. But to create a new presentation based on the default template, simply follow the steps which have been given in the last section for opening a new presentation. This creates a new presentation based on the default template.
Save a presentation to a location on a drive. Save a presentation under another name.
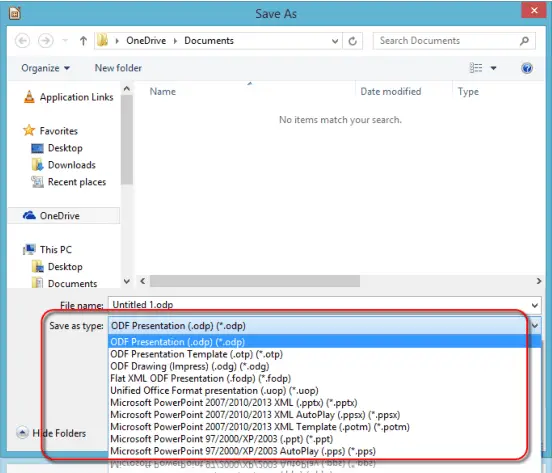
Once the changes to a presentation have been made, we need to save this presentation to a location on our computer. To save a presentation, click on ‘File’ from the main menu bar. From the resulting drop-down, click on ‘Save As’. This opens the ‘Save As’ dialog box.
In this dialog box, we can browse to the folder where we want to save the presentation file and thus select the appropriate location. To change the name by which the file will get saved, just enter the new name in the ‘File Name:’ field. After making these changes, click on ‘Save’. This will save the file to the location which has been specified and under the given file name.
Save a presentation as another file type: Rich Text Format, template, show, image file format, version number.
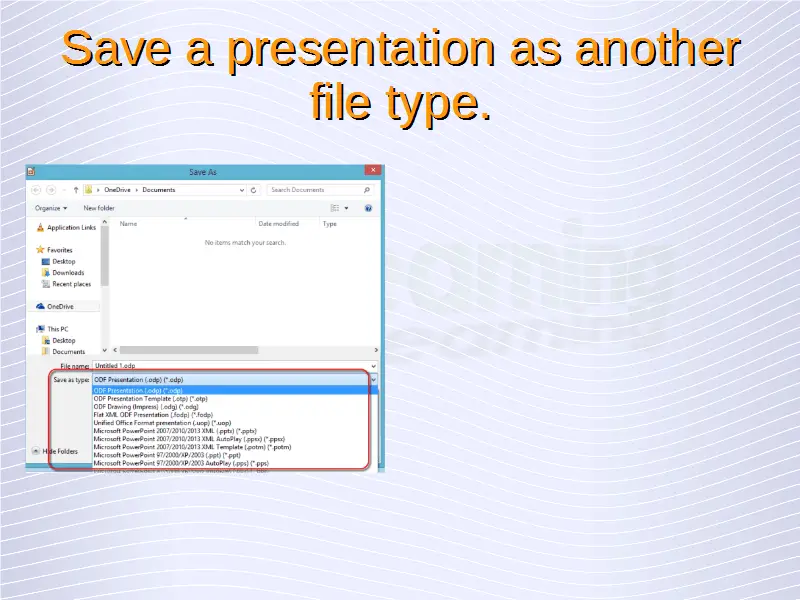
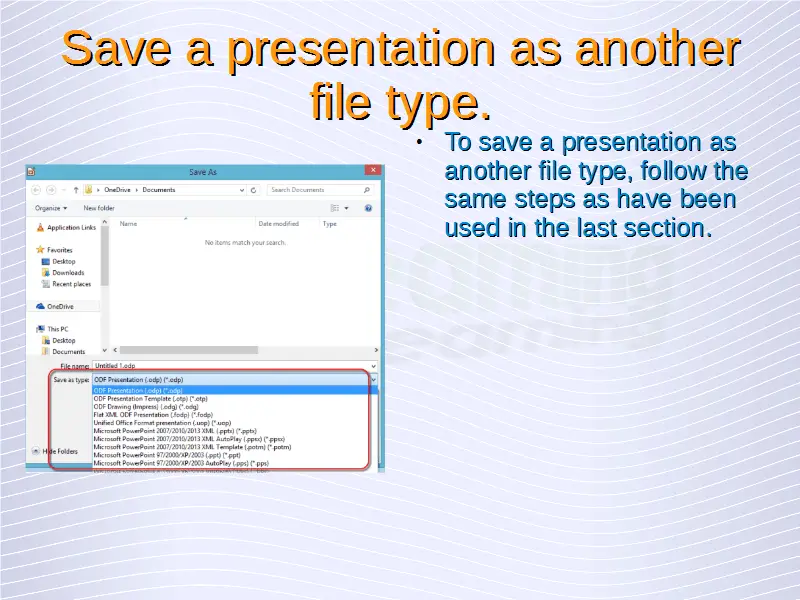
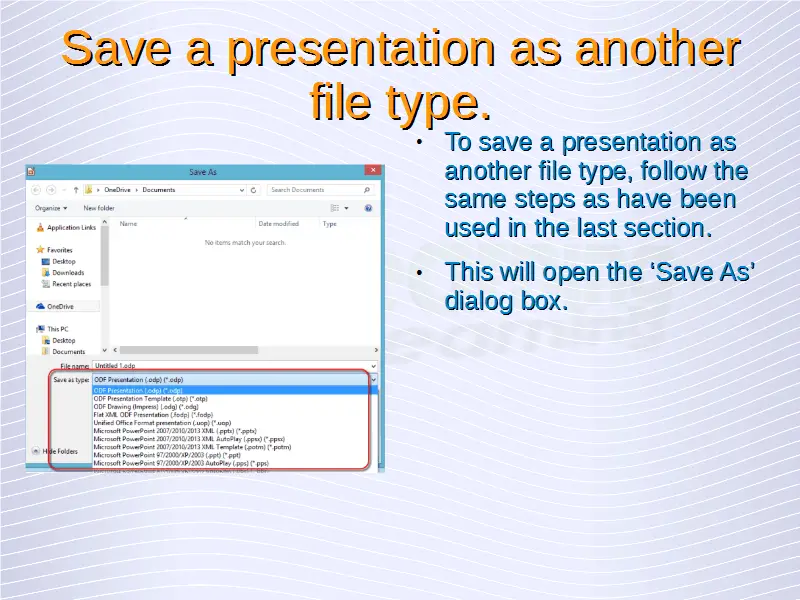
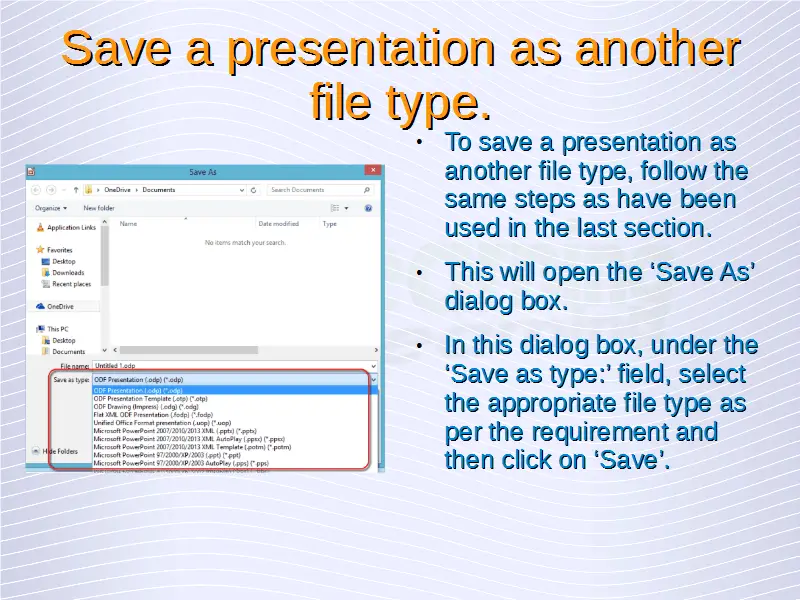
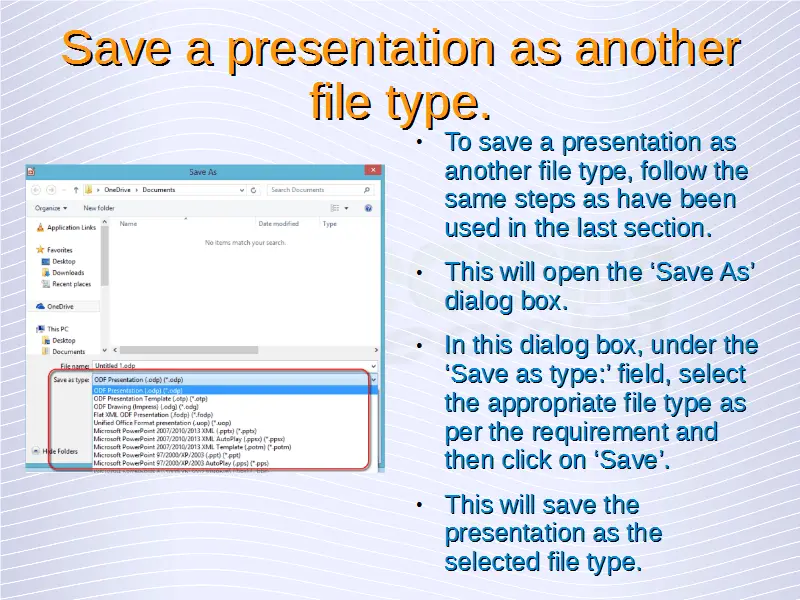
To save a presentation as another file type, follow the same steps as have been used in the previous section. This will open the ‘Save As’ dialog box. In this dialog box, under the ‘Save as type:’ field, select the appropriate file type as per the requirement and then click on ‘Save’. This will save the presentation as the selected file type.