Cleaning Temporary Files and History with Free Software for Windows
In this lesson we will look at another common computer maintenance task – removing temporary files using some free software.
When we use our computers often old temporary files are left lying around by programs. Over time they can accumulate and cause slowdown or low memory space. It is good to clean them up every few months.
Use the buttons below to navigate through the lesson


Luckily we don’t have to do this manually. Free software exists that will clean up these old files for us.
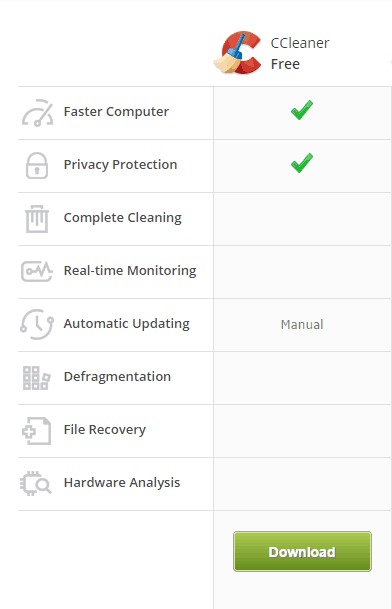
There are many alternatives you can use to perform this task but one of the most popular is called CCleaner.
CCleaner comes with professional versions that cost money but for the average home user the free version is sufficient for our needs.
Here are the steps to follow:
- Download CCleaner from www.piriform.com (this is the original website for the software so we can trust them to provide a safe installer)
- We will be using the Free version:
- Run the downloaded file:
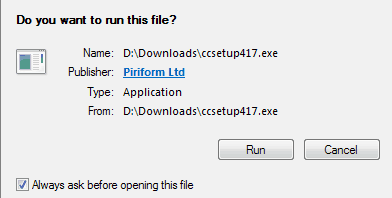
- Follow the on-screen instructions to complete the installation process
- Once the software is installed find CCleaner in the Start Menu and click it to open
- We see a list on the left of all the options we can clean up.
![]()
- There are two tabs at the top of this list:
- First, the Windows tab. You can choose which bits of data you wish to keep and which you wish you delete. For example you may wish to keep your Internet History or Cookies or Autocomplete history for convenience. Alternatively you may wish to delete it to save space.
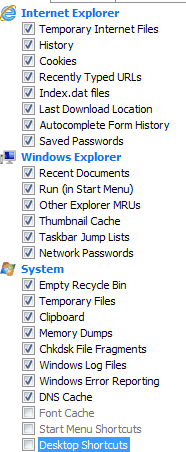
- Open the Applications tab. Here you can choose any application data you wish to remove. For example if you use browsers other than Internet Explorer there may be options here to remove the temporary internet files for those browsers.
- When you have selected the data click ‘Analyze’

- Now you are presented with details of the data that will be removed.
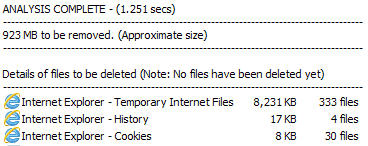
- If you are happy to remove all these files then click ‘Run Cleaner’. WARNING: this will – of course – delete all the data you have selected. If you are unsure then untick the box for the data you want to keep and press ‘Analyze’ again.
- Now you have saved the harddrive space and removed the temporary files.