Advanced Word Processing – Table of Contents
Create, update a table of contents based on specified heading styles and formats.
Writer’s table of contents feature lets you build an automated table of contents from the headings in your document. These entries are automatically generated as hyperlinks in the table. Whenever changes are made to the text of a heading in the body of the document or the page on which the heading appears, those changes automatically appear in the table of contents when it is next updated.


Before you start, make sure that the headings are styled consistently. For example, you can use the Heading 1 style for chapter titles and the Heading 2 and Heading 3 styles for chapter subheadings.
To create a table of contents based on specified heading styles and formats, click on ‘Insert’ from the main menu bar and from the resulting menu, click on ‘Indexes and Tables’, and from the resulting sub-menu, click on ‘Indexes and Tables’. This will open the ‘Insert Index/Table’ dialog box.
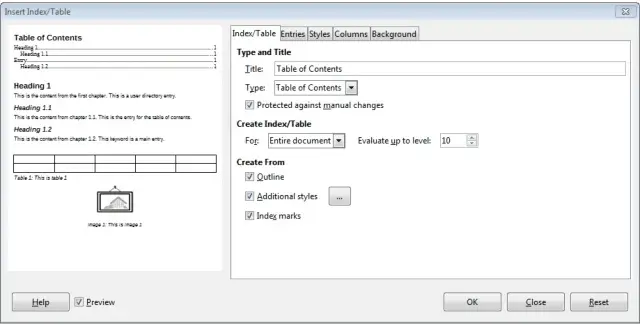
In this dialog box, under the ‘Index/Table’ tab, we have a number of options. Under the ‘Type and Title’ area, we can insert the ‘Title’ for the new table of contents and under ‘Type’, we can choose the type of index which we need to create. Here we are creating a ‘Table of Contents’ and hence we are going to choose the same as ‘Type’.
After this, under the ‘Create From’ area, we have three checkboxes. To create a table of contents based on specific heading styles and formats, check the ‘Outline’ and ‘Additional styles’ checkboxes. This will enable a small button in front of the ‘Additional styles’ checkbox. Click on this button to open the ‘Assign Styles’ dialog box.
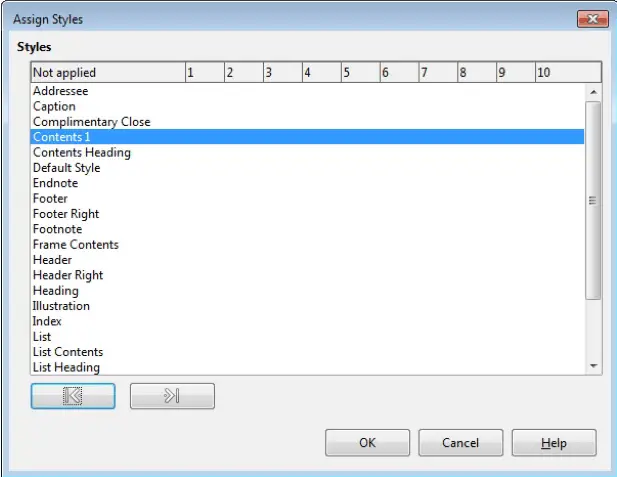
In this dialog box, under ‘Styles’, we have all the different text formatting styles available in Writer. Here we can select the particular formatting based on which we want to create the table of contents. This means that the styles which will be selected here will be used to define the headings and subheadings for the table of contents and any text which uses these styles will be treated as a heading or a subheading. This is why it is very important to have all the text with proper formatting styles.
To select a style as a heading or a subheading, simply click on the style and using the left/right buttons present at the bottom left corner of the dialog, move that style to position 1, 2 or any of the required positions up to 10. Position 1 means heading, 2 means subheading and so on.
After selecting the required style, click on ‘OK’. This will return the control to the ‘Insert Index/Table’ dialog box. Here, click on ‘OK’. The required table of contents will get inserted into the document.
To update a table of contents, simply right-click on the table of contents and from the resulting menu, click on ‘Update Index/Table’. This will update the table of contents with the latest changes which have been done to the document.