Advanced Word Processing – Styles
Create, modify, and update a character style.
A character style is a template which is used to define the styling for a character in LibreOffice Writer. A character style can be applied to a character and the character will take up the styling properties defined by that character style.
To create, modify and update a character style, first of all click on ‘Format’ from the main menu bar and from the resulting drop-down menu, click on ‘Styles and Formatting’. This will open the ‘Styles and Formatting’ toolbar menu at the right side of the document.
After this, click on the ‘Character Styles’ icon to display the different character styles available in LibreOffice Writer in a list format. This icon has been highlighted in the illustration below.
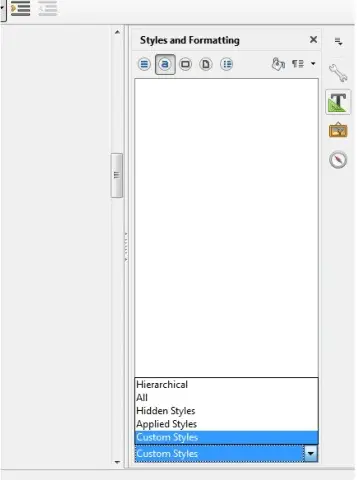 After this, from the drop-down list present at the bottom of the ‘Styles and Formatting’ toolbar, select ‘Custom Styles’.
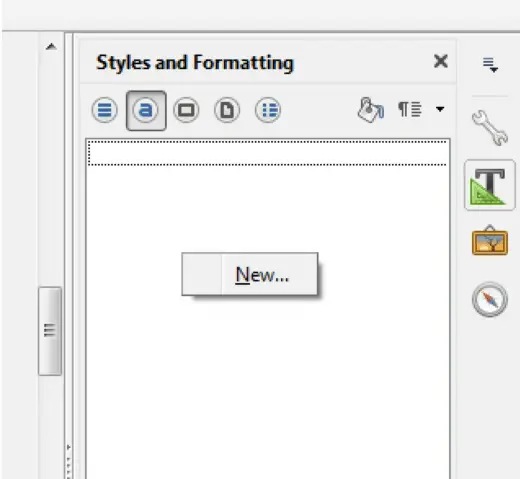 Now, right-click inside the ‘Styles List’ area. This will display an option, ‘New’.
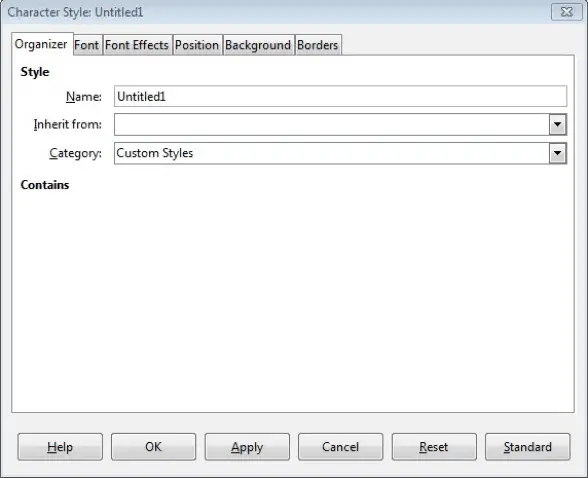 Click on ‘New’ and this will open the ‘Character Style’ dialog box.
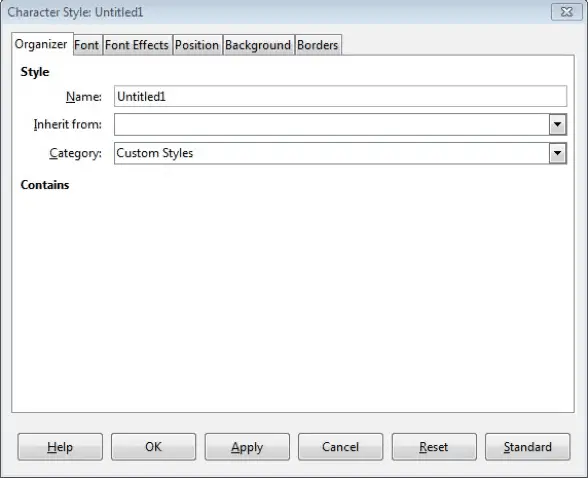 In this dialog box, we can define our new custom character style. Under the ‘Organizer’ tab, we can provide the ‘Name’ for the new character style and then under the other tabs, we can define the different styling properties for this style. After selecting all the properties, click on ‘OK’. This will save the character style in the ‘Styles List’ area for later use.
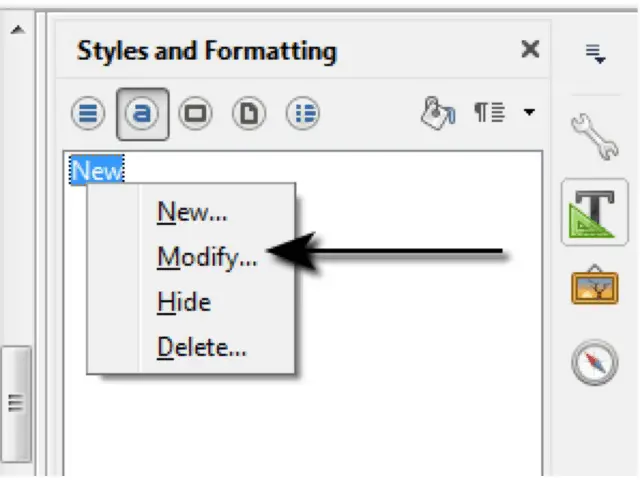
To modify a character style, in the ‘Styles List’ area, right-click on the style which needs to be modified and from the resulting menu click on ‘Modify’. This will open the same ‘Character Style’ dialog box. Make all the required changes here and then click on ‘OK’. This will update the selected character style.