Advanced Word Processing – Index Entry
Mark an index: main entry, subentry. Delete a marked index entry.
An index entry is a technique which helps us in defining some areas in a document which we might need to be used as the headings in a table of contents. This simply means that using index entries, we can define some particular areas in a document to make them a heading in our table of contents.


To mark an index entry, first of all select the text which you need to mark as an index entry. After this, click on ‘Insert’ from the main menu bar and from the resulting menu, click on ‘Indexes and Tables’, and from the resulting sub-menu, click on ‘Index Entry’. This will open the ‘Insert Index Entry’ dialog box.
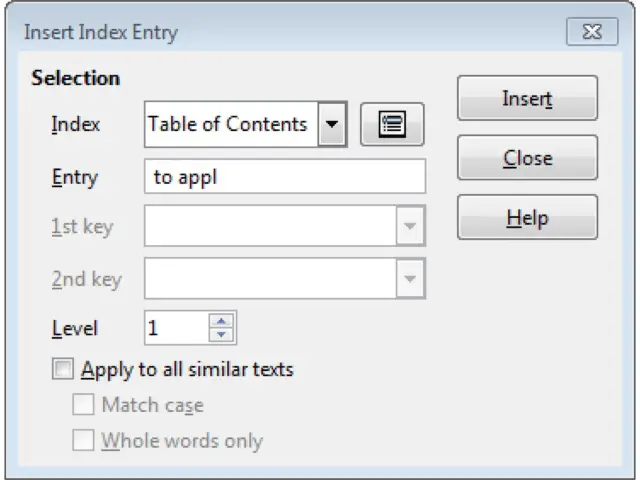
In this dialog box, we have a number of options. Under the ‘Index’ drop-down list, we can choose the type of index entry we need to mark. The type to be selected depends on the type of index we need to create. If we are going to use this index entry for a table of contents, then we can select the ‘Index’ as ‘Table of Contents’ and if we need to use some other type, we can choose ‘User Defined’.
Under ‘Level’, we can select the level of the heading which this index entry will be marked as. Level 1 means main heading, 2 means sub-heading and so on.
After selecting all the values, click on ‘Insert’ and then click on ‘Close’. This will insert the index entry into the document.
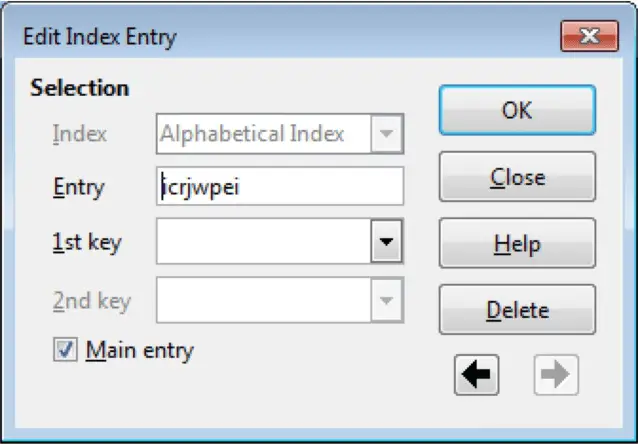
In order to delete a marked index entry, simply right-click on the index entry and from the resulting menu, click on ‘Index Entry’. This will open the ‘Edit Index Entry’ dialog box. In this dialog box, among the different available options, simply click on the ‘Delete’ button. The index entry will get deleted.
Create, update an index based on marked index entries.
We discussed in the last section that index entries can be used as headings in table of contents. Here we will see how exactly this can be achieved.
To create a table of contents based on marked index entries, click on ‘Insert’ from the main menu bar and from the resulting menu, click on ‘Indexes and Tables’, and from the resulting sub-menu, click on ‘Indexes and Tables’. This will open the ‘Insert Index/Table’ dialog box.
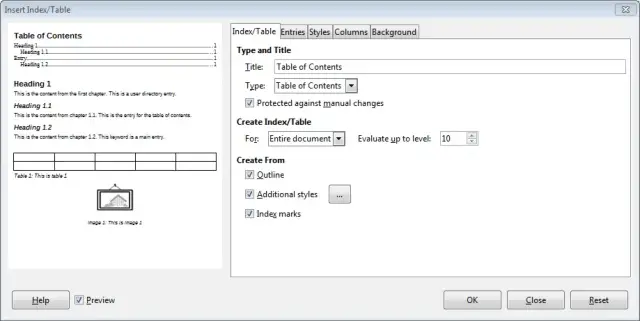
In this dialog box, under the ‘Index/Table’ tab, we have a number of options. Under the ‘Type and Title’ area, we can insert the ‘Title’ for the new table of contents and under ‘Type’, we can choose the type of index which we need to create. Here we are creating a ‘Table of Contents’ and hence we are going to choose the ‘Type’ as ‘Table of Contents’.
After this, under the ‘Create From’ area, we have a number of checkboxes. To create a table of contents based on marked index entries, check the ‘Index marks’ checkbox.
After this, click on ‘OK’. The required table of contents will get inserted into the document.
To update a table of contents, simply right-click on the table of contents and from the resulting menu, click on ‘Update Index/Table’. This will update the table of contents with the latest changes which have been done to the document.