Advanced Spreadsheets – Run a macro
To run a macro, click on ‘Tools’ from the main menu bar. From the resulting drop-down menu, click on ‘Macros’, and from the sub-menu which gets displayed, click on ‘Run Macro’. This will open the ‘Macro Selector’ dialog box.
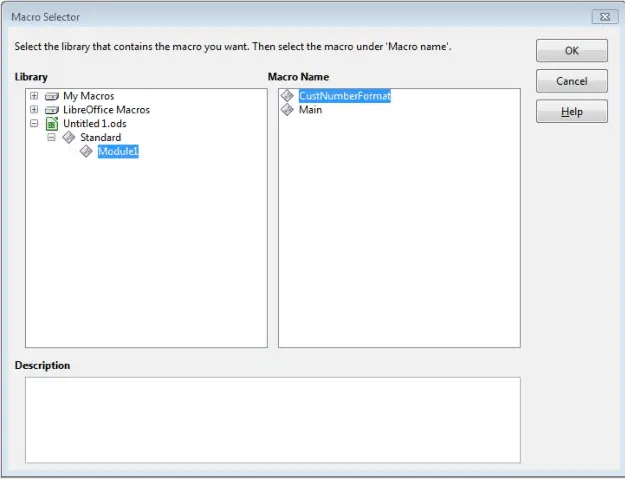
In this dialog box, in the ‘Library’ field, we have the list of all the libraries. Select the appropriate library and also the required module from that library. This will display the name of the macros present in that module in the ‘Macro Name’ field. Select the appropriate macro name and then click on ‘Run’. This will run the selected macro.
Assign a macro to a custom button on a toolbar.
To assign a macro to a custom button on a toolbar, click on ‘View’ from the main menu bar. From the resulting drop-down menu, click on ‘Toolbars’, and from the resulting sub-menu, click on ‘Form Controls’. This will open the ‘Form Controls’ dialog box. In this dialog, first of all click on the ‘Design Mode On/Off’ button. This will enable all the other buttons.
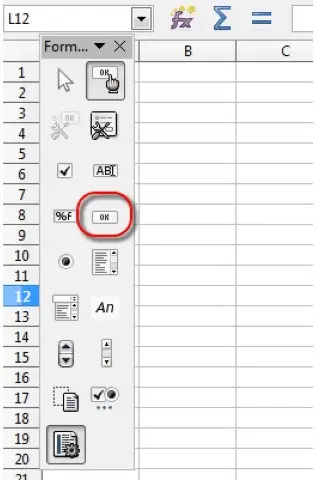
After this, click on ‘Push Button’. The mouse pointer will change to a ‘+’ sign. Drag anywhere on the sheet to create a ‘Push Button’.
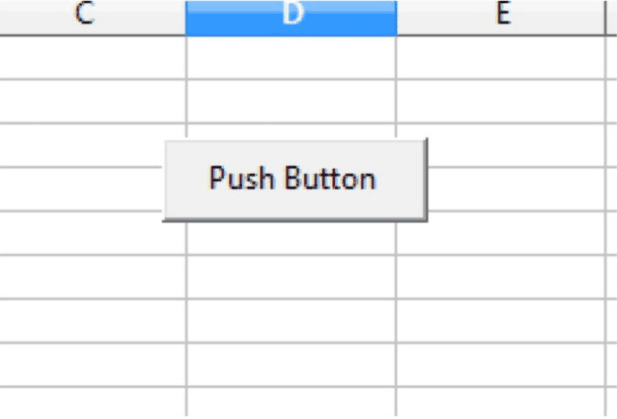
After this, right click on the newly created button and from the resulting menu, click on ‘Control’. This will open the ‘Properties’ dialog box.
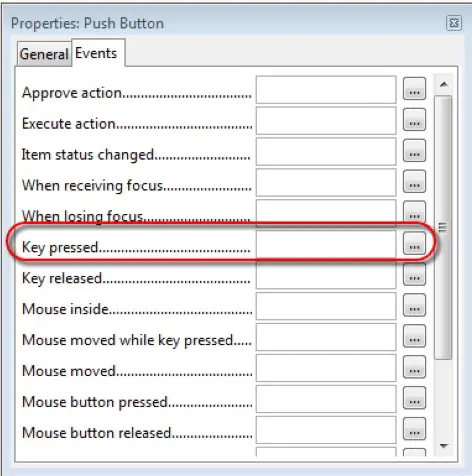
In this dialog, under the ‘Events’ tab, we have different actions. Click on the ‘…’ button in front of the action to which you want to assign the macro. This will open the ‘Assign Action’ dialog box.
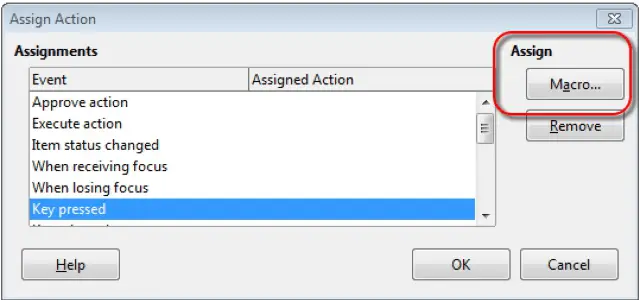
In this dialog box, under the ‘Assign’ field, click on the ‘Macro’ button. This will open the ‘Macro Selector’ dialog box.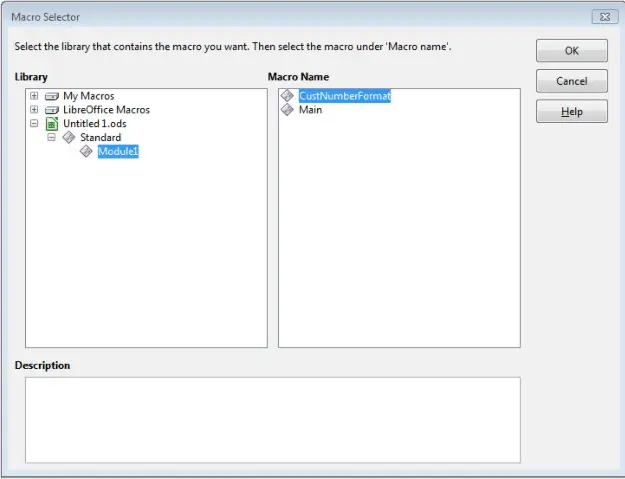
In this dialog box, select the appropriate macro which needs to be assigned to this button. After selecting, click on ‘OK’. This will bring back the ‘Assign Action’ dialog box. Here also click on ‘OK’. This will bring back the ‘Properties’ dialog. Close this dialog and the selected macro will get assigned to the newly created button.


