Advanced Database – linked subform
Create, delete a linked subform.
A subform allows you to display associated data from a different table within a form.

Create a new form using the wizard.
On the first step, add all of the fields from the table ‘Jobs’, then click next.
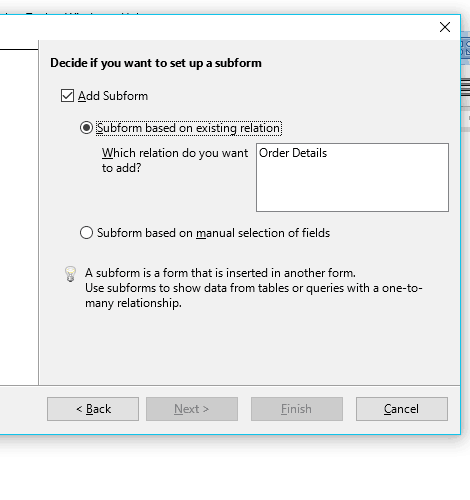
On the second step, we can add a subform based on the existing relation to Order Details table, as we created a relation in a previous tutorial. Select it and click next.

If there was no created relationship in step 2 you can add them manually.
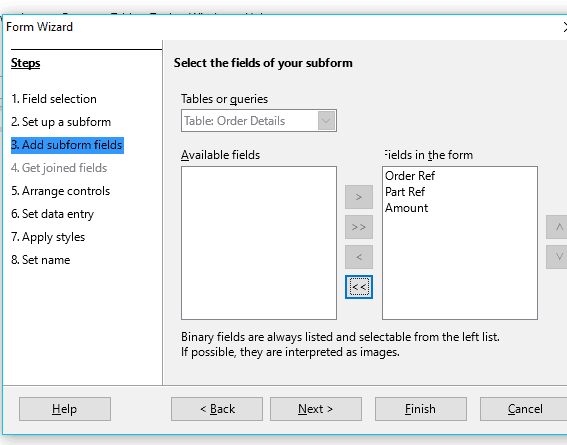
For step 3, select all of the fields by clicking the double arrow button.
Click Next.
Decide on the arrangement and styles you want in steps 5,6,7, then add a name for the form and click Finish.

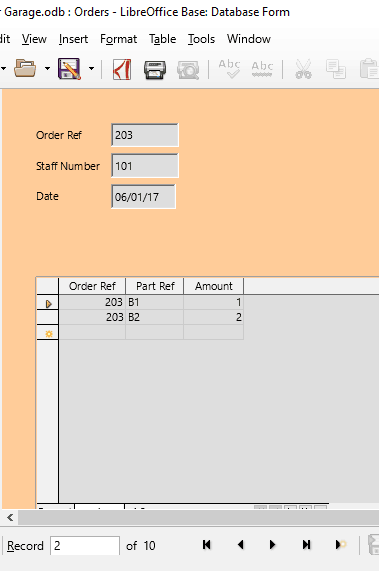
The form will open automatically.
Scroll through the records using the controls at the bottom of the window.
Notice that you can modify or add records to the Orders table, at the same time viewing records from the subform from the ‘Order Details’ table.
This can be useful in cases when you need a reminder of other related information while inputting or modifying data.

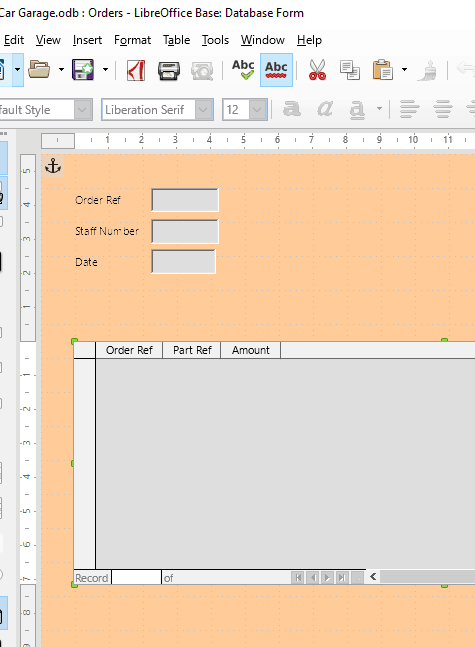
To delete a linked subform, first open the form in design mode by right clicking and selecting edit.
Select the subform by left clicking on it.
Press the delete key to remove the subform.