Advanced Database – Create, modify, delete an input mask in a field
In Base you can only create input masks in a form (not a table as in MS Access).
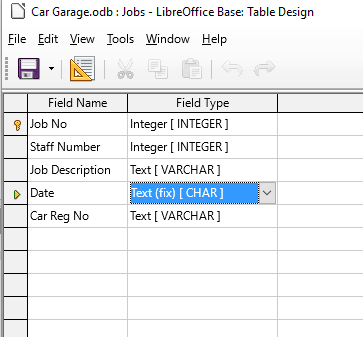
We are going to edit the date field to only allow dates to be inputted in the format DD** MMM YY (e.g. 21st NOV 15)
First we must open the Jobs table in design mode (right click then select ‘Edit’.
Then change the data type in the table of the Date field to Text, as shown and close the table.
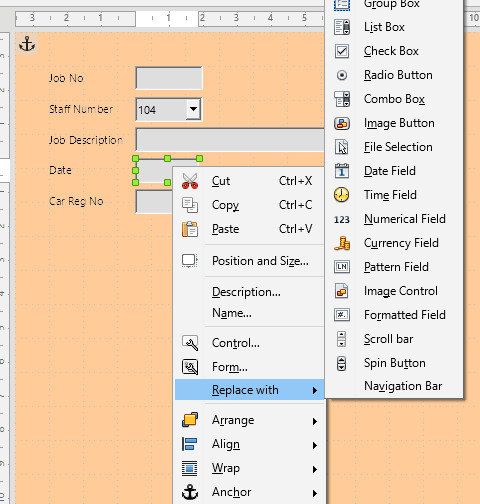
Open the form ‘Jobs Entry’ in design mode by right clicking and select ‘Edit’.
Press ‘Ctrl’ and left click the text box next to ‘Date’ to select it
Right click, select ‘Replace with’ and select ‘Pattern field’. This allows us to create an input mask.
An input mask is like a template that only allows you to enter data in a specific way, this helps prevent errors in the data.
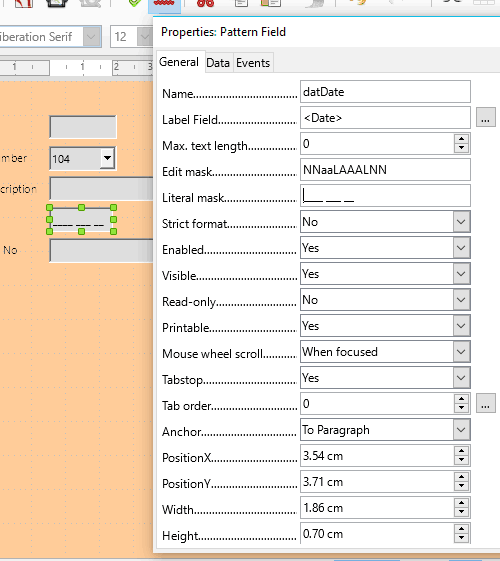
Right click the box and select ‘Control…’
Masks use the following characters: N=numbers 0-9, a=letters a-z, A=letters A-Z (converts lower case to upper case), L=locked i.e. this can’t be overwritten, c or C = all characters (a-z 0-9)
x or X = all printable characters
In Edit mask enter: NNaaLAAALNN to represent e.g. 07th FEB 13 (notice the spaces are L for locked)
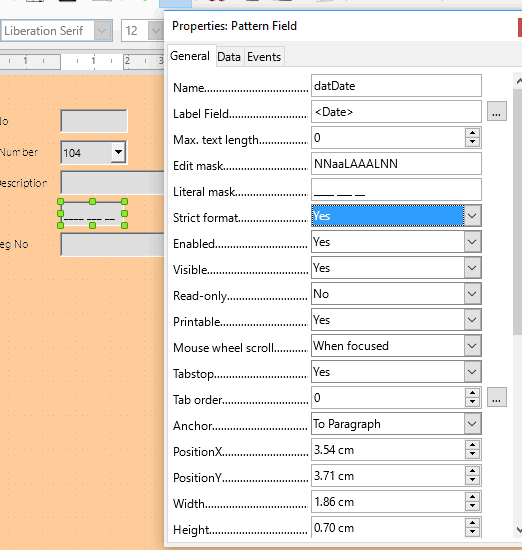
In Literal mask enter: ____ ___ __ (that is 4 underscores, space, 3 underscores, space, 2 underscores)
This is what will appear as default in the input box on the form.
Select Yes for the ‘Strict format’ option, this means if data is entered in the wrong format it won’t be changed. This is useful for preventing mistakes in the data.
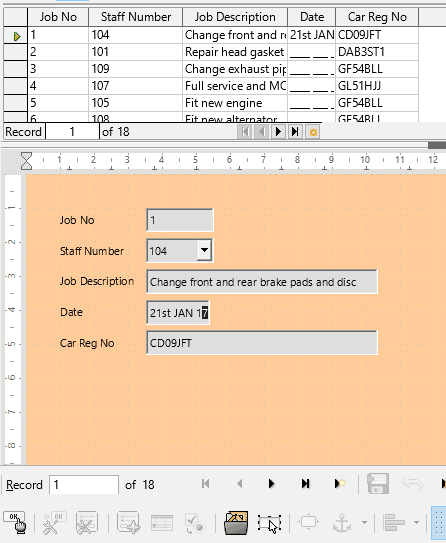
Toggle out of design mode by clicking the design mode icon, and click the ‘data source as table’ icon to view the table.
Try typing dates into the Date field. Notice that you have to follow the format set in the input mask.
If you try using the Tab key to cycle through the form, you may notice the order is wrong for the new box. Go back to design mode by clicking the design mode icon.
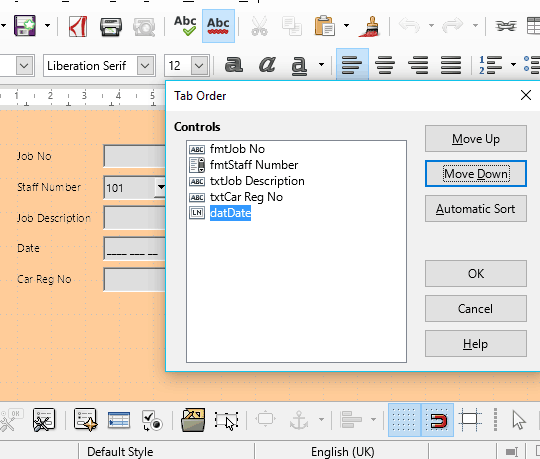
Click the ‘Activation order’ icon on the toolbar to open a dialogue box.
Select the date pattern field and move it up or down until it is between Description and Reg No.
To modify the mask, right click and select ‘Control’, then use the Edit mask option.
To delete the input mask, just change the box back to a text box by right clicking and selecting ‘Replace with’