Change text formatting: font sizes, font types.
To change the font size and the font type of the text in a document, right-click anywhere on the document text area and from the resulting menu, click on ‘Edit Paragraph Style’. This will open the ‘Paragraph Style’ dialog box.

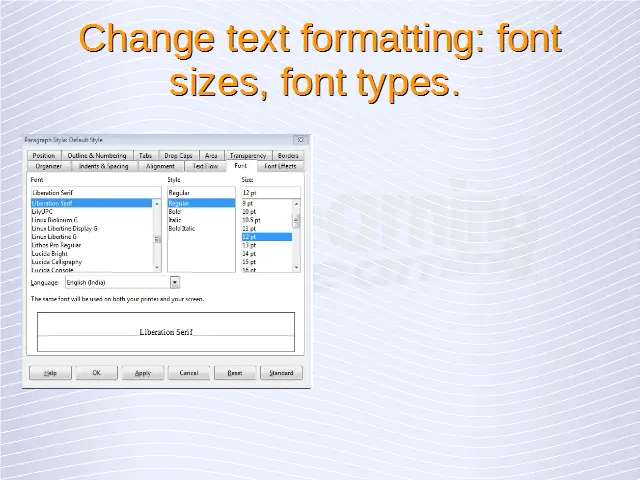
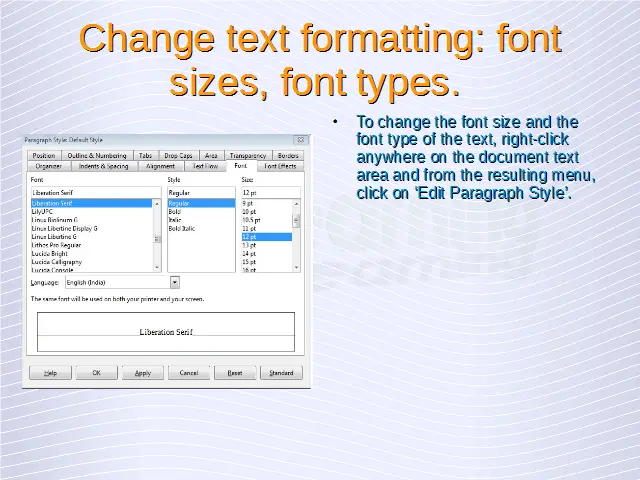

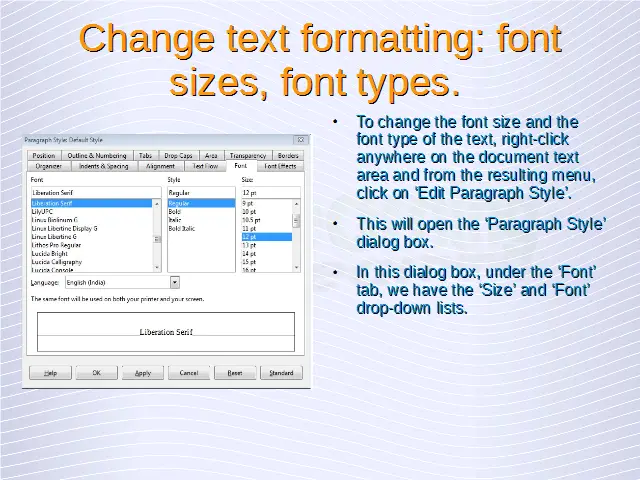
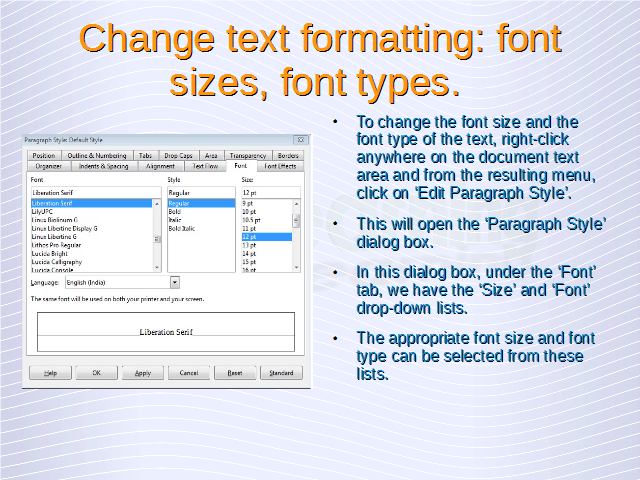


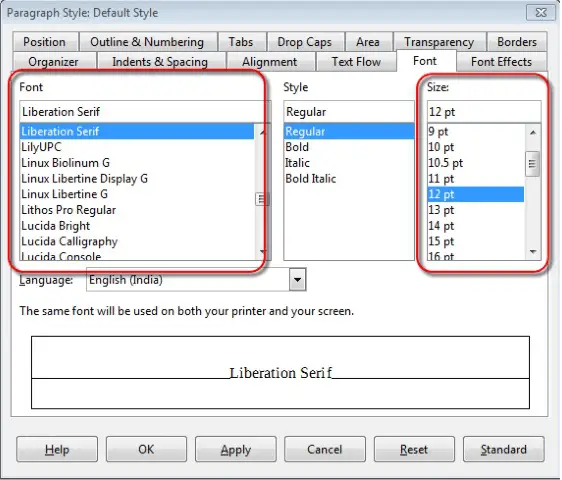
In this dialog box, under the ‘Font’ tab, we have the ‘Size’ and ‘Font’ drop-down lists. The appropriate font size and font type can be selected from these lists. After selecting the required values, click on ‘OK’. This will make the required changes to the document.
Apply text formatting: bold, italic, underline.
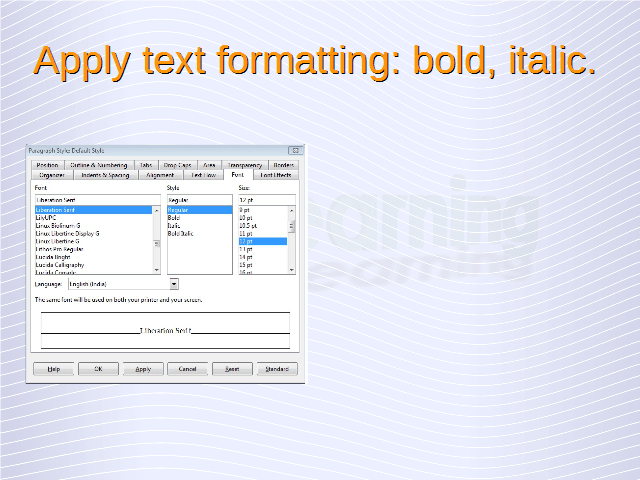
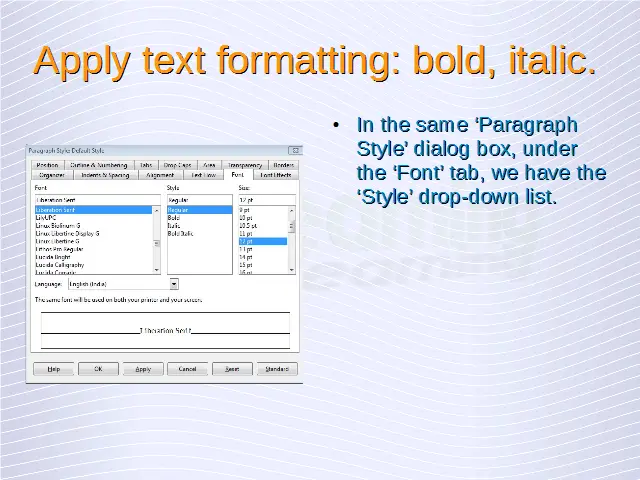
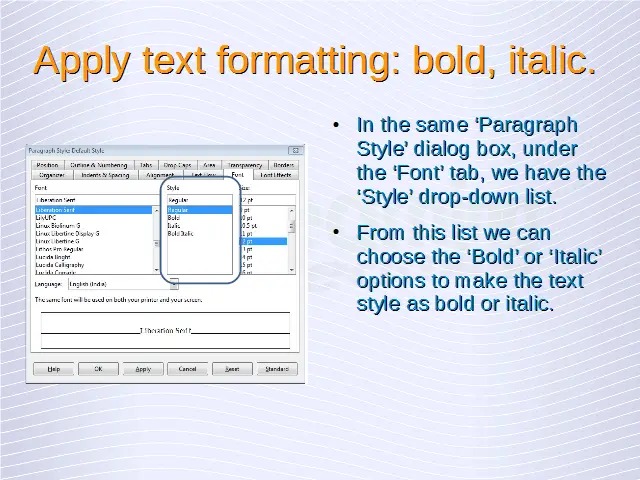
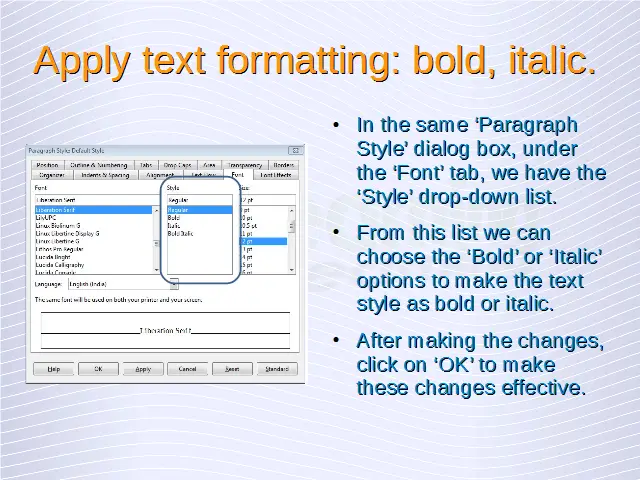
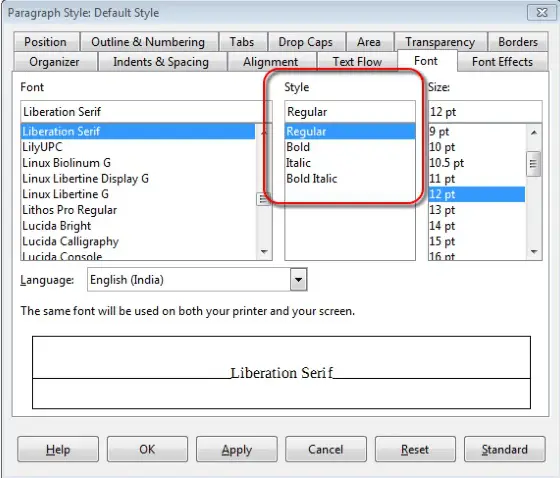
In the same ‘Paragraph Style’ dialog box, under the ‘Font’ tab, we have the ‘Style’ drop-down list. From this list we can choose the ‘Bold’ or ‘Italic’ options to make the text style as bold or italic.

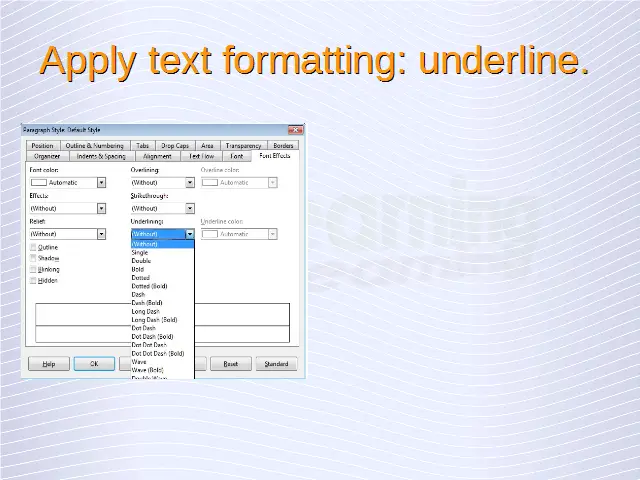
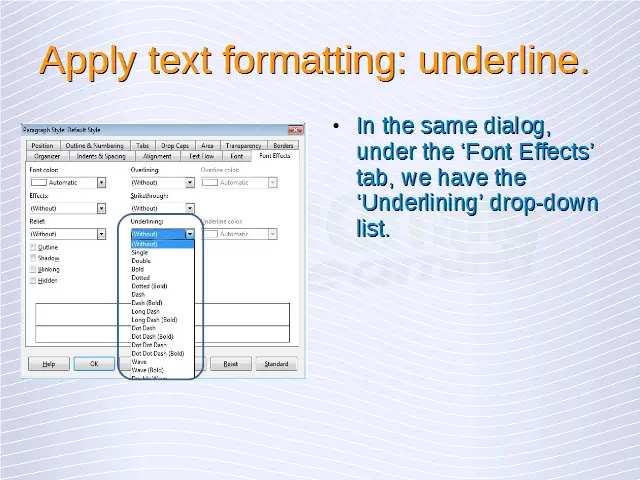
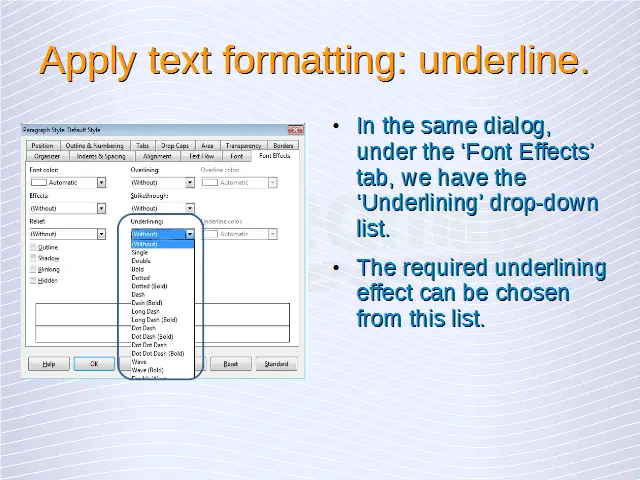
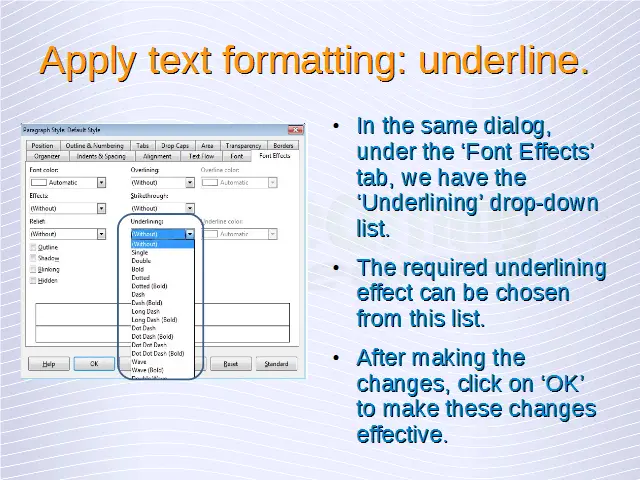
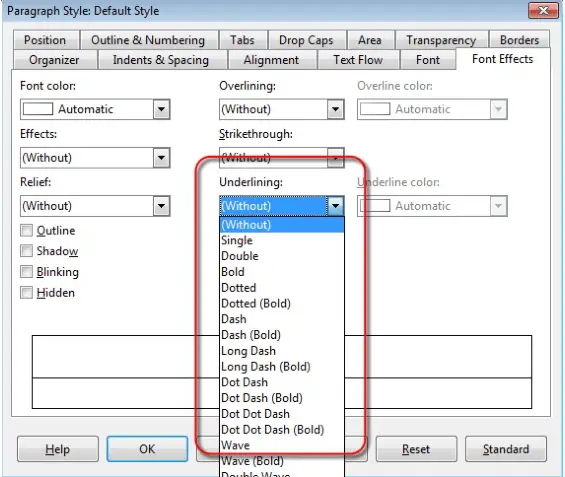
In the same dialog, under the ‘Font Effects’ tab, we have the ‘Underlining’ drop-down list. The required underlining effect can be chosen from this list.

After making the changes, click on ‘OK’ to make these changes effective.
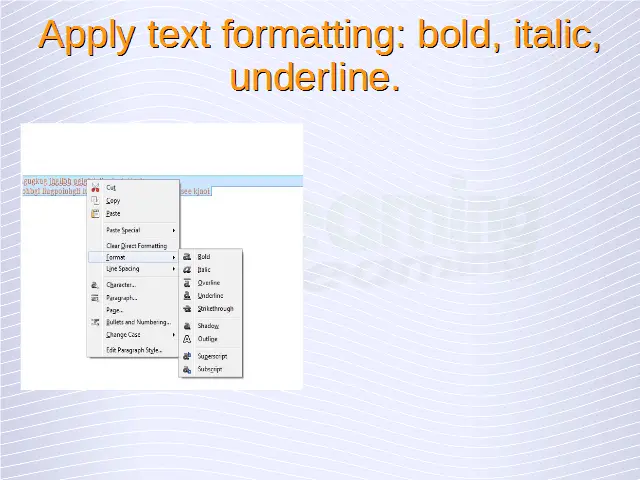
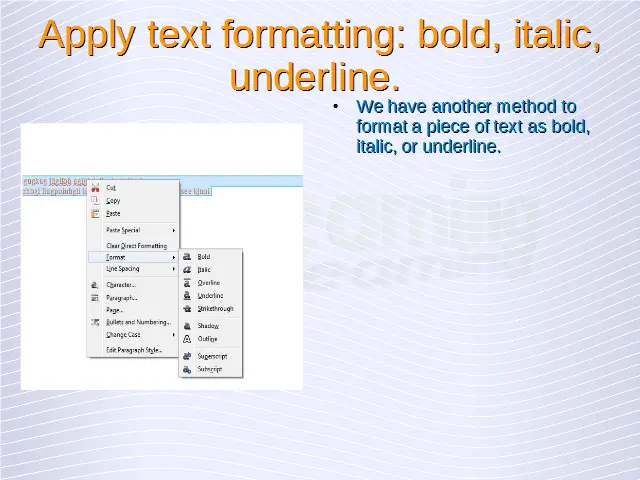
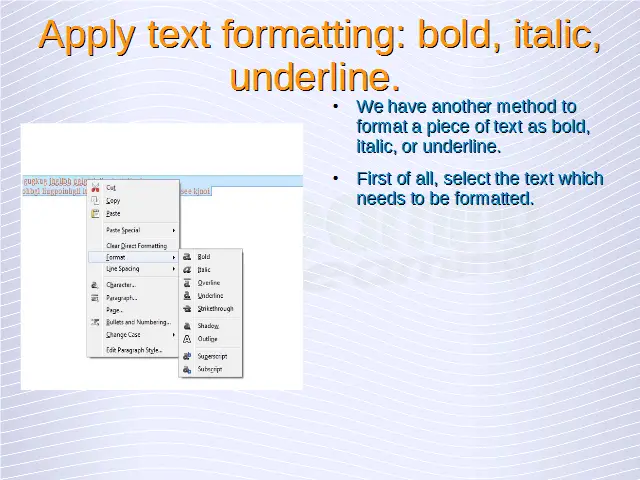
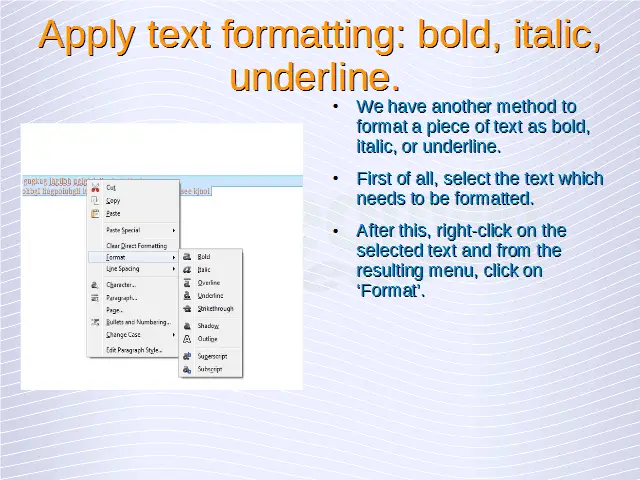
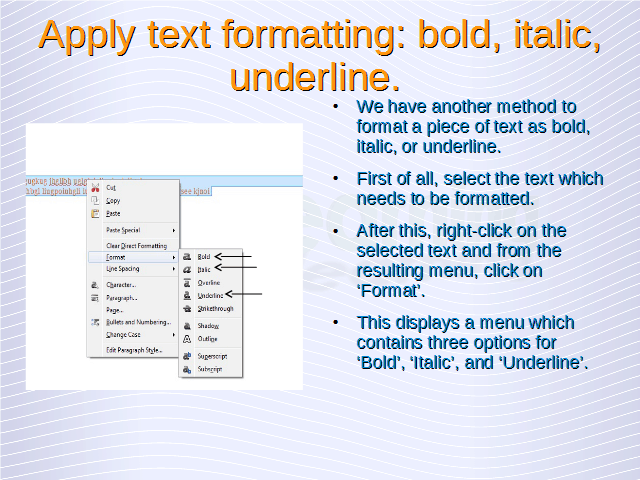
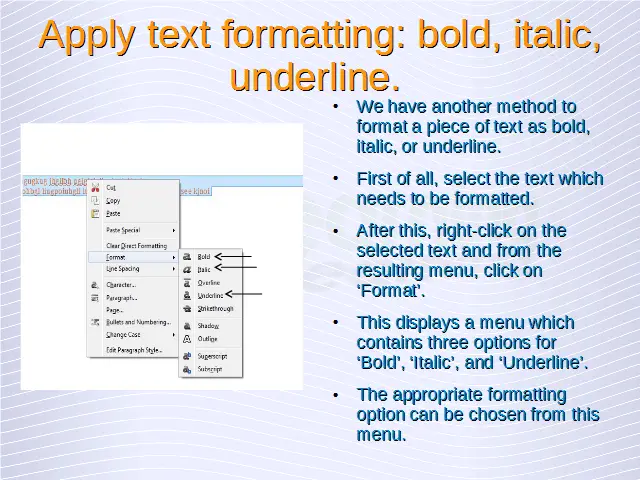
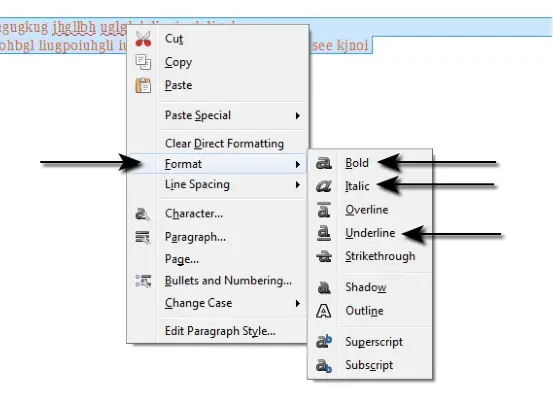
We have another method to format a piece of text as bold, italic, or underline. First of all, select the text which needs to be formatted. After this, right-click on the selected text and from the resulting menu, click on ‘Format’. This displays a menu which contains three options for ‘Bold’, ‘Italic’, and ‘Underline’. The appropriate formatting option can be chosen from this menu.

Apply text formatting: subscript, superscript.
A subscript or superscript is a number, figure, symbol, or indicator that is smaller than the normal line of type and is set slightly below or above it. Subscripts appear at or below the baseline, while superscripts are above it.
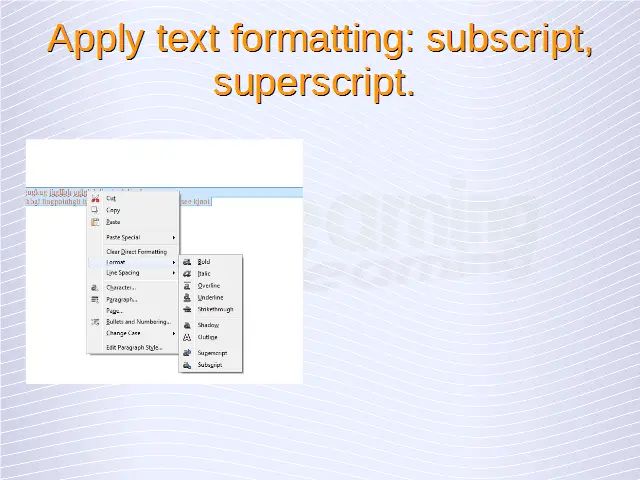
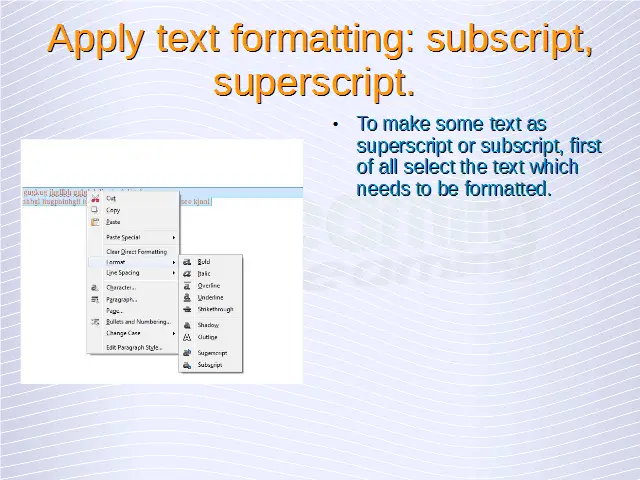
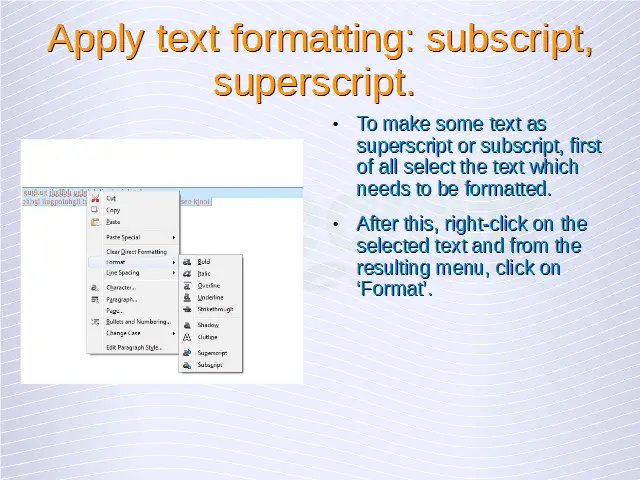
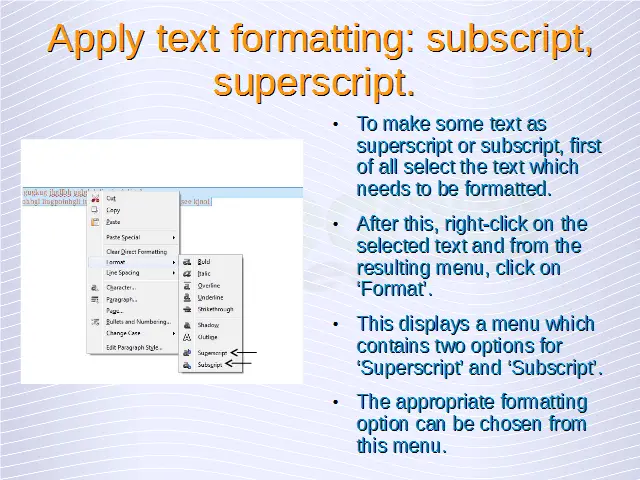
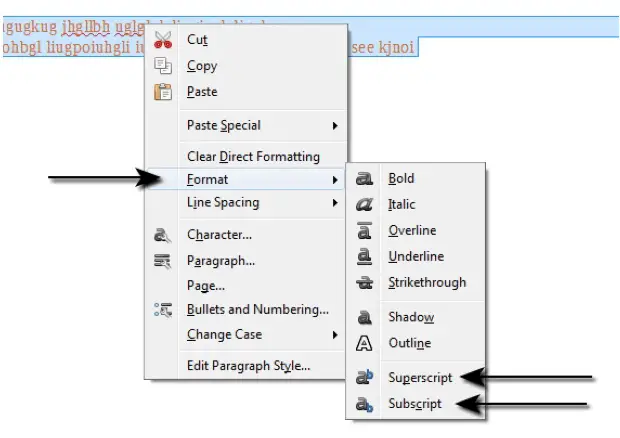
To make some text as superscript or subscript, first of all select the text which needs to be formatted. After this, right-click on the selected text and from the resulting menu, click on ‘Format’. This displays a menu which contains two options for ‘Superscript’ and ‘Subscript’. The appropriate formatting option can be chosen from this menu.

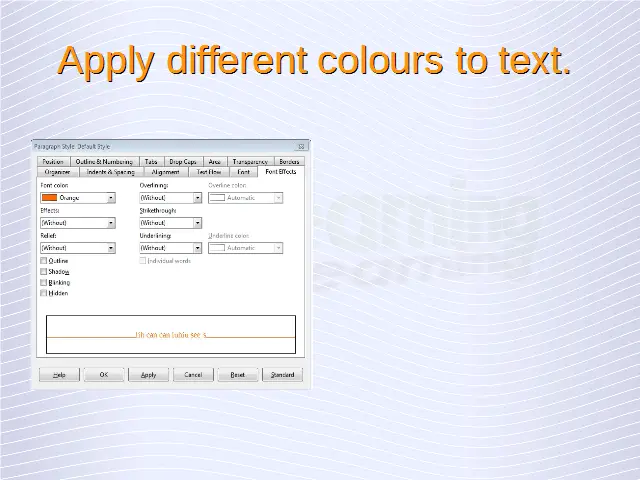
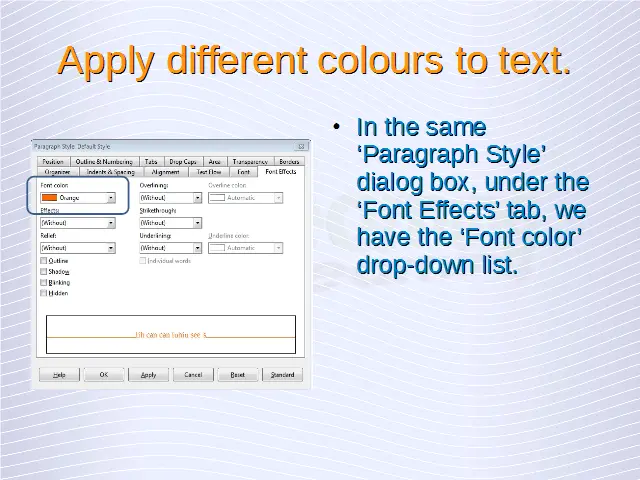
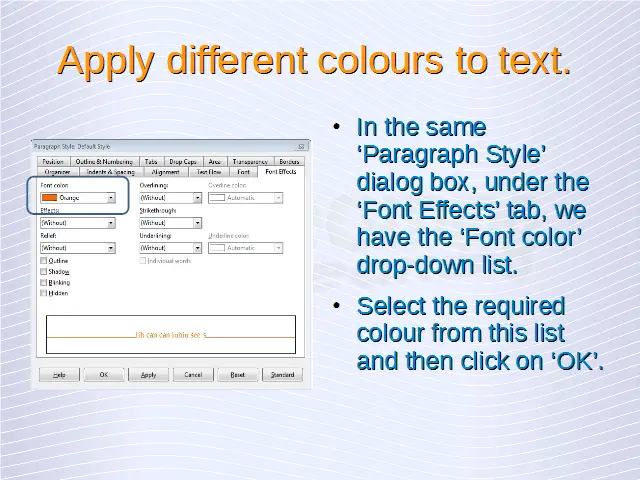
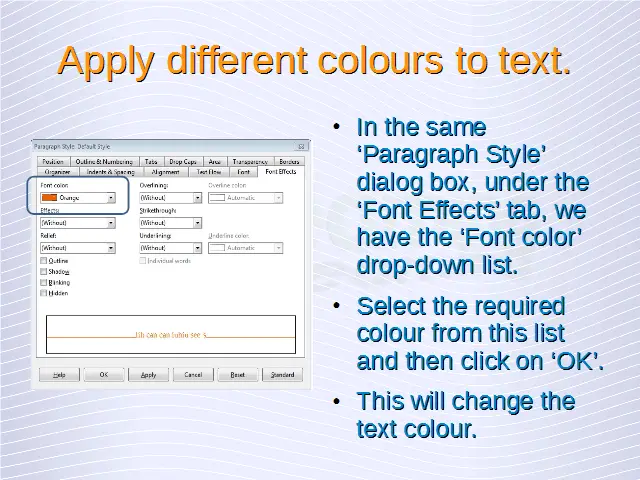
Apply different colours to text.
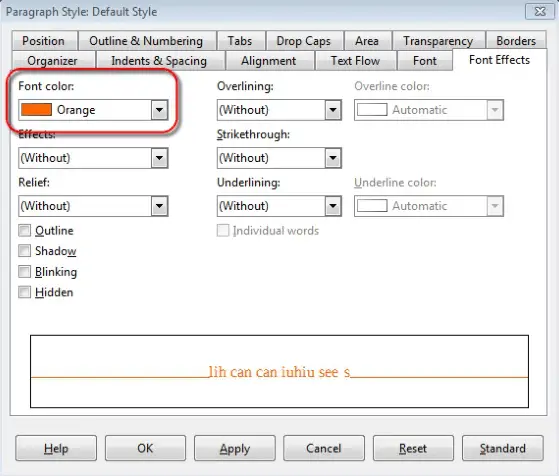
In the same ‘Paragraph Style’ dialog box which has been used in the previous sections, under the ‘Font Effects’ tab, we have the ‘Font color’ drop-down list. Select the required color from this list and then click on ‘OK’. This will change the text color.

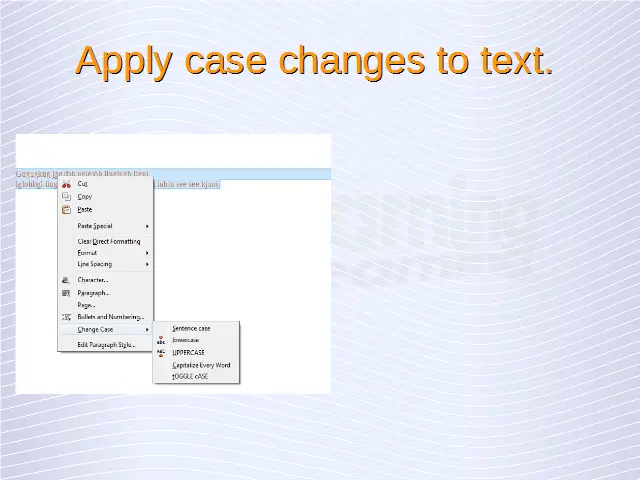
Apply case changes to text.
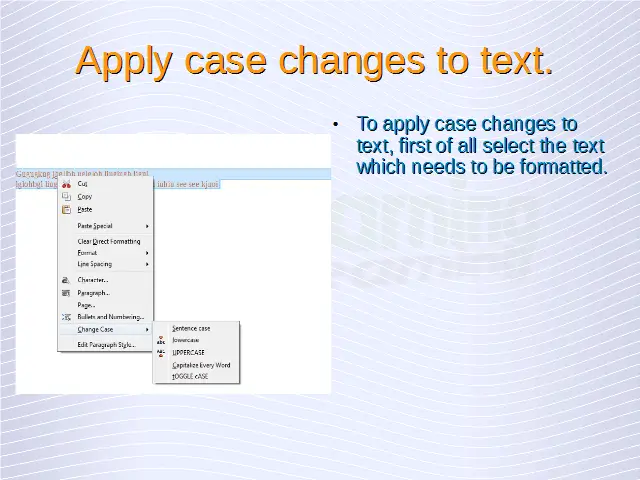
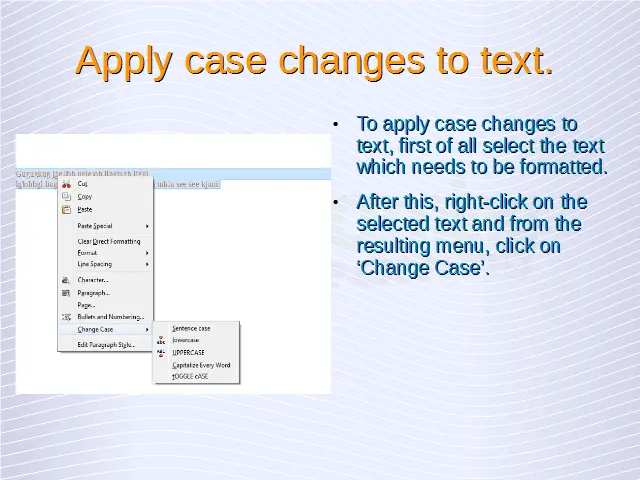
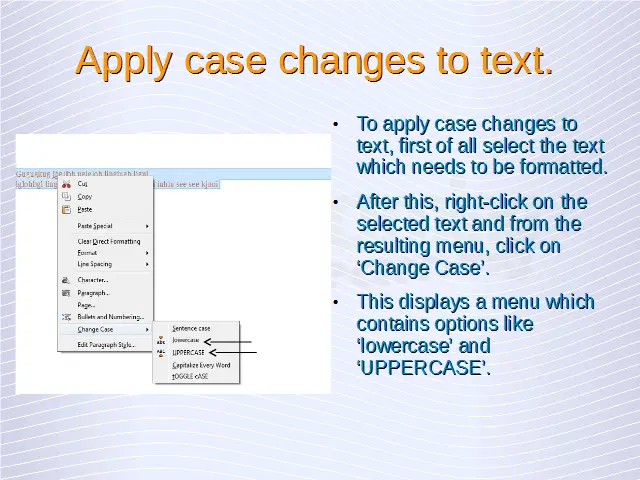
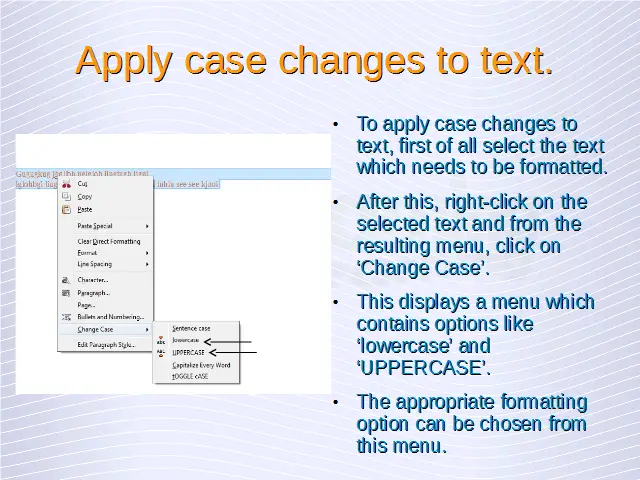
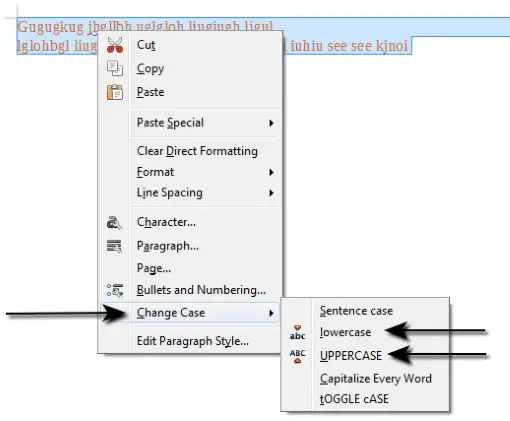
To apply case changes to text, first of all select the text which needs to be formatted. After this, right-click on the selected text and from the resulting menu, click on ‘Change Case’. This displays a menu which contains options like ‘lowercase’ and ‘UPPERCASE’. The appropriate formatting option can be chosen from this menu.

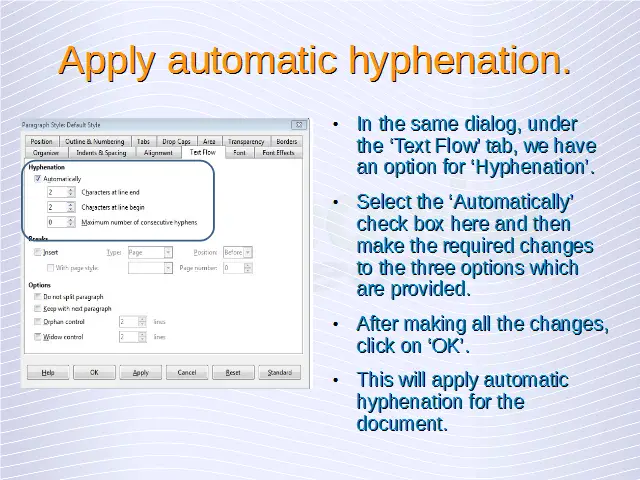
Apply automatic hyphenation.
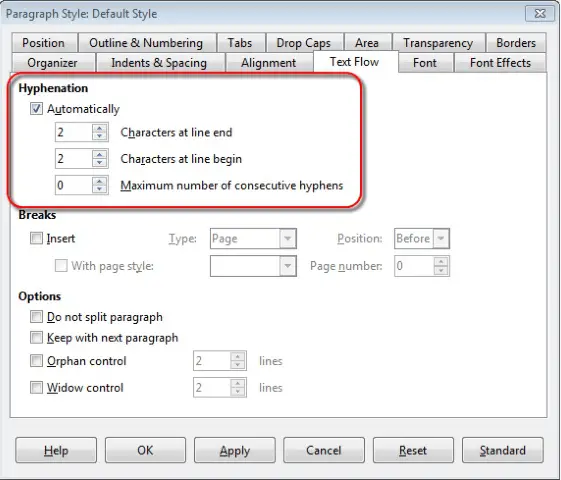
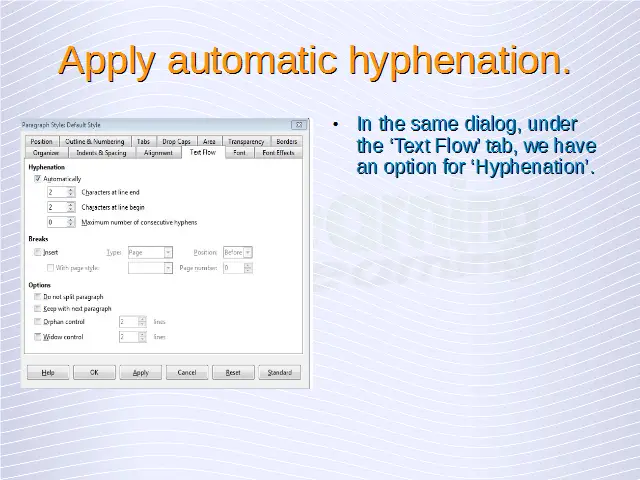
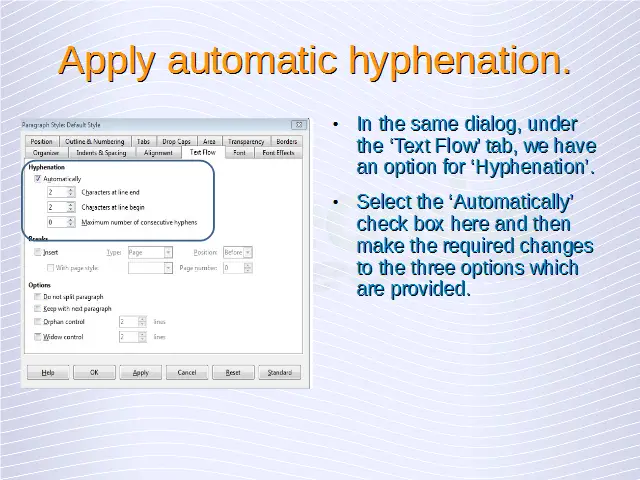
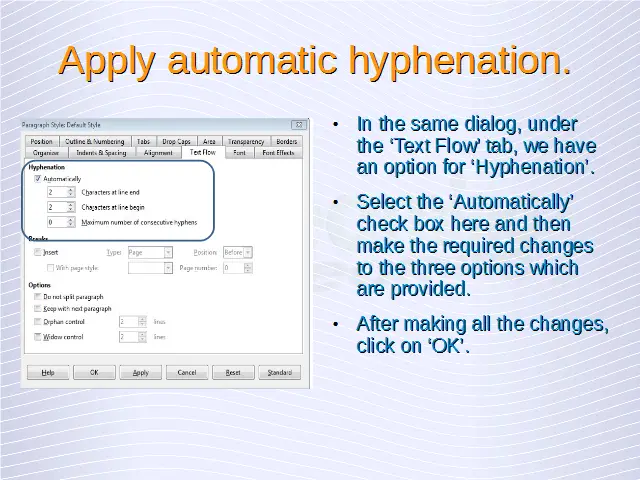
In the same ‘Paragraph Style’ dialog used in the previous sections, under the ‘Text Flow’ tab, we have an option for ‘Hyphenation’. Select the ‘Automatically’ check box here and then make the required changes to the three options which are provided. After making all the changes, click on ‘OK’. This will apply automatic hyphenation for the document.