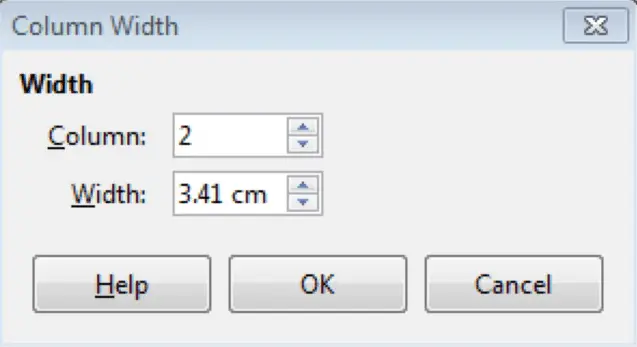
Modify column width, row height.
To modify column width or row height, click once on any one of the cells of the concerned column or row. After this, click on ‘Table’ from the main menu bar and from the resulting drop-down click on ‘Autofit’. From the resulting menu, click on ‘Column Width’ or ‘Row Height’.


This will open the ‘Column Width’ or ‘Row Height’ dialog box where the width or height of the column or the row can be set. After giving the appropriate value, click on ‘OK’. This will change the height or width of the row or column accordingly.

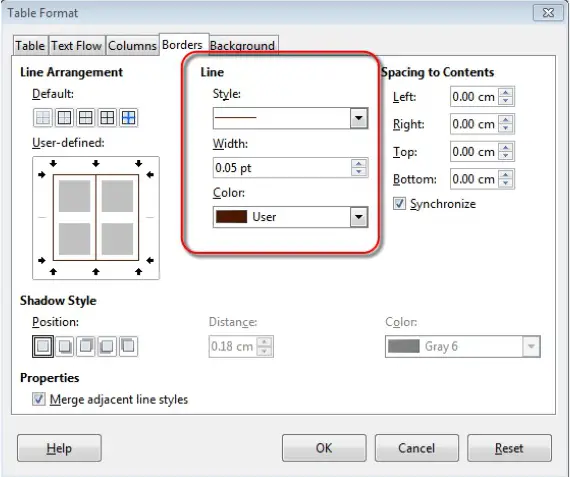
Modify cell border line style, width, and colour.
To modify the cell border line style, width or colour, click on ‘Table’ from the main menu bar, and from the resulting menu, click on ‘Table Properties’. This will open the ‘Table Format’ dialog box.
In this dialog box, under the ‘Borders’ tab, we have the different ‘Line’ options like ‘Style’, ‘Width’ and ‘Color’. The appropriate formatting options can be selected from here. After making all the selections, click on ‘OK’. The cell border line formatting will get changed accordingly.

Add shading/background colour to cells.
To add shading/background colour to cells, click on ‘Table’ from the main menu bar, and from the resulting menu, click on ‘Table Properties’. This will open the ‘Table Format’ dialog box.
In this dialog box, under the ‘Background’ tab, we have the different options like ‘As’ and ‘For’. Under ‘As’, select ‘Color’ or ‘Graphic’ as per the requirement and under ‘For’, select ‘Cell’ for adding the background to cells. After this, select the appropriate colour from the options displayed in the dialog. After making all the selections, click on ‘OK’. The background colour will get added to the cells.

