Create a table ready for data insertion.
In LibreOffice Writer, we can insert a table into the document. To insert a table, click on ‘Table’ from the main menu bar and from the resulting drop-down menu, click on ‘Insert Table’. This will open the ‘Insert Table’ dialog box.


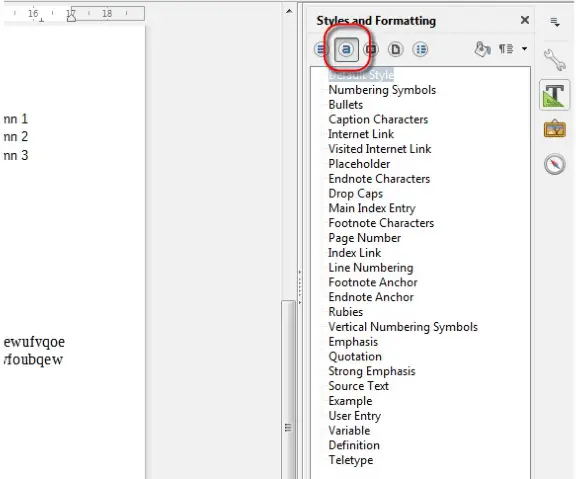
After this, click on the ‘Character Styles’ icon to display the different character styles available in LibreOffice Writer in a list format. This icon has been highlighted in the below given illustration. Now we have a list of all the different character styles available. Double-click on the required character style from this list and this will apply this style to the selected text in the document.

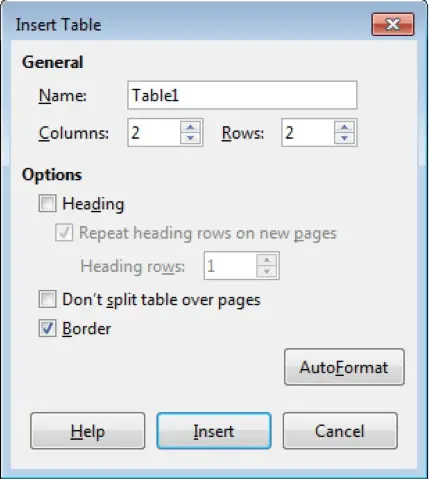

In this dialog, we can select the name of the table under ‘Name’ and the number of the rows and columns under ‘Rows’ and ‘Columns’. We can also select some other features using the ‘Options’ area. The ‘Heading’ checkbox will add a heading row to the table. Similarly the ‘Border’ checkbox will add border to the table.
We can also select a table format by clicking on the ‘AutoFormat’ button. This will open the ‘AutoFormat’ dialog box.
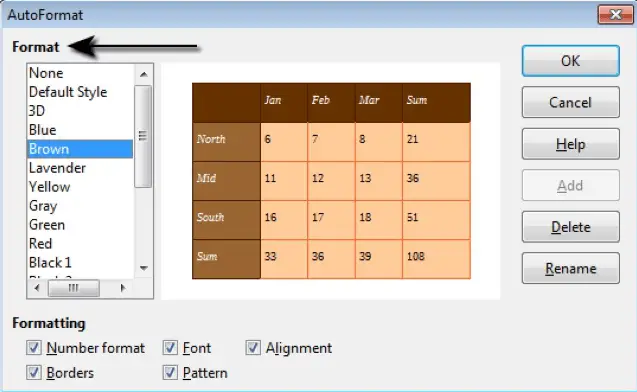

The appropriate format can be chosen from this dialog from the ‘Format’ drop-down list. After selecting the format, click on ‘OK’. This will return the control to the ‘Insert Table’ dialog. Click on ‘Insert’ and the table will get inserted into the document.
Insert, edit data in a table.
To insert data in a table, click once inside the cell in which the data needs to be entered. This will give a blinking text pointer inside the cell. Now simply enter the required data using the keyboard.
To edit the data in a table, click once inside the cell whose data needs to be edited. Now delete the already present value using the ‘delete’ button from the keyboard and then enter the new value. This is how we can edit the table data.
Select rows, columns, cells, entire table.
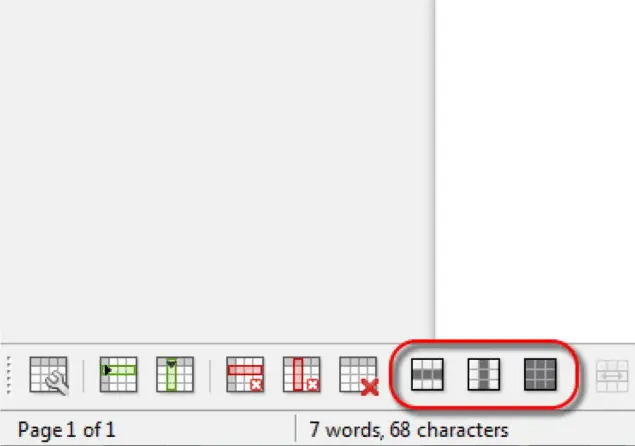
To select a row or a column, click once on any one of the cells from that particular row or column. The table formatting toolbar menu will get displayed at the bottom of the document. From this menu, the row select, column select, or the table select icons can be selected to select a row, a column or the whole table respectively. These icons have been highlighted in the below given illustration.

Insert, delete, rows and columns.
To insert a row or a column, click once on any one of the cells from the column to whose right the new column needs to be inserted or from the row below which the new row needs to be inserted. The table formatting toolbar menu will get displayed at the bottom of the document. From this menu, the insert row or the insert column icons can be selected to insert a row or a column respectively. These icons have been highlighted in the illustration.
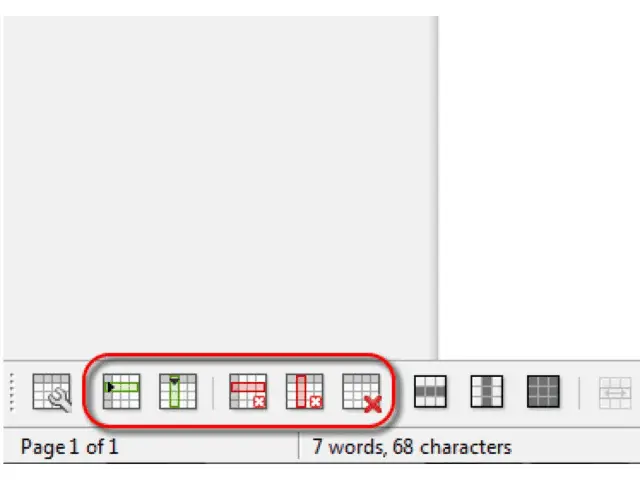
To delete a row or a column, click once on any one of the cells from that particular row or column. The table formatting toolbar menu will get displayed at the bottom of the document. From this menu, the delete row, delete column, or the delete table icons can be selected to delete a row, a column or the whole table respectively. These icons have been highlighted in the illustration.