Open, prepare a document, as a main document for a mail merge.
Mail Merge is a useful tool that allows you to produce multiple letters, labels, envelopes, name tags, and more using information stored in a list, database, or spread sheet.
To open or prepare a document as a main document for mail merge, click on ‘Tools’ from the main menu bar and from the resulting drop-down menu, click on ‘Mail Merge Wizard’. This will open the below shown dialog box.

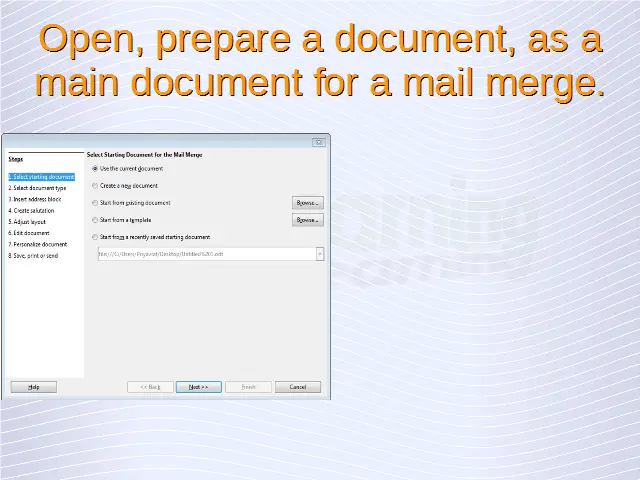
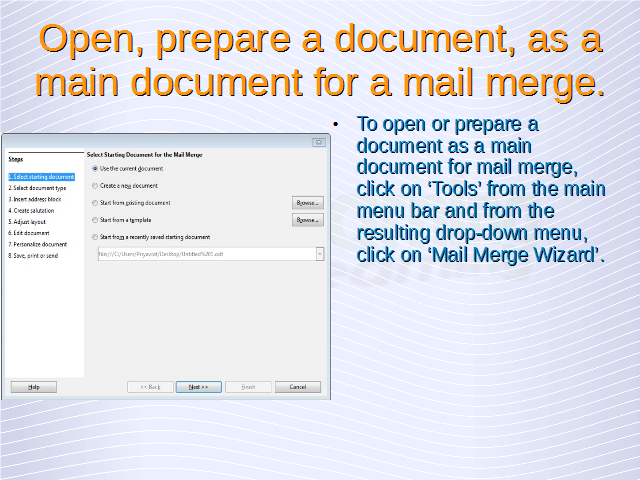
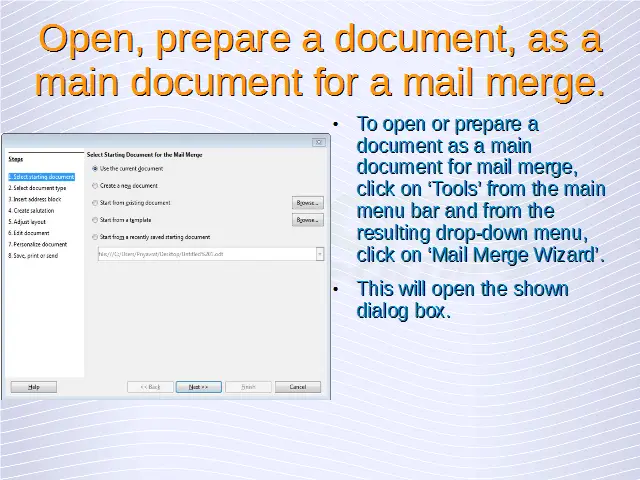
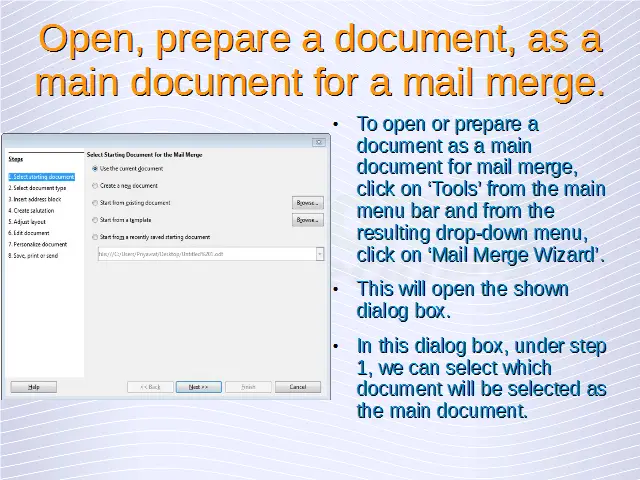
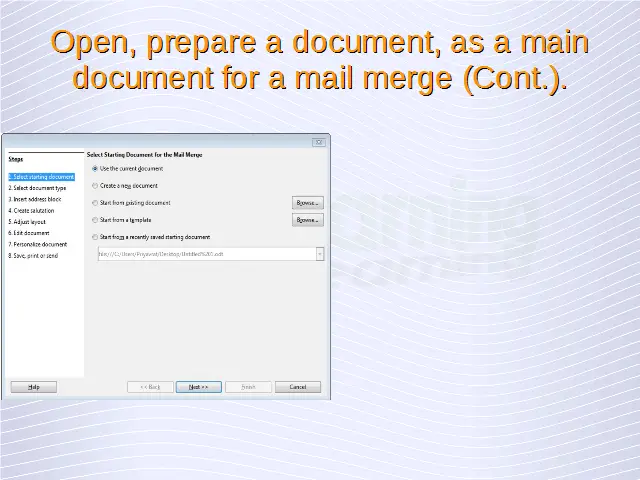
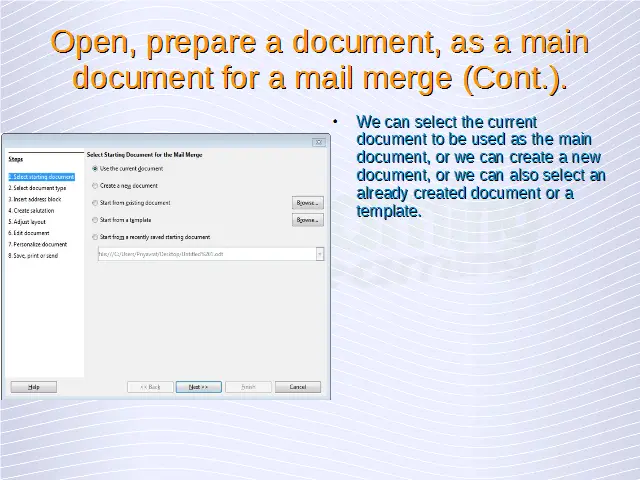
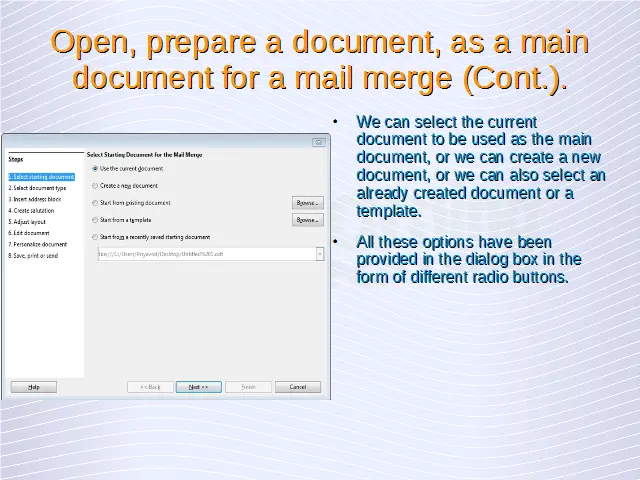
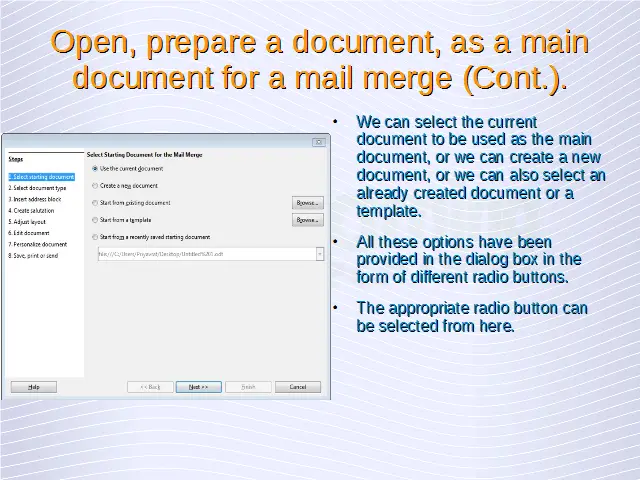
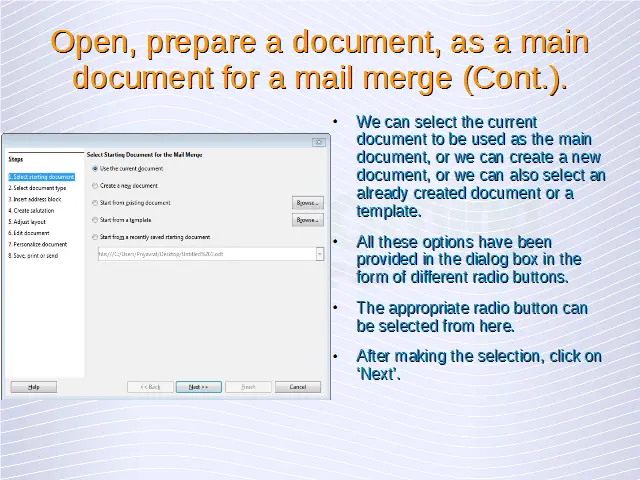
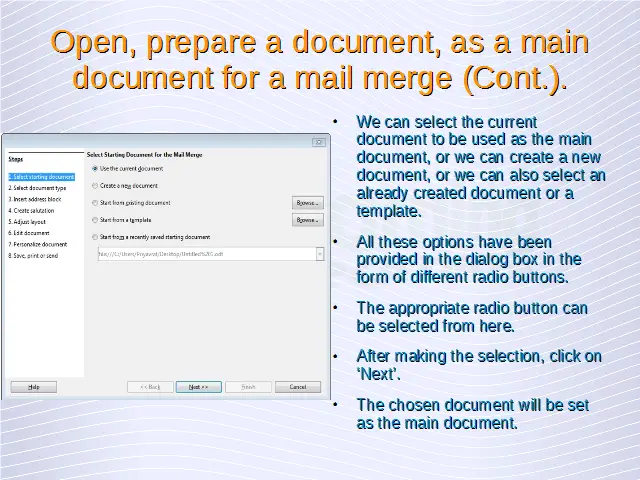


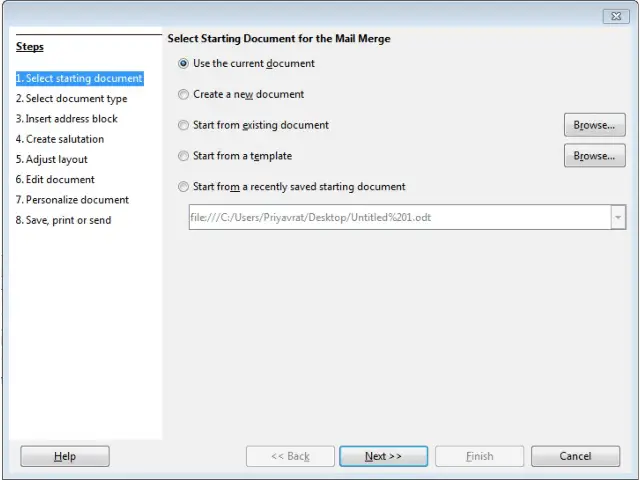
In this dialog box, under step 1, we can select which document will be selected as the main document. We can select the current document to be used as the main document, or we can create a new document, or we can also select an already created document or a template. All these options have been provided in the dialog box in the form of different radio buttons. The appropriate radio button can be selected from here. After making the selection, click on ‘Next’. The chosen document will be set as the main document.
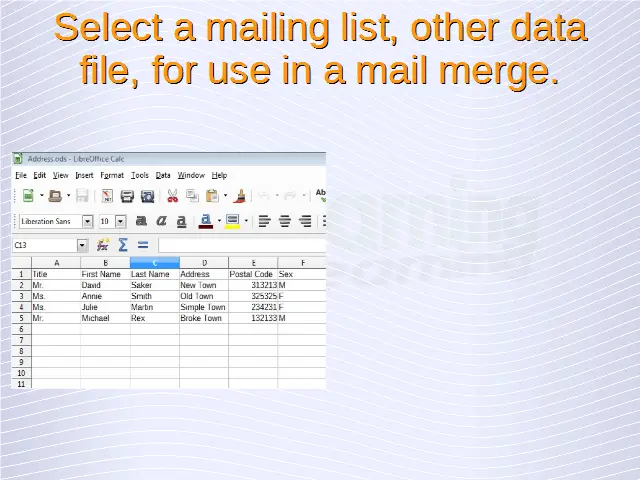
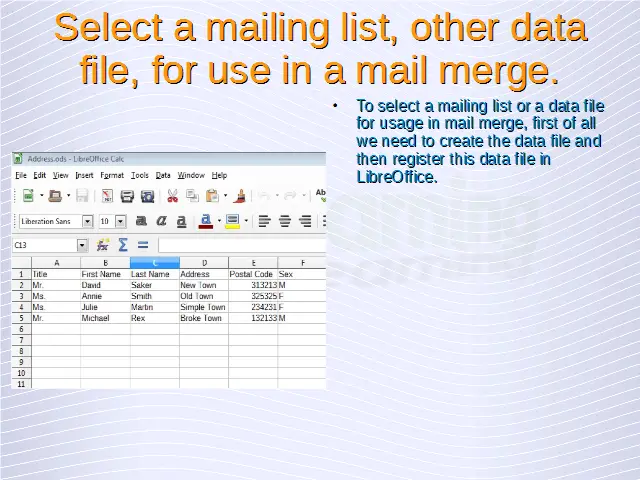
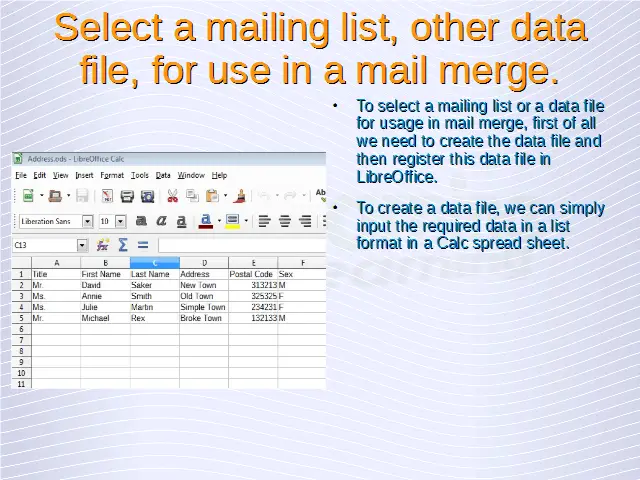
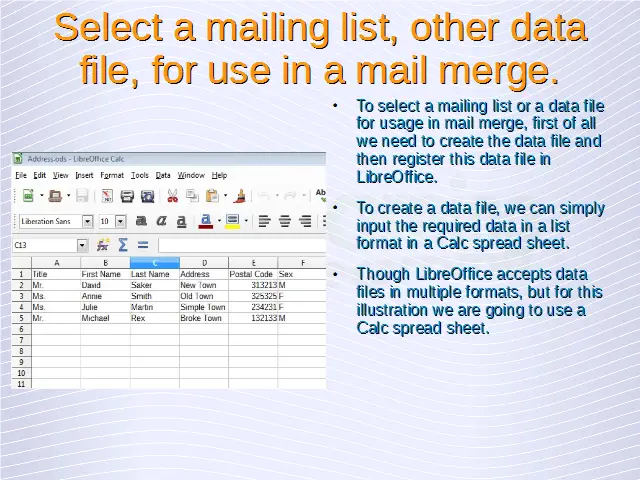
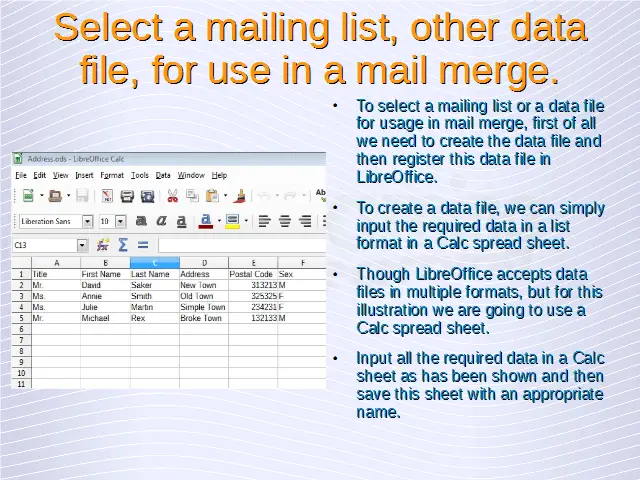
Select a mailing list, other data file, for use in a mail merge.
To select a mailing list or a data file for usage in mail merge, first of all we need to create the data file and then register this data file in LibreOffice.
To create a data file, we can simply input the required data in a list format in a Calc spread sheet. Though LibreOffice accepts data files in multiple formats, but for this illustration we are going to use a Calc spread sheet. Input all the required data in a Calc sheet as has been shown below and then save this sheet with an appropriate name.


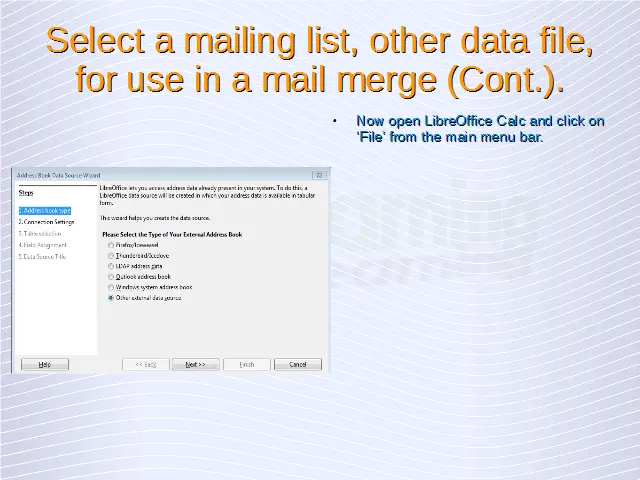
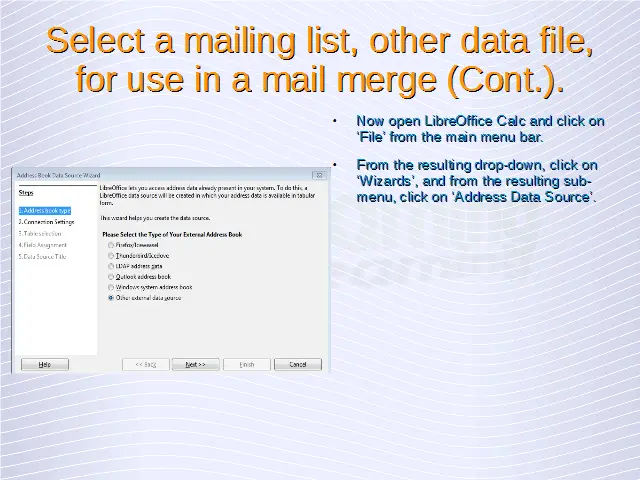
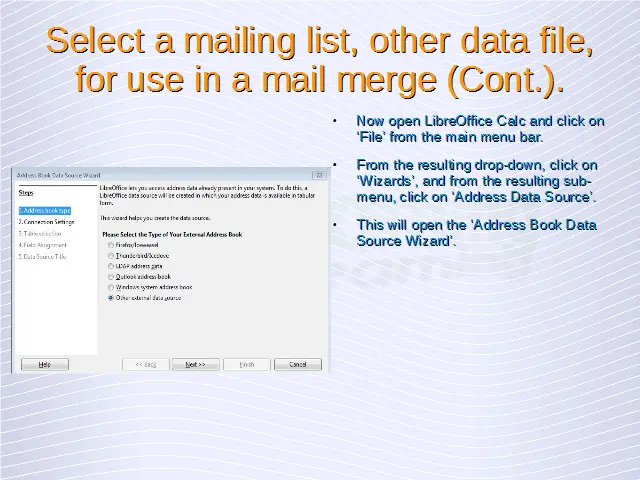
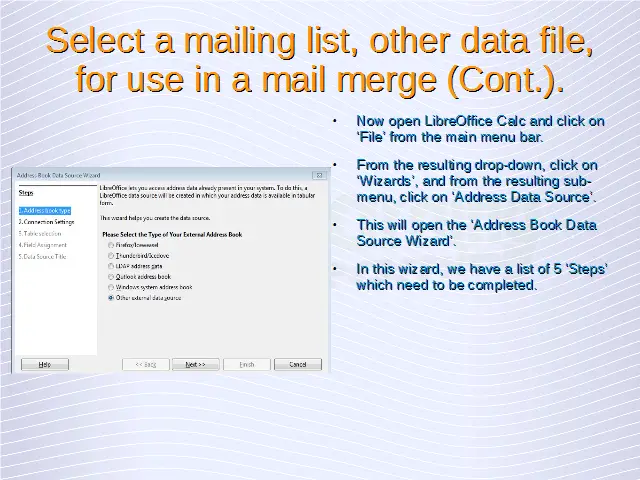
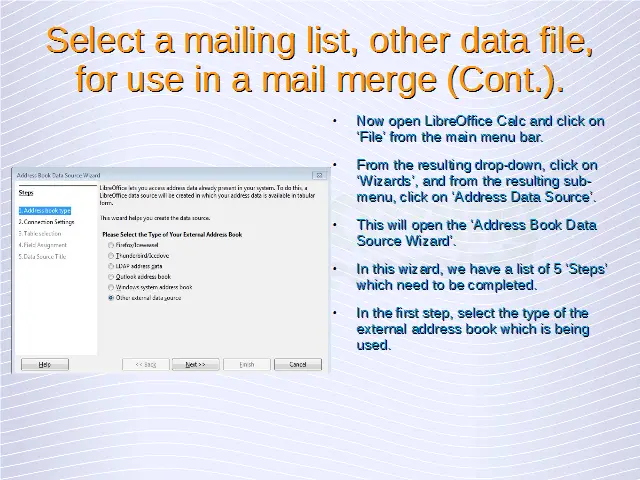
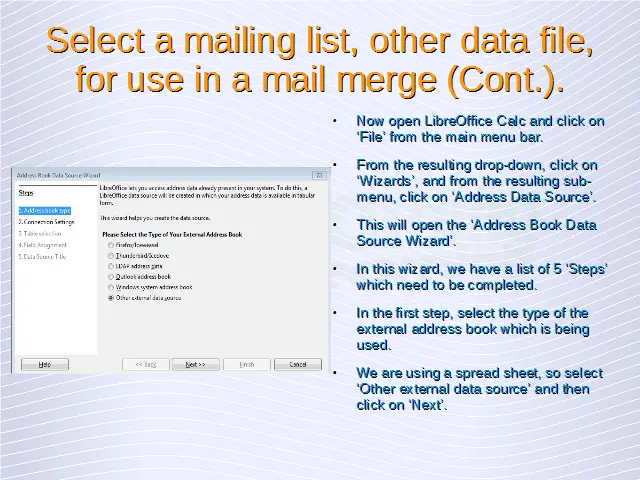
Now open LibreOffice Calc and click on ‘File’ from the main menu bar. From the resulting drop-down, click on ‘Wizards’, and from the resulting sub-menu, click on ‘Address Data Source’. This will open the ‘Address Book Data Source Wizard’.
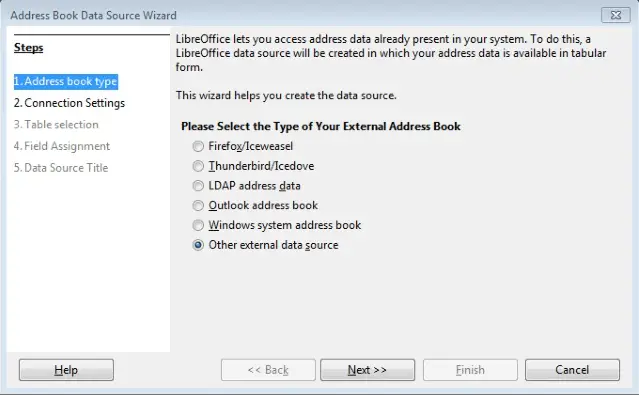

In this wizard, we have a list of 5 ‘Steps’ which need to be completed. In the first step, select the type of the external address book which is being used. We are using a spread sheet, so select ‘Other external data source’ and then click on ‘Next’.
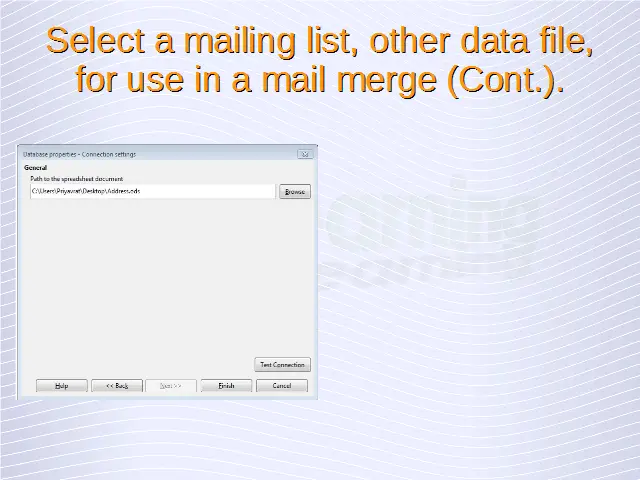
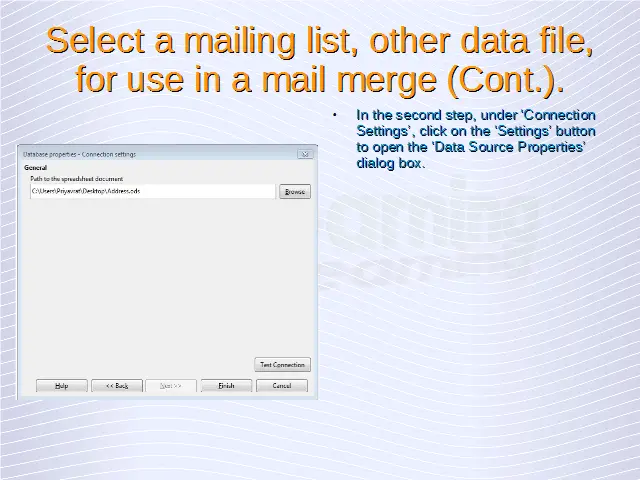
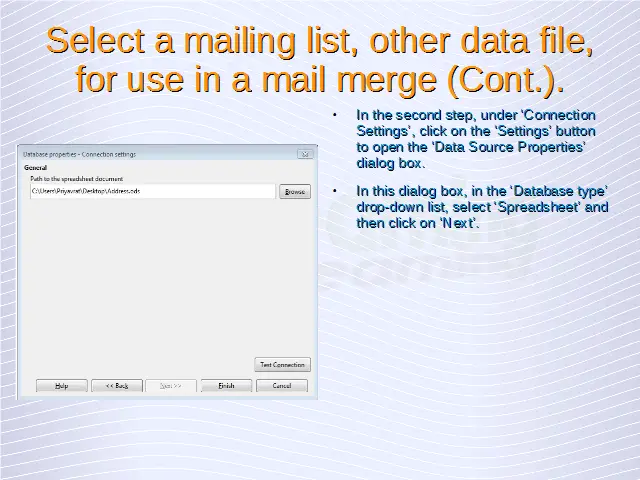
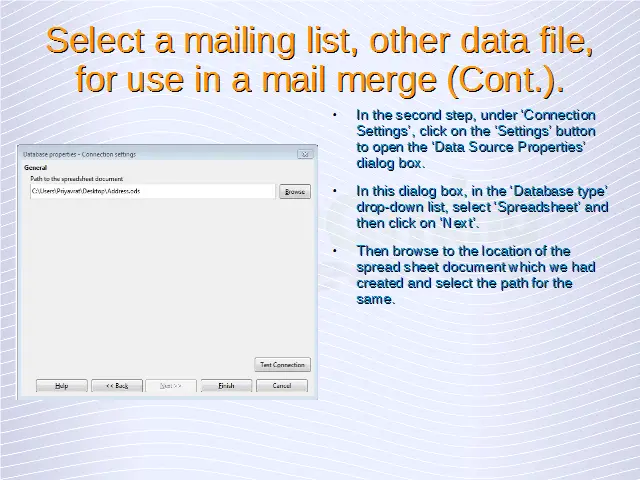
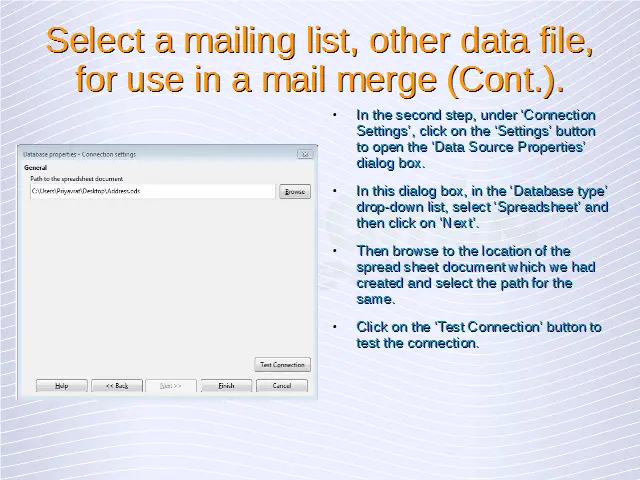
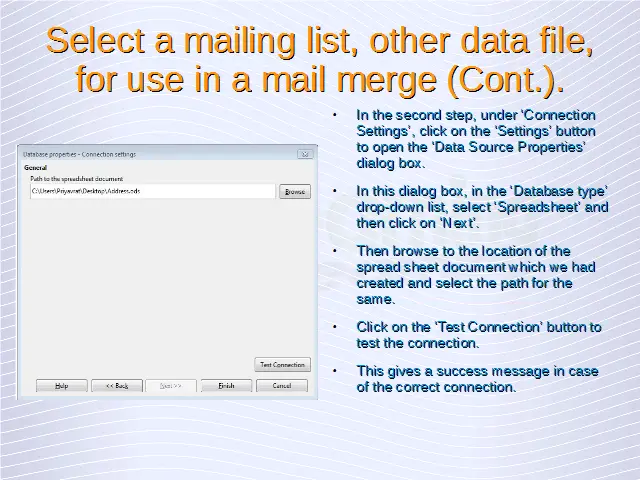
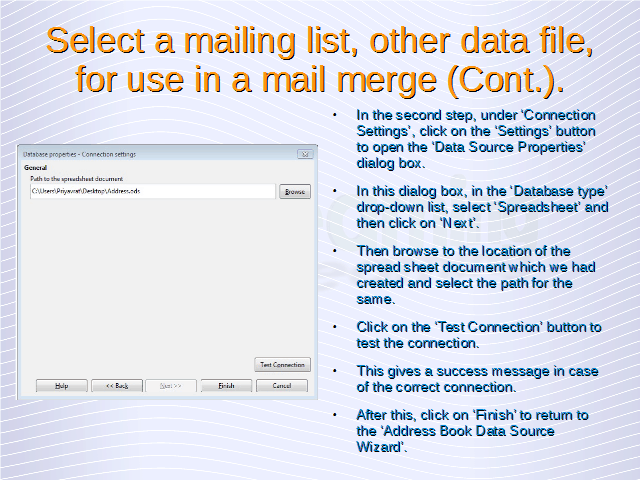
In the second step, under ‘Connection Settings’, click on the ‘Settings’ button to open the ‘Data Source Properties’ dialog box. In this dialog box, in the ‘Database type’ drop-down list, select ‘Spreadsheet’ and then click on ‘Next’.
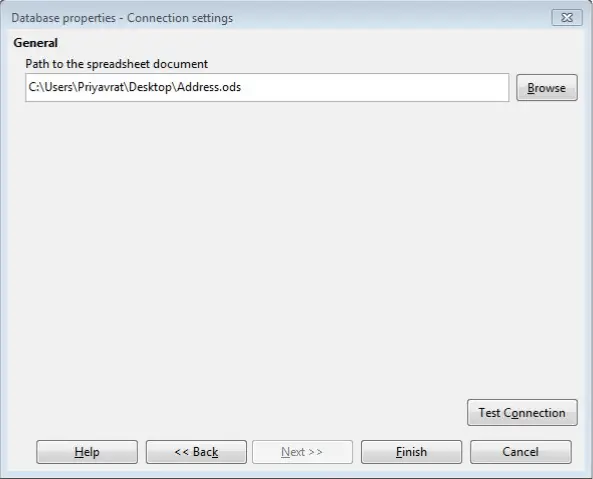

Then browse to the location of the spread sheet document which we had created and select the path for the same. Click on the ‘Test Connection’ button to test the connection. This gives a success message in case of the correct connection.
After this, click on ‘Finish’ to return to the ‘Address Book Data Source Wizard’.
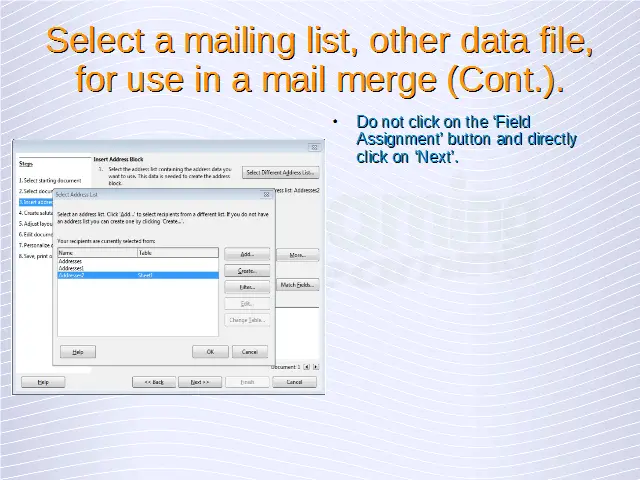
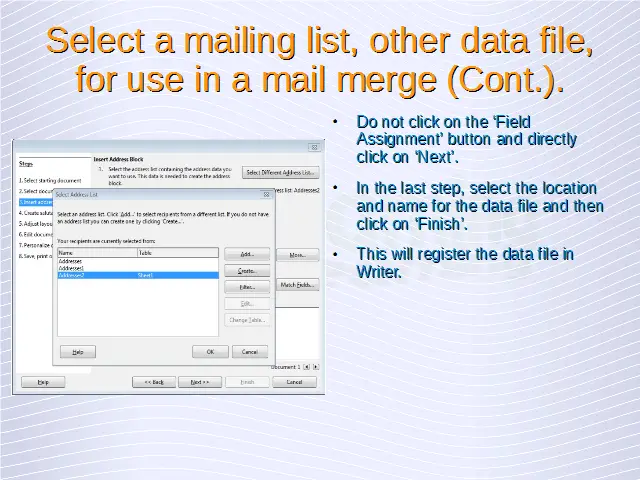
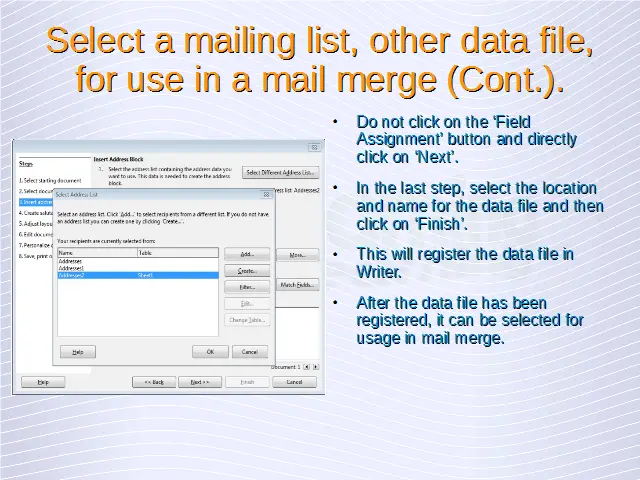
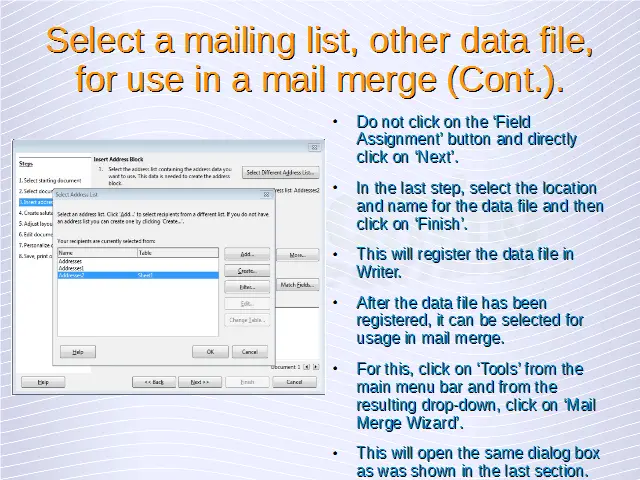
Do not click on the ‘Field Assignment’ button and directly click on ‘Next’. In the last step, select the location and name for the data file and then click on ‘Finish’. This will register the data file in Writer.
After the data file has been registered, it can be selected for usage in mail merge. For this, click on ‘Tools’ from the main menu bar and from the resulting drop-down, click on ‘Mail Merge Wizard’. This will open the same dialog box as was shown in the last section.
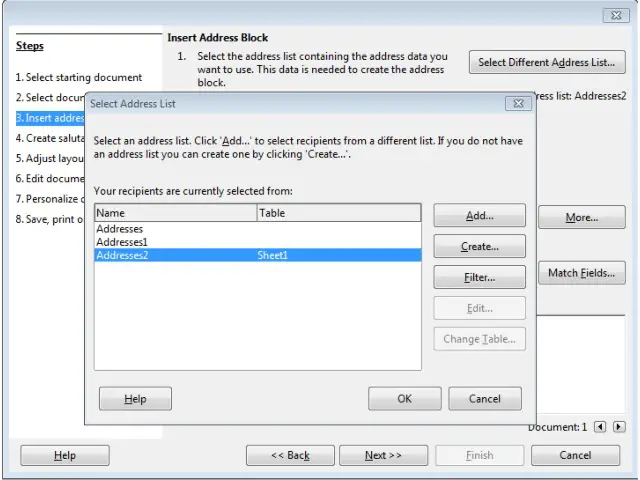
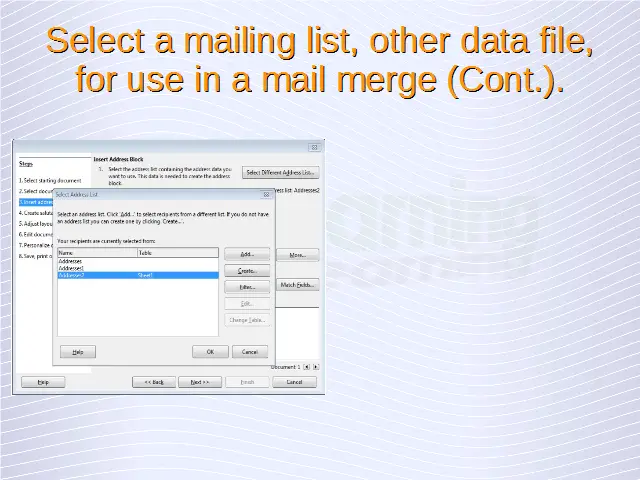
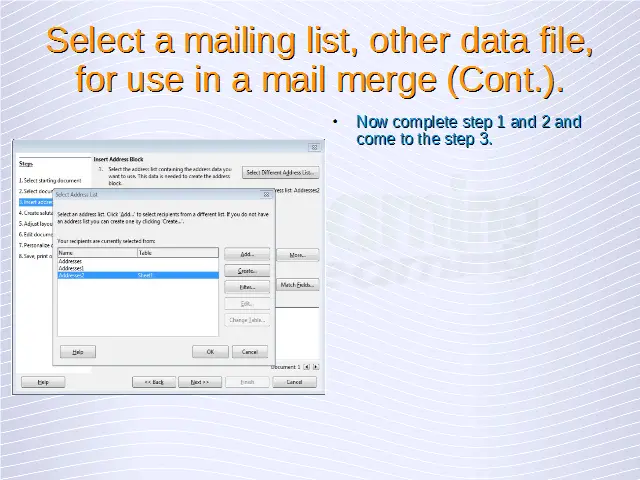
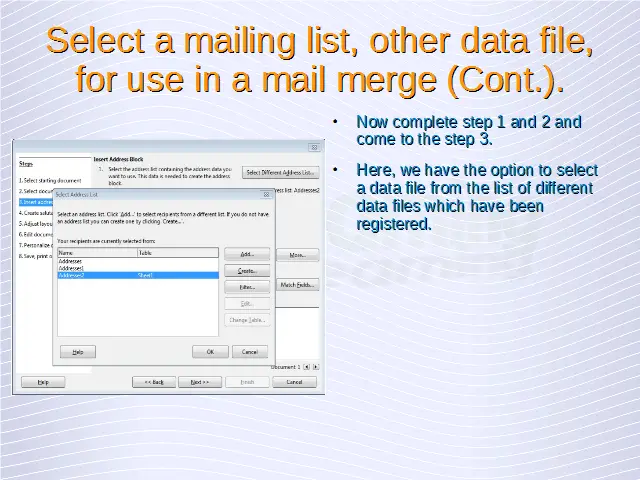
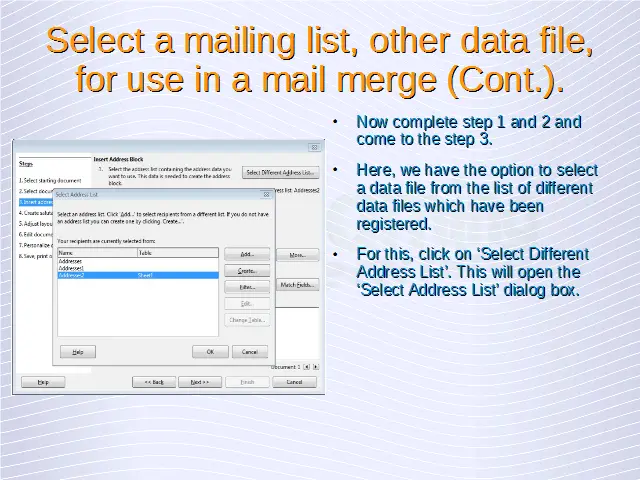
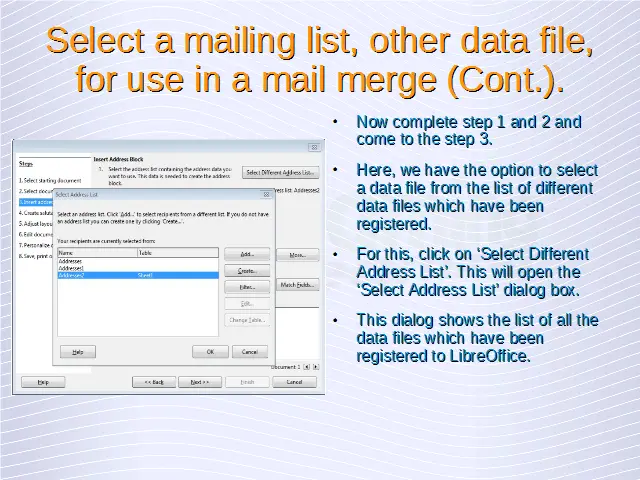
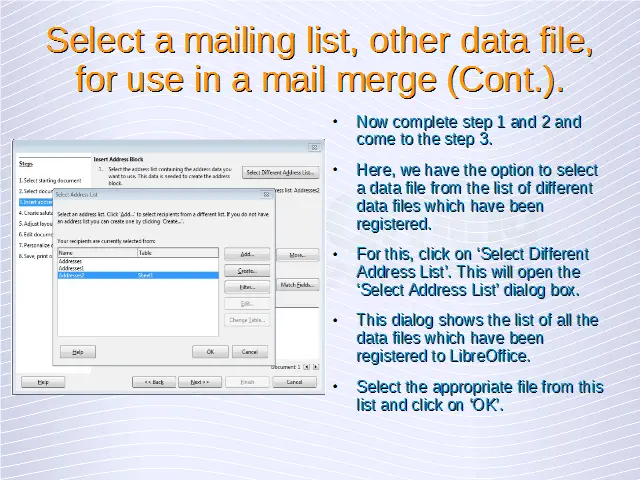
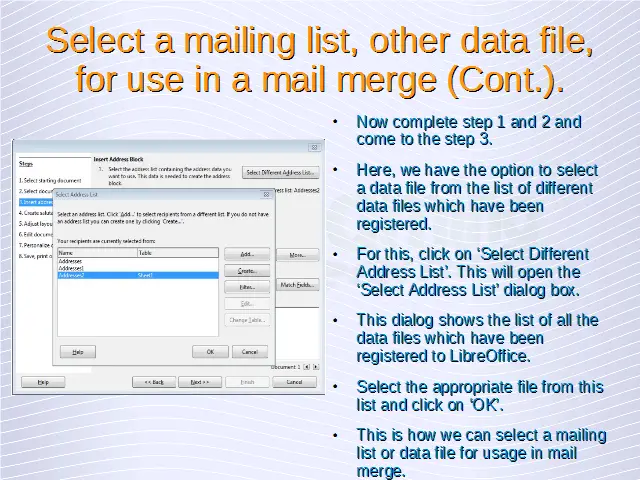
Now complete step 1 and 2 and come to the step 3. Here, we have the option to select a data file from the list of different data files which have been registered. For this, click on ‘Select Different Address List’. This will open the ‘Select Address List’ dialog box.
This dialog shows the list of all the data files which have been registered to LibreOffice. Select the appropriate file from this list and click on ‘OK’. This is how we can select a mailing list or data file for usage in mail merge.