Working with Databases
Open a database application
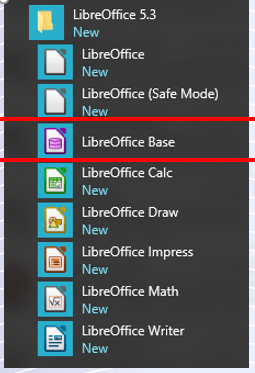
To start LibreOffice Base, search from the ‘Start’ menu or find the LibreOffice folder and click the LibreOffice Base icon.
Open an existing database
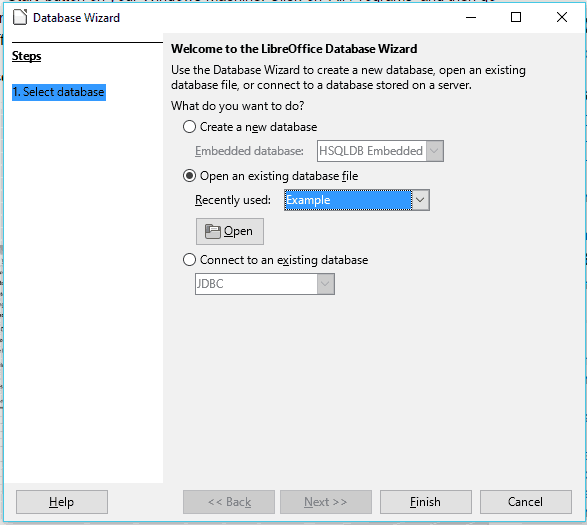
To open an existing database, choose the option ‘open an existing database file’ from the wizard, which is the first screen you see.
Choose a file from the drop-down menu of recently used files or click ‘Open’ to select a file from your drive.
Click on the file you want to open then click finish to open the database.
Create a new database file
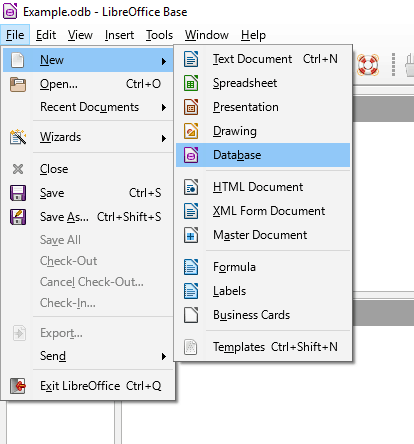
To create a new database file, click on ‘File’ from the main menu bar, then click ‘New’ from the drop-down menu. Click ‘Database’ from the sub-menu. This will open the ‘LibreOffice Database Wizard’
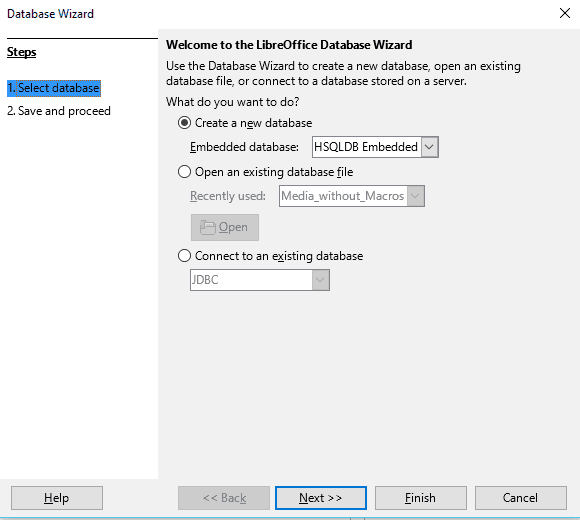
In the LibreOffice Database Wizard, select ‘Create a new database’ then click ‘Next’
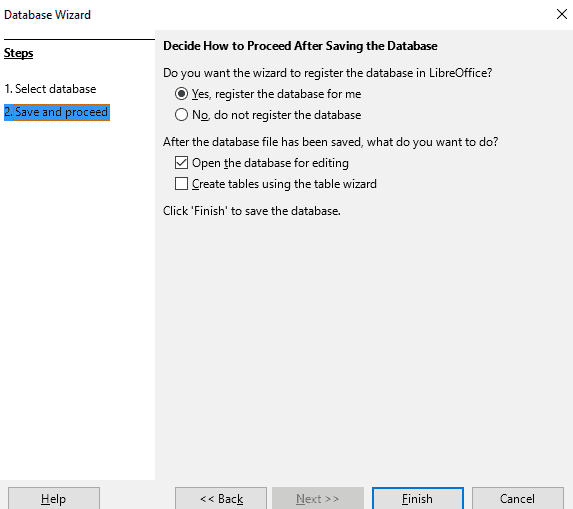
From the ‘Save and proceed’, select ‘Yes, register the database for me’. This allows you to import data into other applications. Select ‘Open the database for editing’, then click ‘Finish’.
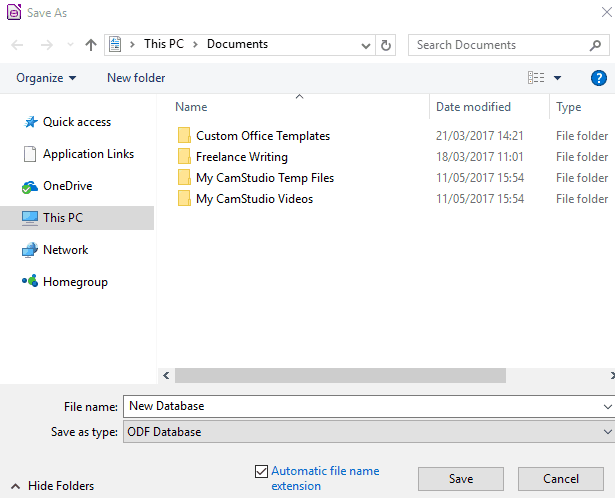
Choose a location on your drive and name the file saving it as file type ‘ODF Database’. Click ‘Save’.
Display, hide built-in toolbars
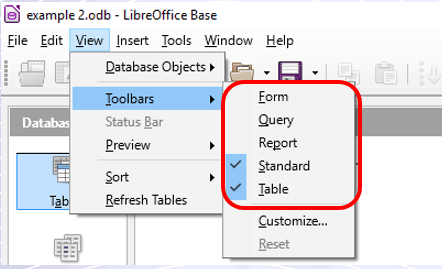
The option to display or hide the built-in toolbars can be controlled by clicking ‘View’ from the main menu bar.
Then click ‘Toolbars’ from the drop-down menu.
You can then check or uncheck various toolbars to display or hide them respectively.
Use available Help functions
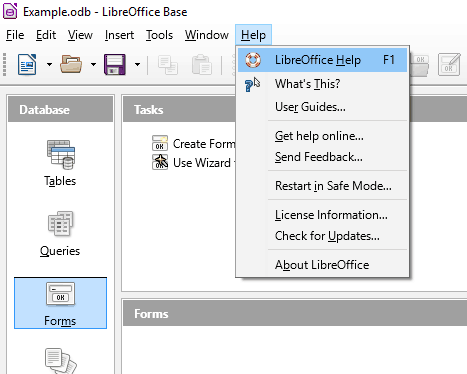
Click ‘Help’ on the menu bar.
Click ‘LibreOffice Help’ or press ‘F1’ key on the keyboard.
This will open a web browser window with online help.