Using Remote Desktop in Windows
In this lesson we will have a brief introduction to using Remote Desktop – a component of Windows that allows us to control another computer remotely.
Sometimes we need to operate a computer remotely. For example perhaps we are maintaining a website, and the data for that website is stored on a remote computer in a data centre elsewhere in the world.
Use the buttons below to navigate through the lesson


In this instance we use Remote Desktop to control the remote computer.
First we find Remote Desktop in the Start Menu:

When we open the program we are prompted for the Computer to connect to.
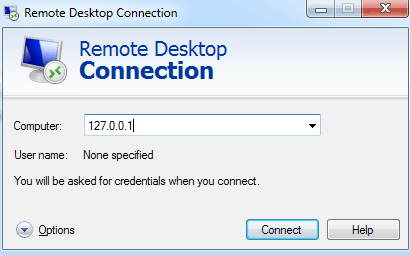
This can be specified by an IP address, or by a computer name, or a URL. If we use a name or URL then the DNS server specified for our connection must be able to translate that name to an address. For example, when connecting to a computer on the local network our router will know what address the computer name translates to.
On clicking connect we are prompted for a username and password. We must have the correct credentials – otherwise anybody could be controlling our computer! These credentials can be local user accounts for the remote computer, or a network account that has access to the remote computer.
After entering the username and password we are shown the desktop of the remote computer. We can now control it as usual – anything we do on this desktop is happening on the remote machine and not on ours.
Finally when we are finished with our tasks on the remote computer we log off.
WARNING: If you select ‘Shut Down’ then you will turn off the remote computer. If you don’t have physical access to the machine it may be difficult to turn it back on – so be careful and consider whether you really want to shut it down, or just to log off!
Now you know the basics of how to use Remote Desktop.